HP Photosmart Premium Fax All-in-One Printer - C309 Full User Guide - Page 120
Solution 2: Check the ink levels, Solution 4: Check the paper type, Solution 5: Clean the printhead
 |
View all HP Photosmart Premium Fax All-in-One Printer - C309 manuals
Add to My Manuals
Save this manual to your list of manuals |
Page 120 highlights
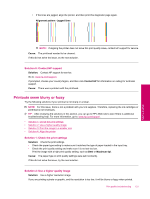
Chapter 13 Solution 2: Check the ink levels Solution: Check the estimated ink levels in the cartridges. NOTE: Ink level warnings and indicators provide estimates for planning purposes only. When you receive a low-ink warning message, consider having a replacement cartridge available to avoid possible printing delays. You do not need to replace the cartridges until print quality becomes unacceptable. For more information, see: • Check the estimated ink levels Cause: The ink cartridges might have insufficient ink. If this did not solve the issue, try the next solution. Solution 3: Check the print settings Solution: Check the print settings. • Check the paper type setting to make sure it matches the type of paper loaded in the input tray. • Check the print quality setting and make sure it is not set too low. Print the image with a high print quality setting, such as Best or Maximum dpi. Cause: The paper type or print quality settings were set incorrectly. If this did not solve the issue, try the next solution. Solution 4: Check the paper type Solution: HP recommends that you use HP papers or any other paper type that is appropriate for the product. Always make sure the paper you are printing on is flat. For best results when printing images, use HP Advanced Photo Paper. Store photo media in its original packaging inside a resealable plastic bag on a flat surface in a cool, dry place. When you are ready to print, remove only the paper you plan to use immediately. When you have finished printing, return any unused photo paper to the plastic bag. This will prevent the photo paper from curling. For more information, see: • Recommended papers for printing • Information on paper Cause: The wrong kind of paper was loaded in the input tray. If this did not solve the issue, try the next solution. Solution 5: Clean the printhead Solution: If the previous solutions did not resolve the issue, try cleaning the printhead. To clean the printhead from the control panel 1. Press Setup. 2. Press the down arrow button to highlight Tools, and then press OK. 118 Solve a problem Solve a problem
-
 1
1 -
2
-
3
-
4
-
5
-
6
-
7
-
8
-
9
-
10
-
11
-
12
-
13
-
14
-
15
-
16
-
17
-
18
-
19
-
20
-
21
-
22
-
23
-
24
-
25
-
26
-
27
-
28
-
29
-
30
-
31
-
32
-
33
-
34
-
35
-
36
-
37
-
38
-
39
-
40
-
41
-
42
-
43
-
44
-
45
-
46
-
47
-
48
-
49
-
50
-
51
-
52
-
53
-
54
-
55
-
56
-
57
-
58
-
59
-
60
-
61
-
62
-
63
-
64
-
65
-
66
-
67
-
68
-
69
-
70
-
71
-
72
-
73
-
74
-
75
-
76
-
77
-
78
-
79
-
80
-
81
-
82
-
83
-
84
-
85
-
86
-
87
-
88
-
89
-
90
-
91
-
92
-
93
-
94
-
95
-
96
-
97
-
98
-
99
-
100
-
101
-
102
-
103
-
104
-
105
-
106
-
107
-
108
-
109
-
110
-
111
-
112
-
113
-
114
-
 115
115 -
 116
116 -
 117
117 -
 118
118 -
 119
119 -
 120
120 -
 121
121 -
 122
122 -
 123
123 -
 124
124 -
 125
125 -
126
-
127
-
128
-
129
-
130
-
131
-
132
-
133
-
134
-
135
-
136
-
137
-
138
-
139
-
140
-
141
-
142
-
143
-
144
-
145
-
146
-
147
-
148
-
149
-
150
-
151
-
152
-
153
-
154
-
155
-
156
-
157
-
158
-
159
-
160
-
161
-
162
-
163
-
164
-
165
-
166
-
167
-
168
-
169
-
170
-
171
-
172
-
173
-
174
-
175
-
176
-
177
-
178
-
179
-
180
-
181
-
182
-
183
-
184
-
185
-
186
-
187
-
188
-
189
-
190
-
191
-
192
-
193
-
194
-
195
-
196
-
197
-
198
-
199
-
200
-
201
-
202
-
203
-
204
-
205
-
206
-
207
-
208
-
209
-
210
-
211
-
212
-
213
-
214
-
215
-
216
-
217
-
218
-
219
-
220
-
221
-
222
-
223
-
224
-
225
-
226
-
227
-
228
-
229
-
230
-
231
-
232
-
233
-
234
-
235
-
236
-
237
-
238
-
239
-
240
-
241
-
242
-
243
-
244
 |
 |
