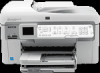
HP Photosmart Premium Fax All-in-One Printer - C309 Full User Guide - Page 85
Speed Dial Setup, Individual Speed Dial
 |
View all HP Photosmart Premium Fax All-in-One Printer - C309 manuals
Add to My Manuals
Save this manual to your list of manuals |
Page 85 highlights
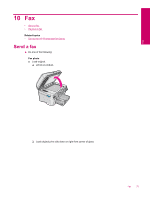
3. Press the Menu button to select Fax Menu. Fax 4. Press the down arrow button to Send Fax Later, and then press OK. 5. Enter the send time by using the numeric keypad, and then press OK. If prompted, press 1 for AM, or 2 for PM. 6. Enter the fax number by using the keypad. 7. Press Start Fax. The HP Photosmart scans all pages and the scheduled time appears on the display. The HP Photosmart sends the fax at the scheduled time. To cancel a scheduled fax 1. Press OK when Fax is highlighted on the Home Screen. 2. Press the Menu button to select Fax Menu. 3. Press the down arrow button to highlight Send Fax Later, and then press OK. 4. Press the down arrow button to highlight Cancel scheduled fax, and then press OK. NOTE: You can also cancel the scheduled fax by pressing Cancel on the control panel when the Send Fax Later message is visible on the display. Set up and use speed dial You can quickly send a black-and-white or color fax from the HP Photosmart using speed dials. This section provides instructions for sending the fax in black and white. To create speed dial entries from the control panel 1. Press Setup. 2. Press the down arrow button to highlight Speed Dial Setup, and then press OK. 3. Press the down arrow button to highlight Individual Speed Dial, and then press OK. 4. Press the down arrow button to select the displayed speed dial entry. You can also press the down arrow button to highlight a different unassigned entry, and then press OK. 5. Enter the fax number for the speed dial entry by using the numeric keypad, and then press OK. TIP: To add a pause in the fax number you are entering, press the up arrow button. A dash (-) appears on the display. The visual keyboard appears on the display. 6. Use the visual keyboard to enter the name. When you are finished, highlight Done on the visual keyboard, and then press OK. 7. Press OK if you want to set up another number. To send a fax using speed dials from the control panel 1. Load your originals print side up into the document feeder tray. If you are sending a single-page fax, such as a photograph, you can also load your original print side down on the glass. NOTE: If you are sending a multiple-page fax, you must load the originals in the document feeder tray. You cannot fax a multiple-page document from the glass. 2. Press OK when Fax is highlighted on the Home screen. Set up and use speed dial 83
-
 1
1 -
2
-
3
-
4
-
5
-
6
-
7
-
8
-
9
-
10
-
11
-
12
-
13
-
14
-
15
-
16
-
17
-
18
-
19
-
20
-
21
-
22
-
23
-
24
-
25
-
26
-
27
-
28
-
29
-
30
-
31
-
32
-
33
-
34
-
35
-
36
-
37
-
38
-
39
-
40
-
41
-
42
-
43
-
44
-
45
-
46
-
47
-
48
-
49
-
50
-
51
-
52
-
53
-
54
-
55
-
56
-
57
-
58
-
59
-
60
-
61
-
62
-
63
-
64
-
65
-
66
-
67
-
68
-
69
-
70
-
71
-
72
-
73
-
74
-
75
-
76
-
77
-
78
-
79
-
 80
80 -
 81
81 -
 82
82 -
 83
83 -
 84
84 -
 85
85 -
 86
86 -
 87
87 -
 88
88 -
 89
89 -
 90
90 -
91
-
92
-
93
-
94
-
95
-
96
-
97
-
98
-
99
-
100
-
101
-
102
-
103
-
104
-
105
-
106
-
107
-
108
-
109
-
110
-
111
-
112
-
113
-
114
-
115
-
116
-
117
-
118
-
119
-
120
-
121
-
122
-
123
-
124
-
125
-
126
-
127
-
128
-
129
-
130
-
131
-
132
-
133
-
134
-
135
-
136
-
137
-
138
-
139
-
140
-
141
-
142
-
143
-
144
-
145
-
146
-
147
-
148
-
149
-
150
-
151
-
152
-
153
-
154
-
155
-
156
-
157
-
158
-
159
-
160
-
161
-
162
-
163
-
164
-
165
-
166
-
167
-
168
-
169
-
170
-
171
-
172
-
173
-
174
-
175
-
176
-
177
-
178
-
179
-
180
-
181
-
182
-
183
-
184
-
185
-
186
-
187
-
188
-
189
-
190
-
191
-
192
-
193
-
194
-
195
-
196
-
197
-
198
-
199
-
200
-
201
-
202
-
203
-
204
-
205
-
206
-
207
-
208
-
209
-
210
-
211
-
212
-
213
-
214
-
215
-
216
-
217
-
218
-
219
-
220
-
221
-
222
-
223
-
224
-
225
-
226
-
227
-
228
-
229
-
230
-
231
-
232
-
233
-
234
-
235
-
236
-
237
-
238
-
239
-
240
-
241
-
242
-
243
-
244
 |
 |
