HP Photosmart Premium Fax All-in-One Printer - C309 Full User Guide - Page 170
Solution 2: Check for error messages on the display, Advanced Fax Setup, Fax Speed, Cause, Solution
 |
View all HP Photosmart Premium Fax All-in-One Printer - C309 manuals
Add to My Manuals
Save this manual to your list of manuals |
Page 170 highlights
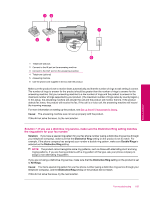
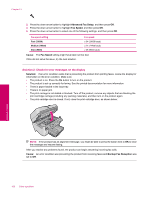
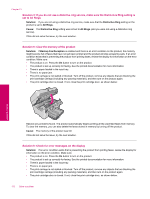
Chapter 13 2. Press the down arrow button to highlight Advanced Fax Setup, and then press OK. 3. Press the down arrow button to highlight Fax Speed, and then press OK. 4. Press the down arrow button to select one of the following settings, and then press OK. Fax speed setting Fast (33600) Medium (14400) Slow (9600) Fax speed v.34 (33600 baud) v.17 (14400 baud) v.29 (9600 baud) Cause: The Fax Speed setting might have been set too fast. If this did not solve the issue, try the next solution. Solution 2: Check for error messages on the display Solution: If an error condition exists that is preventing the product from printing faxes, review the display for information on the error condition. Make sure: • The product is on. Press the On button to turn on the product. • The product is set up correctly for faxing. See the printed documentation for more information. • There is paper loaded in the input tray. • There is no paper jam. • The print carriage is not stalled or blocked. Turn off the product, remove any objects that are blocking the print cartridge carriage (including any packing materials), and then turn on the product again. • The print cartridge door is closed. If not, close the print cartridge door, as shown below: Solve a problem NOTE: If the product has an alignment message, you might be able to press the button next to OK to clear the message and resume faxing. After you resolve any problems found, the product can begin answering incoming fax calls. Cause: An error condition was preventing the product from receiving faxes and Backup Fax Reception was set to Off. 168 Solve a problem
-
 1
1 -
2
-
3
-
4
-
5
-
6
-
7
-
8
-
9
-
10
-
11
-
12
-
13
-
14
-
15
-
16
-
17
-
18
-
19
-
20
-
21
-
22
-
23
-
24
-
25
-
26
-
27
-
28
-
29
-
30
-
31
-
32
-
33
-
34
-
35
-
36
-
37
-
38
-
39
-
40
-
41
-
42
-
43
-
44
-
45
-
46
-
47
-
48
-
49
-
50
-
51
-
52
-
53
-
54
-
55
-
56
-
57
-
58
-
59
-
60
-
61
-
62
-
63
-
64
-
65
-
66
-
67
-
68
-
69
-
70
-
71
-
72
-
73
-
74
-
75
-
76
-
77
-
78
-
79
-
80
-
81
-
82
-
83
-
84
-
85
-
86
-
87
-
88
-
89
-
90
-
91
-
92
-
93
-
94
-
95
-
96
-
97
-
98
-
99
-
100
-
101
-
102
-
103
-
104
-
105
-
106
-
107
-
108
-
109
-
110
-
111
-
112
-
113
-
114
-
115
-
116
-
117
-
118
-
119
-
120
-
121
-
122
-
123
-
124
-
125
-
126
-
127
-
128
-
129
-
130
-
131
-
132
-
133
-
134
-
135
-
136
-
137
-
138
-
139
-
140
-
141
-
142
-
143
-
144
-
145
-
146
-
147
-
148
-
149
-
150
-
151
-
152
-
153
-
154
-
155
-
156
-
157
-
158
-
159
-
160
-
161
-
162
-
163
-
164
-
 165
165 -
 166
166 -
 167
167 -
 168
168 -
 169
169 -
 170
170 -
 171
171 -
 172
172 -
 173
173 -
 174
174 -
 175
175 -
176
-
177
-
178
-
179
-
180
-
181
-
182
-
183
-
184
-
185
-
186
-
187
-
188
-
189
-
190
-
191
-
192
-
193
-
194
-
195
-
196
-
197
-
198
-
199
-
200
-
201
-
202
-
203
-
204
-
205
-
206
-
207
-
208
-
209
-
210
-
211
-
212
-
213
-
214
-
215
-
216
-
217
-
218
-
219
-
220
-
221
-
222
-
223
-
224
-
225
-
226
-
227
-
228
-
229
-
230
-
231
-
232
-
233
-
234
-
235
-
236
-
237
-
238
-
239
-
240
-
241
-
242
-
243
-
244
 |
 |
