HP Photosmart Premium Fax All-in-One Printer - C309 Full User Guide - Page 74
Preview a copy before printing
 |
View all HP Photosmart Premium Fax All-in-One Printer - C309 manuals
Add to My Manuals
Save this manual to your list of manuals |
Page 74 highlights
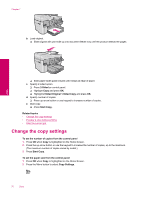
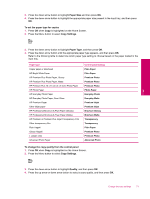
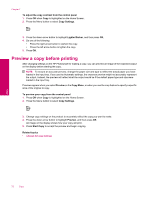
Chapter 7 To adjust the copy contrast from the control panel 1. Press OK when Copy is highlighted on the Home Screen. 2. Press the Menu button to select Copy Settings. 3. Press the down arrow button to highlight Lighter/Darker, and then press OK. 4. Do one of the following: • Press the right arrow button to darken the copy. • Press the left arrow button to lighten the copy. 5. Press OK. Preview a copy before printing After changing settings on the HP Photosmart for making a copy, you can preview an image of the expected output on the display before starting the copy. NOTE: To ensure an accurate preview, change the paper size and type to reflect the actual paper you have loaded in the input tray. If you use the Automatic settings, the onscreen preview might not accurately represent the output. Instead, the preview will reflect what the output would be if the default paper type and size were loaded in the input tray. Previews appear when you select Preview on the Copy Menu, or when you use the crop feature to specify a specific area of the original to copy. To preview your copy from the control panel 1. Press OK when Copy is highlighted on the Home Screen. 2. Press the Menu button to select Copy Settings. 3. Change copy settings on the product to accurately reflect the copy you want to make. 4. Press the down arrow button to highlight Preview, and then press OK. An image on the display shows how your copy will print. 5. Press Start Copy to accept the preview and begin copying. Related topics • Change the copy settings Copy 72 Copy
-
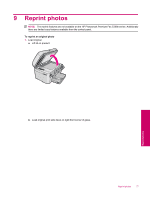
 1
1 -
2
-
3
-
4
-
5
-
6
-
7
-
8
-
9
-
10
-
11
-
12
-
13
-
14
-
15
-
16
-
17
-
18
-
19
-
20
-
21
-
22
-
23
-
24
-
25
-
26
-
27
-
28
-
29
-
30
-
31
-
32
-
33
-
34
-
35
-
36
-
37
-
38
-
39
-
40
-
41
-
42
-
43
-
44
-
45
-
46
-
47
-
48
-
49
-
50
-
51
-
52
-
53
-
54
-
55
-
56
-
57
-
58
-
59
-
60
-
61
-
62
-
63
-
64
-
65
-
66
-
67
-
68
-
 69
69 -
 70
70 -
 71
71 -
 72
72 -
 73
73 -
 74
74 -
 75
75 -
 76
76 -
 77
77 -
 78
78 -
 79
79 -
80
-
81
-
82
-
83
-
84
-
85
-
86
-
87
-
88
-
89
-
90
-
91
-
92
-
93
-
94
-
95
-
96
-
97
-
98
-
99
-
100
-
101
-
102
-
103
-
104
-
105
-
106
-
107
-
108
-
109
-
110
-
111
-
112
-
113
-
114
-
115
-
116
-
117
-
118
-
119
-
120
-
121
-
122
-
123
-
124
-
125
-
126
-
127
-
128
-
129
-
130
-
131
-
132
-
133
-
134
-
135
-
136
-
137
-
138
-
139
-
140
-
141
-
142
-
143
-
144
-
145
-
146
-
147
-
148
-
149
-
150
-
151
-
152
-
153
-
154
-
155
-
156
-
157
-
158
-
159
-
160
-
161
-
162
-
163
-
164
-
165
-
166
-
167
-
168
-
169
-
170
-
171
-
172
-
173
-
174
-
175
-
176
-
177
-
178
-
179
-
180
-
181
-
182
-
183
-
184
-
185
-
186
-
187
-
188
-
189
-
190
-
191
-
192
-
193
-
194
-
195
-
196
-
197
-
198
-
199
-
200
-
201
-
202
-
203
-
204
-
205
-
206
-
207
-
208
-
209
-
210
-
211
-
212
-
213
-
214
-
215
-
216
-
217
-
218
-
219
-
220
-
221
-
222
-
223
-
224
-
225
-
226
-
227
-
228
-
229
-
230
-
231
-
232
-
233
-
234
-
235
-
236
-
237
-
238
-
239
-
240
-
241
-
242
-
243
-
244
 |
 |
