IBM 620410U User Guide - Page 63
Installing a SCSI adapter
 |
UPC - 087944665410
View all IBM 620410U manuals
Add to My Manuals
Save this manual to your list of manuals |
Page 63 highlights
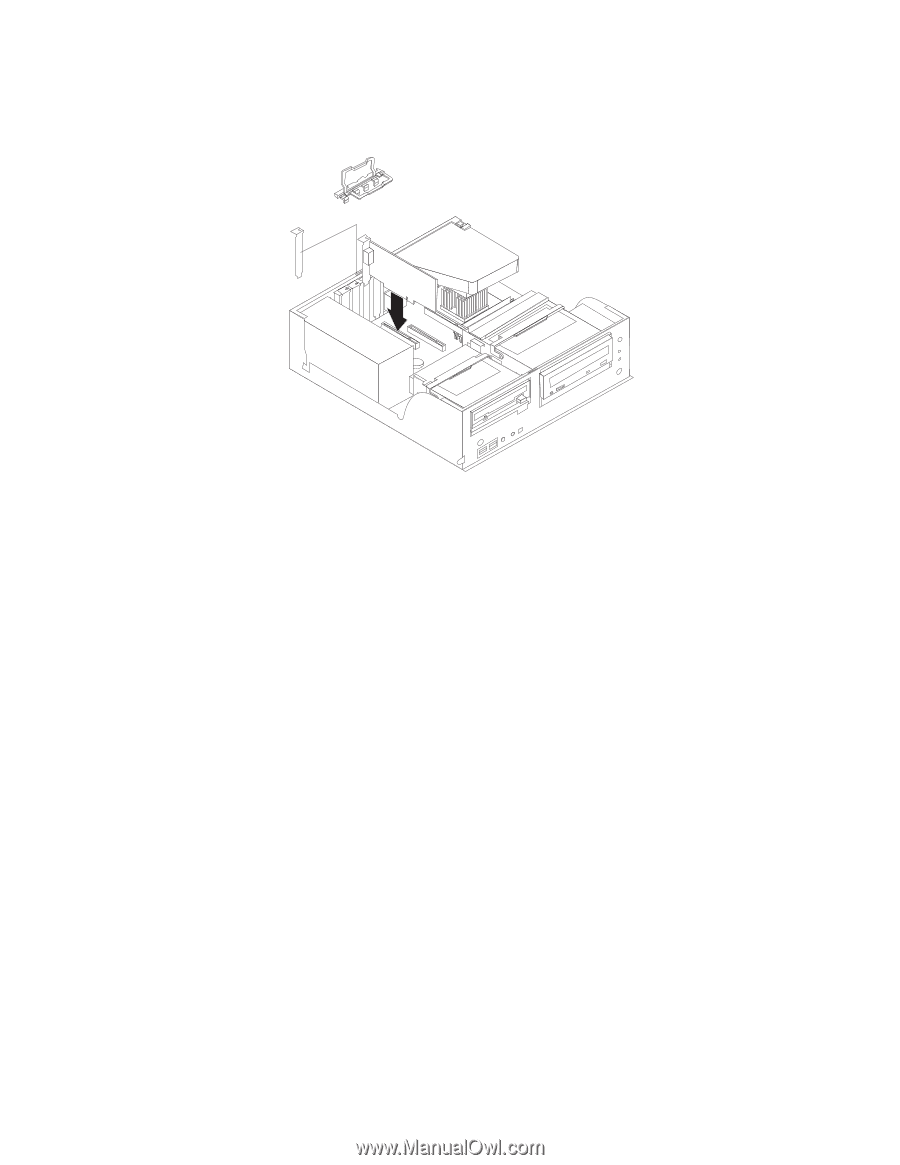
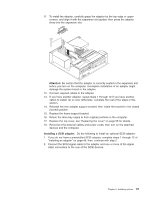
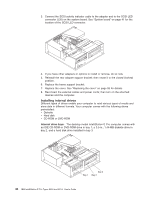
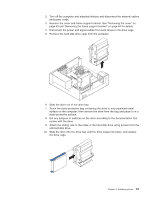
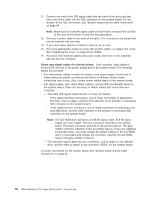
11. To install the adapter, carefully grasp the adapter by the top edge or upper corners, and align it with the expansion slot guides; then press the adapter firmly into the expansion slot. Attention: Be certain that the adapter is correctly seated in the expansion slot before you turn on the computer. Incomplete installation of an adapter might damage the system board or the adapter. 12. Connect required cables to the adapter. 13. If you have another adapter, repeat steps 1 through 12 If you have another option to install, do so now. Otherwise, complete the rest of the steps in this section. 14. Reinstall the rear adapter support bracket; then rotate the bracket to the closed (locked) position. 15. Replace the frame support bracket. 16. Return the drive bay cages to their original positions in the computer. 17. Replace the top cover, see "Replacing the cover" on page 55 for details. 18. Reconnect the external cables and power cords; then turn on the attached devices and the computer. Installing a SCSI adapter: Do the following to install an optional SCSI adapter: 1. If you do not have a preinstalled SCSI adapter, complete steps 1 through 12 of "Installing an adapter" on page 46; then, continue with step 2. 2. Connect the SCSI signal cable to the adapter and one or more of the signal cable connectors to the rear of the SCSI devices. Chapter 5. Installing options 47
-
 1
1 -
2
-
3
-
4
-
5
-
6
-
7
-
8
-
9
-
10
-
11
-
12
-
13
-
14
-
15
-
16
-
17
-
18
-
19
-
20
-
21
-
22
-
23
-
24
-
25
-
26
-
27
-
28
-
29
-
30
-
31
-
32
-
33
-
34
-
35
-
36
-
37
-
38
-
39
-
40
-
41
-
42
-
43
-
44
-
45
-
46
-
47
-
48
-
49
-
50
-
51
-
52
-
53
-
54
-
55
-
56
-
57
-
 58
58 -
 59
59 -
 60
60 -
 61
61 -
 62
62 -
 63
63 -
 64
64 -
 65
65 -
 66
66 -
 67
67 -
 68
68 -
69
-
70
-
71
-
72
-
73
-
74
-
75
-
76
-
77
-
78
-
79
-
80
-
81
-
82
-
83
-
84
-
85
-
86
-
87
-
88
-
89
-
90
-
91
-
92
-
93
-
94
-
95
-
96
-
97
-
98
-
99
-
100
-
101
-
102
-
103
-
104
-
105
-
106
-
107
-
108
-
109
-
110
-
111
-
112
-
113
-
114
-
115
-
116
-
117
-
118
-
119
-
120
-
121
-
122
-
123
-
124
-
125
-
126
-
127
-
128
-
129
-
130
-
131
-
132
-
133
-
134
-
135
-
136
-
137
-
138
-
139
-
140
-
141
-
142
-
143
-
144
-
145
-
146
-
147
-
148
-
149
-
150
-
151
-
152
-
153
-
154
-
155
-
156
-
157
-
158
-
159
-
160
-
161
-
162
-
163
-
164
-
165
-
166
 |
 |