Lenovo NetVista X40 Quick Reference for NetVista 2179 and 6643 systems (Dutch) - Page 66
Installing internal drives, System and PCI
 |
View all Lenovo NetVista X40 manuals
Add to My Manuals
Save this manual to your list of manuals |
Page 66 highlights
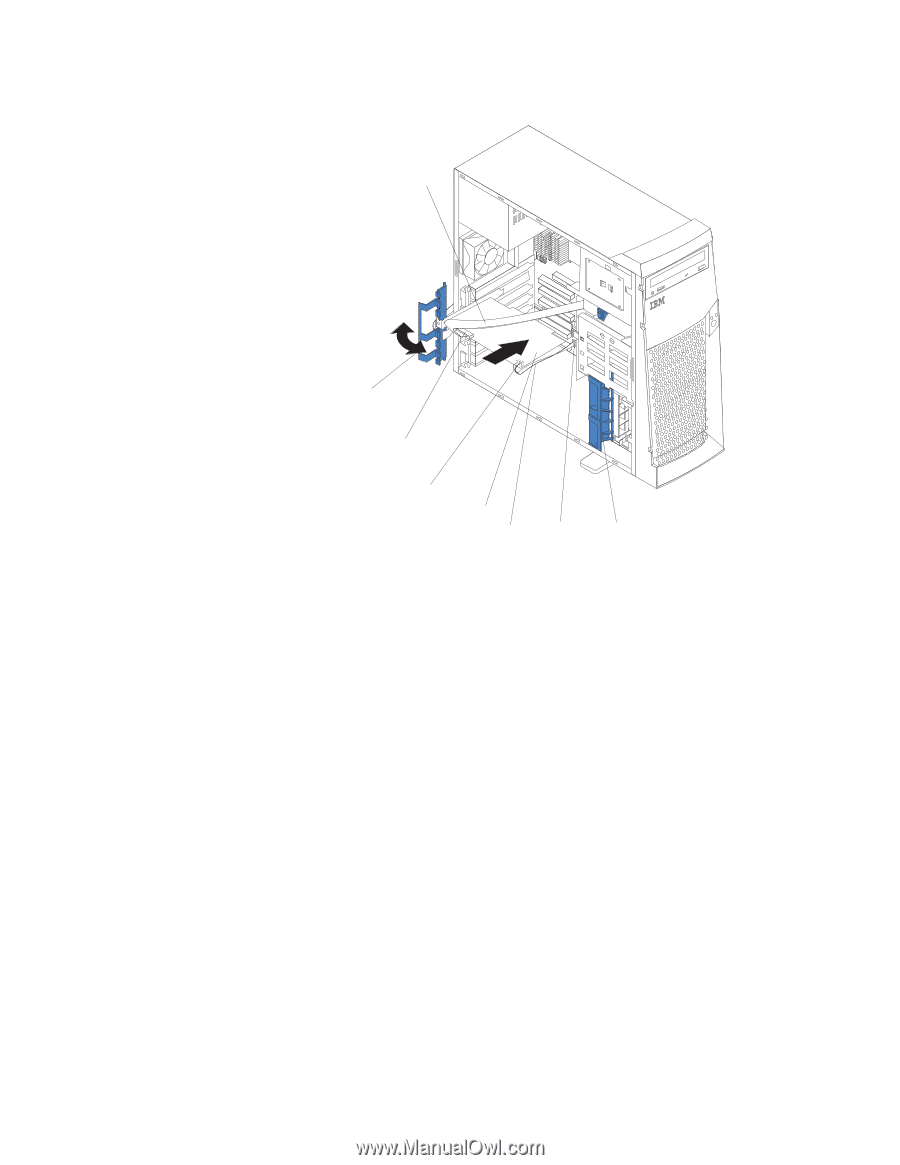
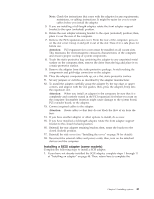
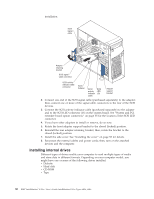
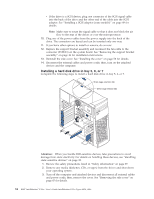
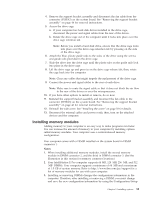
installation. SCSI signal cable Adapter retaining bracket SCSI signal cable connector SCSI activity indicator cable connector SCSI Adapter SCSI activity indicator cable SCSI LED (J3) Adapter support bracket 2. Connect one end of the SCSI signal cable (purchased separately) to the adapter; then, connect one or more of the signal cable connectors to the rear of the SCSI devices. 3. Connect the SCSI activity indicator cable (purchased separately) to the adapter and to the SCSI LED connector (J3) on the system board. See "System and PCI extender board option connectors" on page 35 for the location of the SCSI LED connector. 4. If you have other adapters to install or remove, do so now. 5. Rotate the front adapter support bracket to the closed (locked) position. 6. Reinstall the rear adapter retaining bracket; then, rotate the bracket to the closed (locked) position. 7. Install the side cover. See "Installing the cover" on page 58 for details. 8. Reconnect the external cables and power cords; then, turn on the attached devices and the computer. Installing internal drives Different types of drives enable your computer to read multiple types of media and store data in different formats. Depending on your computer model, you might have one or more of the following drives installed. v Diskette v Hard disk v CD-ROM v Tape 50 IBM® IntelliStation® E Pro: User's Guide IntelliStation E Pro Types 6836, 6846
-
 1
1 -
2
-
3
-
4
-
5
-
6
-
7
-
8
-
9
-
10
-
11
-
12
-
13
-
14
-
15
-
16
-
17
-
18
-
19
-
20
-
21
-
22
-
23
-
24
-
25
-
26
-
27
-
28
-
29
-
30
-
31
-
32
-
33
-
34
-
35
-
36
-
37
-
38
-
39
-
40
-
41
-
42
-
43
-
44
-
45
-
46
-
47
-
48
-
49
-
50
-
51
-
52
-
53
-
54
-
55
-
56
-
57
-
58
-
59
-
60
-
 61
61 -
 62
62 -
 63
63 -
 64
64 -
 65
65 -
 66
66 -
 67
67 -
 68
68 -
 69
69 -
 70
70 -
 71
71 -
72
-
73
-
74
-
75
-
76
-
77
-
78
-
79
-
80
-
81
-
82
-
83
-
84
-
85
-
86
-
87
-
88
-
89
-
90
-
91
-
92
-
93
-
94
-
95
-
96
-
97
-
98
-
99
-
100
-
101
-
102
-
103
-
104
-
105
-
106
-
107
-
108
-
109
-
110
-
111
-
112
-
113
-
114
-
115
-
116
-
117
-
118
-
119
-
120
-
121
-
122
-
123
-
124
-
125
-
126
-
127
-
128
-
129
-
130
-
131
-
132
-
133
-
134
-
135
-
136
-
137
-
138
-
139
-
140
-
141
-
142
-
143
-
144
-
145
-
146
-
147
-
148
-
149
-
150
-
151
-
152
-
153
-
154
-
155
-
156
 |
 |