Lenovo NetVista X40 Quick Reference for NetVista 2179 and 6643 systems (Dutch) - Page 83
Installing memory modules
 |
View all Lenovo NetVista X40 manuals
Add to My Manuals
Save this manual to your list of manuals |
Page 83 highlights
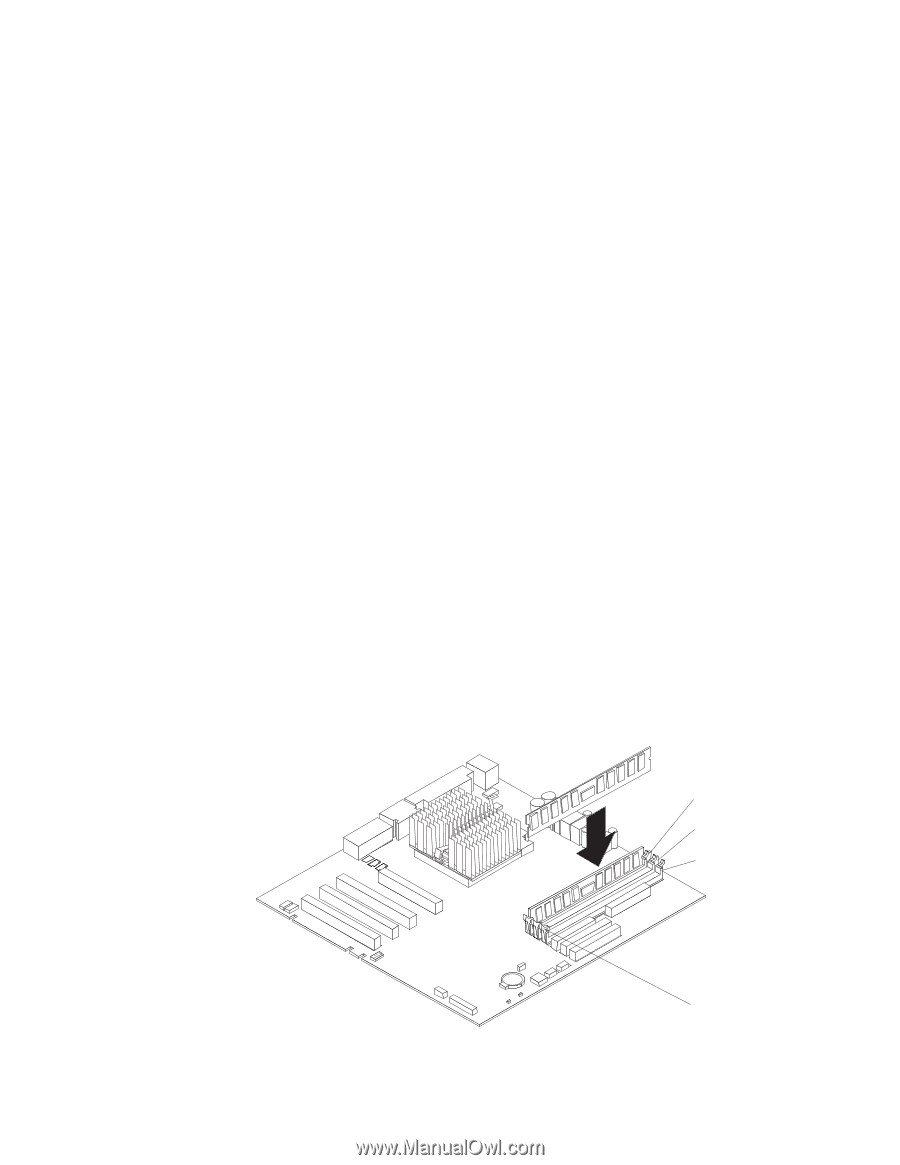
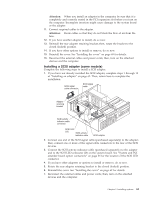
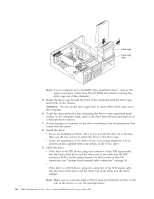
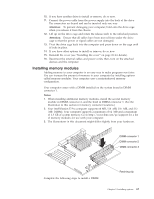
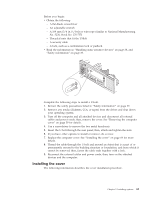
10. If you have another drive to install or remove, do so now. 11. Connect the power cable from the power supply into the back of the drive. The connectors are keyed and can be inserted only one way. Attention: To prevent damaging your computer, hold onto the drive cage when you release it from the chassis. 12. Lift up on the drive cage and rotate the release latch to the unlocked position. Attention: Ensure that all cables have been moved from under the drive cage so that the power or signal cables are not damaged. 13. Pivot the drive cage back into the computer and press down on the cage until it locks in place. 14. If you have other options to install or remove, do so now. 15. Reinstall the cover (see "Installing the cover" on page 69 for details). 16. Reconnect the external cables and power cords; then, turn on the attached devices and the computer. Installing memory modules Adding memory to your computer is an easy way to make programs run faster. You can increase the amount of memory in your computer by installing options called memory modules. Your computer uses a noninterleaved memory configuration. Your computer comes with a DIMM installed on the system board in DIMM connector 1. Notes: 1. When installing additional memory modules, install the second memory module in DIMM connector 2, and the third in DIMM connector 3. (See the illustration in this section for memory connector locations.) 2. Your IntelliStation E Pro computer supports 64 MB, 128 MB, 256 MB, and 512 MB DIMMs. Your computer supports a minimum of 64 MB and a maximum of 1.5 GB of system memory. Go to http://www.ibm.com/pc/support for a list of memory modules for use with your computer. 3. The illustrations in this document might differ slightly from your hardware. DIMM connector 1 DIMM connector 2 DIMM connector 3 Complete the following steps to install a DIMM. Retaining clip Chapter 5. Installing options 67
-
 1
1 -
2
-
3
-
4
-
5
-
6
-
7
-
8
-
9
-
10
-
11
-
12
-
13
-
14
-
15
-
16
-
17
-
18
-
19
-
20
-
21
-
22
-
23
-
24
-
25
-
26
-
27
-
28
-
29
-
30
-
31
-
32
-
33
-
34
-
35
-
36
-
37
-
38
-
39
-
40
-
41
-
42
-
43
-
44
-
45
-
46
-
47
-
48
-
49
-
50
-
51
-
52
-
53
-
54
-
55
-
56
-
57
-
58
-
59
-
60
-
61
-
62
-
63
-
64
-
65
-
66
-
67
-
68
-
69
-
70
-
71
-
72
-
73
-
74
-
75
-
76
-
77
-
 78
78 -
 79
79 -
 80
80 -
 81
81 -
 82
82 -
 83
83 -
 84
84 -
 85
85 -
 86
86 -
 87
87 -
 88
88 -
89
-
90
-
91
-
92
-
93
-
94
-
95
-
96
-
97
-
98
-
99
-
100
-
101
-
102
-
103
-
104
-
105
-
106
-
107
-
108
-
109
-
110
-
111
-
112
-
113
-
114
-
115
-
116
-
117
-
118
-
119
-
120
-
121
-
122
-
123
-
124
-
125
-
126
-
127
-
128
-
129
-
130
-
131
-
132
-
133
-
134
-
135
-
136
-
137
-
138
-
139
-
140
-
141
-
142
-
143
-
144
-
145
-
146
-
147
-
148
-
149
-
150
-
151
-
152
-
153
-
154
-
155
-
156
 |
 |