Lenovo NetVista X40 Quick Reference for NetVista 2179 and 6643 systems (Dutch) - Page 77
Adapter considerations, Start Options, Startup Sequence, Second device
 |
View all Lenovo NetVista X40 manuals
Add to My Manuals
Save this manual to your list of manuals |
Page 77 highlights
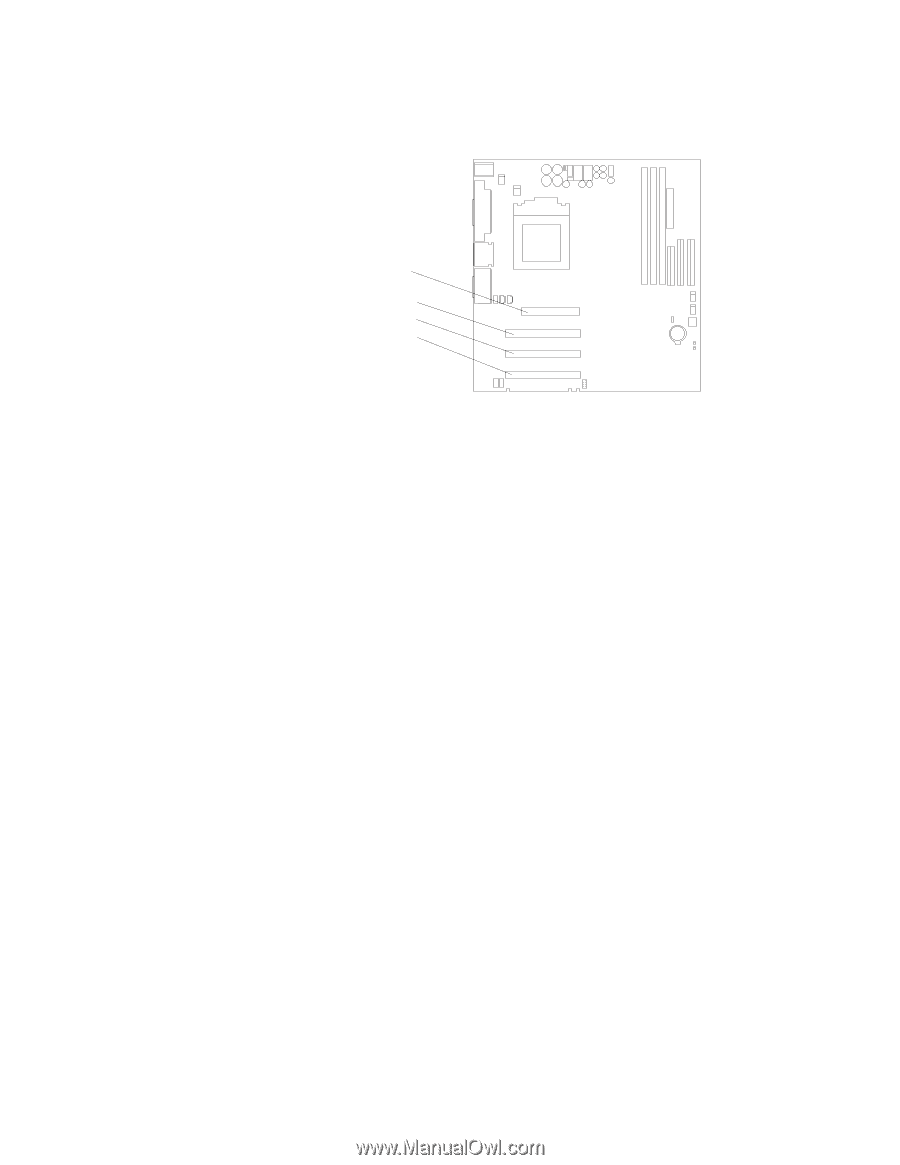
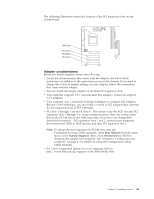
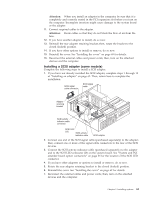
The following illustration shows the location of the PCI expansion slots on the system board. AGP slot PCI slot 1 PCI slot 2 PCI slot 3 Adapter considerations Before you install adapters, review the following: v Locate the documentation that comes with the adapter and follow those instructions in addition to the instructions given in this chapter. If you need to change the switch or jumper settings on your adapter, follow the instructions that come with the adapter. v You can install full-length adapters in all three PCI expansion slots. v Your computer supports 5.0 V and universal PCI adapters; it does not support 3.3 V adapters. v Your computer uses a rotational interrupt technique to configure PCI adapters. Because of this technique, you can install a variety of PCI adapters that currently do not support sharing of PCI interrupts. v PCI slots 1 through 3 are on PCI bus 0 . The system scans the AGP slot and PCI expansion slots 1 through 3 to assign system resources; then, the system starts (boots) the PCI devices in the following order, if you have not changed the default boot sequence : PCI expansion slots 1 and 2, system board integrated drive electronics (IDE) or SCSI devices, and then PCI expansion slot 3. Note: To change the boot sequence for PCI devices, start the Configuration/Setup Utility program, select Start Options from the main menu, select Startup Sequence; then, select Second device (SCSI) to designate the adapter boot sequence. See "Chapter 4. Configuring your computer" on page 27 for details on using the Configuration/Setup Utility program. v For a list of supported options for your computer, refer to http://www.ibm.com/pc/support on the World Wide Web. Chapter 5. Installing options 61
-
 1
1 -
2
-
3
-
4
-
5
-
6
-
7
-
8
-
9
-
10
-
11
-
12
-
13
-
14
-
15
-
16
-
17
-
18
-
19
-
20
-
21
-
22
-
23
-
24
-
25
-
26
-
27
-
28
-
29
-
30
-
31
-
32
-
33
-
34
-
35
-
36
-
37
-
38
-
39
-
40
-
41
-
42
-
43
-
44
-
45
-
46
-
47
-
48
-
49
-
50
-
51
-
52
-
53
-
54
-
55
-
56
-
57
-
58
-
59
-
60
-
61
-
62
-
63
-
64
-
65
-
66
-
67
-
68
-
69
-
70
-
71
-
 72
72 -
 73
73 -
 74
74 -
 75
75 -
 76
76 -
 77
77 -
 78
78 -
 79
79 -
 80
80 -
 81
81 -
 82
82 -
83
-
84
-
85
-
86
-
87
-
88
-
89
-
90
-
91
-
92
-
93
-
94
-
95
-
96
-
97
-
98
-
99
-
100
-
101
-
102
-
103
-
104
-
105
-
106
-
107
-
108
-
109
-
110
-
111
-
112
-
113
-
114
-
115
-
116
-
117
-
118
-
119
-
120
-
121
-
122
-
123
-
124
-
125
-
126
-
127
-
128
-
129
-
130
-
131
-
132
-
133
-
134
-
135
-
136
-
137
-
138
-
139
-
140
-
141
-
142
-
143
-
144
-
145
-
146
-
147
-
148
-
149
-
150
-
151
-
152
-
153
-
154
-
155
-
156
 |
 |