Netgear SRXN3205 SRXN3205 Reference Manual
Netgear SRXN3205 - ProSafe Wireless-N VPN Firewall Wireless Router Manual
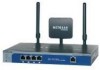 |
UPC - 606449057461
View all Netgear SRXN3205 manuals
Add to My Manuals
Save this manual to your list of manuals |
Netgear SRXN3205 manual content summary:
- Netgear SRXN3205 | SRXN3205 Reference Manual - Page 1
ProSafe Wireless-N VPN Firewall SRXN3205 Reference Manual NETGEAR, Inc. 4500 Great America Parkway Santa Clara, CA 95054 USA October 2008 202-10416-01 v1.0 - Netgear SRXN3205 | SRXN3205 Reference Manual - Page 2
ProSafe is a trademark of NETGEAR, Inc. Microsoft, Windows, and Windows üfen. Certificate of the Manufacturer/Importer It is hereby certified that the ProSafe Wireless-N VPN Firewall has been refer to the notes in the operating instructions. Federal Office for Telecommunications Approvals has been - Netgear SRXN3205 | SRXN3205 Reference Manual - Page 3
. Read instructions for correct handling. Additional Copyrights AES Copyright (c) 2001, Dr Brian Gladman , Worcester, UK. All rights endorse or promote any products derived from this software without his specific prior written permission. This software is provided 'as is' with - Netgear SRXN3205 | SRXN3205 Reference Manual - Page 4
Open SSL MD5 Copyright (c) 1998-2000 The OpenSSL Project. All rights reserved. Redistribution , EXEMPLARY, OR CONSEQUENTIAL DAMAGES (INCLUDING, BUT NOT LIMITED TO, PROCUREMENT OF SUBSTITUTE GOODS OR SERVICES; LOSS OF USE, DATA, OR PROFITS; OR BUSINESS INTERRUPTION) HOWEVER CAUSED AND ON ANY THEORY - Netgear SRXN3205 | SRXN3205 Reference Manual - Page 5
.txt (gzip format) Product and Publication Details Model Number: Publication Date: Product Family: Product Name: Home or Business Product: Language: Publication Part Number: Publication Version Number SRXN3205 October 2008 VPN Firewall ProSafe Wireless-N VPN Firewall Business English 202-10416-01 - Netgear SRXN3205 | SRXN3205 Reference Manual - Page 6
vi 1.0, October 2008 - Netgear SRXN3205 | SRXN3205 Reference Manual - Page 7
Rear Panel Features ...1-8 Default IP Address, Login Name, and Password Location 1-9 Qualified Web Browsers 1-9 Chapter 2 Connecting to the Internet (WAN) Understanding the Connection Steps 2-1 Logging into the VPN Firewall 2-2 Navigating the Menus ...2-3 Configuring the Internet Connection - Netgear SRXN3205 | SRXN3205 Reference Manual - Page 8
ProSafe Wireless-N VPN Firewall SRXN3205 Reference Manual Configuring the WAN Mode 2-10 Configuring Dynamic DNS 2-11 Configuring the Advanced WAN Options (Optional 2-12 Additional WAN Related Configuration 2-14 Chapter 3 LAN Configuration Configuring the LAN Setup Options 3-1 Using the VPN - Netgear SRXN3205 | SRXN3205 Reference Manual - Page 9
ProSafe Wireless-N VPN Firewall SRXN3205 Reference Manual Restricting Wireless Access by MAC Address 4-18 Chapter 5 Firewall Security and Content Filtering About Firewall Security and Content Filtering 5-1 Using Rules & Services to Block or Allow Traffic 5-2 Services-Based Rules 5-2 Viewing the - Netgear SRXN3205 | SRXN3205 Reference Manual - Page 10
, Groups, and Users 7-7 Configuring Applications for Port Forwarding 7-7 Adding Servers ...7-7 Adding A New Host Name 7-9 Configuring the SSL VPN Client 7-9 Configuring the Client IP Address Range 7-11 Adding Routes for VPN Tunnel Clients 7-12 Replacing and Deleting Client Routes 7-12 Using - Netgear SRXN3205 | SRXN3205 Reference Manual - Page 11
ProSafe Wireless-N VPN Firewall SRXN3205 Reference Manual Chapter 8 Managing Users, Authentication, and Certificates Adding Authentication Domains, Groups, and Users 8-1 Creating a Domain 8-1 Creating a Group ...8-3 Creating a New User Account 8-4 Setting User Login Policies 8-5 Managing - Netgear SRXN3205 | SRXN3205 Reference Manual - Page 12
ProSafe Wireless-N VPN Firewall SRXN3205 Reference Manual Viewing Port Triggering Status 11-12 Monitoring VPN Tunnel Connection Status 11-13 Reviewing the VPN Logs 11-14 Chapter 12 Troubleshooting Basic Functions ...12-1 Power LED Not On 12-2 LEDs Never Turn Off 12-2 LAN or WAN Port LEDs Not On - Netgear SRXN3205 | SRXN3205 Reference Manual - Page 13
ProSafe Wireless-N VPN Firewall SRXN3205 Reference Manual About This Manual The NETGEAR® ProSafe™ Wireless-N VPN FirewallReference Manual describes how to configure and troubleshoot a ProSafe Wireless-N VPN Firewall. The information in this manual is intended for readers with intermediate computer - Netgear SRXN3205 | SRXN3205 Reference Manual - Page 14
VPN Firewall SRXN3205 Reference Manual Danger: This is a safety warning. Failure to take heed of this notice may result in personal injury or death. • Scope. This manual is written for the firewall according to these specifications: Product Manual Publication Date ProSafe Wireless-N VPN Firewall - Netgear SRXN3205 | SRXN3205 Reference Manual - Page 15
ProSafe Wireless-N VPN Firewall SRXN3205 Reference Manual • Printing from PDF. Your computer must page in the manual. The PDF version of the complete manual opens in a browser window. • Click the print icon in the upper left of your browser window. Tip: If your printer supports printing two pages on - Netgear SRXN3205 | SRXN3205 Reference Manual - Page 16
ProSafe Wireless-N VPN Firewall SRXN3205 Reference Manual xvi v1.0, October 2008 - Netgear SRXN3205 | SRXN3205 Reference Manual - Page 17
be installed and configured within minutes. This chapter contains the following sections: • "Key Firewall Features" • "Wireless Networking Features" • "System Requirements" • "Package Contents" • "Front Panel Features" • "Rear Panel Features" • "Default IP Address, Login Name, and Password Location - Netgear SRXN3205 | SRXN3205 Reference Manual - Page 18
ProSafe Wireless-N VPN Firewall SRXN3205 Reference Manual • Advanced IPsec and SSL VPN support • Advanced stateful packet inspection (SPI) firewall with multi-NAT support • Easy, web-based setup for installation and management • Front panel LEDs for easy monitoring of status and activity • Flash - Netgear SRXN3205 | SRXN3205 Reference Manual - Page 19
ProSafe Wireless-N VPN Firewall SRXN3205 Reference Manual Extensive Protocol Support The firewall supports the Transmission Control Protocol/Internet Protocol (TCP/IP) and Routing Information Protocol (RIP). For further information about TCP/IP, refer to "Internet Configuration Requirements" on page - Netgear SRXN3205 | SRXN3205 Reference Manual - Page 20
ProSafe Wireless-N VPN Firewall SRXN3205 Reference Manual • SSL VPN provides remote access for mobile users to selected corporate resources without requiring a pre-installed VPN client on their computers. - Uses the familiar Secure Sockets Layer (SSL) protocol, commonly used for e-commerce - Netgear SRXN3205 | SRXN3205 Reference Manual - Page 21
ProSafe Wireless-N VPN Firewall SRXN3205 Reference Manual Easy Installation and Management You can install, configure, and operate the ProSafe Wireless-N VPN Firewall within minutes after connecting it to the network. The following features simplify installation and management tasks: • Browser-Based - Netgear SRXN3205 | SRXN3205 Reference Manual - Page 22
Guide, SRXN3205 ProSafe Wireless-N VPN Firewall . • Resource CD, including: - Application Notes and other helpful information. - ProSafe VPN Client Software - one user license. • Warranty and Support Information Card. If any of the parts are incorrect, missing, or damaged, contact your NETGEAR - Netgear SRXN3205 | SRXN3205 Reference Manual - Page 23
modes Reset Reboot 2 button (Press with a sharp Factory Defaults object) Press once to reboot the unit. Hold in for 15 seconds (until the TEST light flashes). This resets the unit to factory default settings, erasing all configuration settings and restores the default password. 3 LAN Ports - Netgear SRXN3205 | SRXN3205 Reference Manual - Page 24
ProSafe Wireless-N VPN Firewall SRXN3205 Reference Manual Rear Panel Features The rear panel of the ProSafe Wireless-N VPN Firewall is shown below. 1 2 Figure 1-2 New Photo 1. Detachable (SMA) Antennas: The SRXN3205 provides three SMA connectors for the detachable antennas (two dipole and one patch - Netgear SRXN3205 | SRXN3205 Reference Manual - Page 25
Manual Default IP Address, Login Name, and Password Location Check the label on the bottom of the SRXN3205's enclosure if you need a reminder of the following factory default information: IP Address User Name Password Figure 1-3 Qualified Web Browsers To configure the ProSafe Wireless-N VPN Firewall - Netgear SRXN3205 | SRXN3205 Reference Manual - Page 26
ProSafe Wireless-N VPN Firewall SRXN3205 Reference Manual 1-10 v1.0, October 2008 Introduction - Netgear SRXN3205 | SRXN3205 Reference Manual - Page 27
ProSafe Wireless-N VPN Firewall SRXN3205 Reference Manual Chapter 2 Connecting to the Internet (WAN) The initial Internet configuration of the SRXN3205 ProSafe Wireless-N VPN Firewall is described in this chapter. This chapter contains the following sections: • "Understanding the Connection Steps" • - Netgear SRXN3205 | SRXN3205 Reference Manual - Page 28
ProSafe Wireless-N VPN Firewall SRXN3205 Reference Manual Logging into the VPN Firewall To connect to the firewall, your computer needs to be configured to get an IP address via DHCP. To log in to the firewall, follow these steps: 1. Open a browser, and enter https://192.168.1.1 in the address field - Netgear SRXN3205 | SRXN3205 Reference Manual - Page 29
ProSafe Wireless-N VPN Firewall SRXN3205 Reference Manual Navigating the Menus The Web Configuration Manager menus are organized in a layered structure of main categories and submenus: • Main menu. The horizontal orange bar near the top of the page is - Netgear SRXN3205 | SRXN3205 Reference Manual - Page 30
ProSafe Wireless-N VPN Firewall SRXN3205 Reference Manual 1. Select Network Configuration > WAN Settings from the menu/submenu. The WAN tabs appear on screen with the WAN ISP Settings tab in view. Figure 2-3 2. Click Auto Detect at the bottom of the menu. Auto Detect will probe the WAN port for a - Netgear SRXN3205 | SRXN3205 Reference Manual - Page 31
No data is required. Login (Username, Password); Account Name, Domain Name (sometimes required). Login (Username, Password), Local IP address, and PPTP Server IP address; Account Name (sometimes required). Static IP address, Subnet, and Gateway IP; DNS Server IP addresses. c. If Auto Detect does - Netgear SRXN3205 | SRXN3205 Reference Manual - Page 32
ProSafe Wireless-N VPN Firewall SRXN3205 Reference Manual The WAN Status window should show a valid IP address and gateway. If the configuration was not successful, skip ahead to "Manually Configuring the Internet Connection" following this section, or see "Troubleshooting the ISP Connection" on - Netgear SRXN3205 | SRXN3205 Reference Manual - Page 33
ProSafe Wireless-N VPN Firewall SRXN3205 Reference Manual 4. In the ISP Type options, select the type of ISP connection you use from the three listed options. (By default If your ISP uses PPPoE as a login protocol: a. Select Other (PPPoE). Figure 2-8 b. Configure the following fields: • Account Name - Netgear SRXN3205 | SRXN3205 Reference Manual - Page 34
The Login Server is the IP address of the local BigPond Login Server in your area. 8. Review the Internet (IP) Address options. Figure 2-9 These options are inactive if BigPond Cable is selected???. 9. If your ISP has assigned a fixed (static) IP address, select Use Static IP Address, and configure - Netgear SRXN3205 | SRXN3205 Reference Manual - Page 35
ProSafe Wireless-N VPN Firewall SRXN3205 Reference Manual • Subnet Mask. Enter the mask provided by the ISP or your network administrator. • Gateway IP Address. Enter the IP address of the ISP's gateway, provided by the ISP or your network administrator. 10. If your ISP has not assigned a static IP - Netgear SRXN3205 | SRXN3205 Reference Manual - Page 36
ProSafe Wireless-N VPN Firewall SRXN3205 Reference Manual Configuring the WAN Mode To access the WAN Mode, click on Network Configuration > WAN Settings and select the WAN Mode tab. The WAN mode page allows you to configure how your firewall uses the external Internet connection. This screen gives - Netgear SRXN3205 | SRXN3205 Reference Manual - Page 37
ProSafe Wireless-N VPN Firewall SRXN3205 Reference Manual Configuring Dynamic DNS Note: Dynamic DNS enables you to employ some VPN configurations that require using an FQDN instead of the WAN IP address. Dynamic DNS (DDNS) is an Internet service that allows routers with varying public IP addresses - Netgear SRXN3205 | SRXN3205 Reference Manual - Page 38
ProSafe Wireless-N VPN Firewall SRXN3205 Reference Manual To configure Dynamic DNS: 1. Select Network Configuration > Dynamic DNS from the main/submenu. The Current WAN Mode section reports the currently configured WAN mode. Only those options that match the configured WAN Mode will be accessible. - Netgear SRXN3205 | SRXN3205 Reference Manual - Page 39
ProSafe Wireless-N VPN Firewall SRXN3205 Reference Manual 2. Click the Advanced link to the right of the tabs. The WAN Advanced Options tab is displayed. Figure 2-11 Need new screenshot 3. Edit the default information you want to change. a. MTU Size. The normal MTU (Maximum Transmit Unit) value - Netgear SRXN3205 | SRXN3205 Reference Manual - Page 40
ProSafe Wireless-N VPN Firewall SRXN3205 Reference Manual The format for the MAC address is 01:23:45:67:89:AB (numbers 0-9 and either uppercase or lowercase letters A-F). If you select Use This MAC Address and then type in a MAC address, your entry will be overwritten. 4. Click Apply to save your - Netgear SRXN3205 | SRXN3205 Reference Manual - Page 41
VPN Firewall as a DHCP Server" on page 3-3 • "Configuring Multi Home LAN IP Addresses" on page 3-8 • "Configuring Static Routes" on page 3-10 • "Configuring Routing Information Protocol (RIP)" on page 3-11 Configuring the LAN Setup Options The LAN Setup menu allows configuration of LAN IP services - Netgear SRXN3205 | SRXN3205 Reference Manual - Page 42
ProSafe Wireless-N VPN Firewall SRXN3205 Reference Manual . Figure 3-1 2. In the LAN TCP/IP Setup section, configure the following settings: • IP Address. The LAN address of your firewall (factory default: 192.168.1.1). Note: If you change the LAN IP address of the firewall while connected through - Netgear SRXN3205 | SRXN3205 Reference Manual - Page 43
to a client. • Enable DNS Proxy. When DNS proxy is enabled (default), the DHCP server will provide the SRXN3205 LAN IP address as the DNS server for address name resolution. If this box is unchecked, the DHCP server will provide the ISP's DNS server IP addresses. The firewall will still service DNS - Netgear SRXN3205 | SRXN3205 Reference Manual - Page 44
ProSafe Wireless-N VPN Firewall SRXN3205 Reference Manual addresses will be assigned to the attached PCs from a pool of addresses specified in this menu. Each pool address is tested before it is assigned to avoid duplicate addresses on the LAN. Specify the pool of IP addresses to be assigned by - Netgear SRXN3205 | SRXN3205 Reference Manual - Page 45
ProSafe Wireless-N VPN Firewall SRXN3205 Reference Manual • Scanning the Network. The local network is scanned using ARP requests. The ARP scan will detect active devices that are not DHCP clients. However, sometimes the name of the PC or device cannot be accurately determined, and will appear in - Netgear SRXN3205 | SRXN3205 Reference Manual - Page 46
the DHCP server, then the Name will be appended by an asterisk. • IP Address. The current IP address of the computer. For DHCP clients of the firewall, this IP address will not change. If a computer is assigned a static IP addresses, you will need to update this entry manually if the IP address on - Netgear SRXN3205 | SRXN3205 Reference Manual - Page 47
Wireless-N VPN Firewall SRXN3205 Reference Manual • IP Address Type. From the pull-down menu, choose how this device receives its IP address. The choices are: - Fixed (Set on PC). The IP address is statically assigned on the computer. - Reserved (DHCP Client). Directs the firewall's DHCP server - Netgear SRXN3205 | SRXN3205 Reference Manual - Page 48
ProSafe Wireless-N VPN Firewall SRXN3205 Reference Manual Figure 3-3 2. Select the radio button next to any group name to make that name active for editing. 3. Type a new name in the field. 4. Click Apply to save your setting, each - Netgear SRXN3205 | SRXN3205 Reference Manual - Page 49
ProSafe Wireless-N VPN Firewall SRXN3205 Reference Manual 2. Click the LAN Multi-homing tab and the LAN Multi-homing screen displays. Figure 3-4 The Available Secondary LAN IPs table lists the secondary LAN IP addresses added to the firewall. • IP Address. The "alias," an additional IP address - Netgear SRXN3205 | SRXN3205 Reference Manual - Page 50
ProSafe Wireless-N VPN Firewall SRXN3205 Reference Manual Configuring Static Routes Static Routes provide additional routing information to your firewall. Under normal circumstances, the firewall has adequate routing information after it has been configured for Internet access, and you do not need - Netgear SRXN3205 | SRXN3205 Reference Manual - Page 51
ProSafe Wireless-N VPN Firewall SRXN3205 Reference Manual 3. Enter a route name for this static route in the Route Name field (for identification and management). 4. Select Active to make this route effective. 5. Select Private if you want to limit access to the LAN only. The static route will not - Netgear SRXN3205 | SRXN3205 Reference Manual - Page 52
ProSafe Wireless-N VPN Firewall SRXN3205 Reference Manual The RIP Configuration menu displays. Figure 3-7 3. From the RIP Direction pull-down menu, choose the direction in which the firewall will send and receive RIP packets. The choices are: • None. The firewall neither broadcasts its route table - Netgear SRXN3205 | SRXN3205 Reference Manual - Page 53
ProSafe Wireless-N VPN Firewall SRXN3205 Reference Manual • RIP-2. This includes all the functionality of RIPv1 plus it supports subnet information. Though the data is , MD-5 keys to authenticate between firewalls. 6. Click Add to save your settings. LAN Configuration v1.0, October 2008 3-13 - Netgear SRXN3205 | SRXN3205 Reference Manual - Page 54
ProSafe Wireless-N VPN Firewall SRXN3205 Reference Manual 3-14 v1.0, October 2008 LAN Configuration - Netgear SRXN3205 | SRXN3205 Reference Manual - Page 55
LAN through the WAN port to a device such as a hub, switch, router, or Cable/DSL gateway. • A correctly set up ProSafe Wireless-N VPN Firewall for wireless access • One or more computers with properly configured 802.11b/g/n or 802.11a/n wireless adapters. • A location for the SRXN3205 that conforms - Netgear SRXN3205 | SRXN3205 Reference Manual - Page 56
ProSafe Wireless-N VPN Firewall SRXN3205 Reference Manual Wireless Equipment Placement and Range Guidelines The operating distance or range of your wireless connection can vary significantly based on the physical placement of the VPN firewall. The latency, data throughput performance, and notebook - Netgear SRXN3205 | SRXN3205 Reference Manual - Page 57
ProSafe Wireless-N VPN Firewall SRXN3205 Reference Manual Figure 4-1Need new photo/picture There are several ways you can enhance the security of your wireless network: • Restrict Access Based on MAC address. You can restrict access to only trusted PCs so that unknown PCs cannot wirelessly connect - Netgear SRXN3205 | SRXN3205 Reference Manual - Page 58
ProSafe Wireless-N VPN Firewall SRXN3205 Reference Manual Basic Wireless Setup (No Security) Test wireless connectivity in your environment by setting up the unit without wireless security. To configure the SRXN3205 for basic Wireless access, follow these simple steps: 1. Log in to the SRXN3205. 2. - Netgear SRXN3205 | SRXN3205 Reference Manual - Page 59
ProSafe Wireless-N VPN Firewall SRXN3205 Reference Manual 4. If you want your SSID (network name) broadcast, leave the default setting as is. If you disable Allow Broadcast of Name (SSID), only devices that have the correct SSID can connect. This nullifies the wireless network "discovery" feature of - Netgear SRXN3205 | SRXN3205 Reference Manual - Page 60
ProSafe Wireless-N VPN Firewall SRXN3205 Reference Manual 1. Select Network Configuration > Wireless Settings from main. Note: The Enable Wireless Access Point checkbox must be checked to enable all the options on this screen. 2. Configure the Wireless LAN settings based on the following field - Netgear SRXN3205 | SRXN3205 Reference Manual - Page 61
ProSafe Wireless-N VPN Firewall SRXN3205 Reference Manual 1. From your Web browser, log in to the SRXN3205 using its default address of http://192.168.1.1. 2. Use the default user name of admin and default password of password- or use a new LAN address and password if you have set them up. 3. Select - Netgear SRXN3205 | SRXN3205 Reference Manual - Page 62
ProSafe Wireless-N VPN Firewall SRXN3205 Reference Manual Wireless Security Types and Settings Configure the Wireless Security Types based on the level of security you need using one of the following methods and print out the form provided to aid you - Netgear SRXN3205 | SRXN3205 Reference Manual - Page 63
ProSafe Wireless-N VPN Firewall SRXN3205 Reference Manual SSID and WEP/WPA Settings Setup Form 802.11b/g/n Configuration For a new wireless network, print or copy this form and fill in the configuration parameters. For an existing wireless network, the person who set it up or is responsible for the - Netgear SRXN3205 | SRXN3205 Reference Manual - Page 64
settings for the primary and secondary RADIUS servers: Server Name/IP Address: Primary Secondary RADIUS Port Shared Key Use the procedures described in the following sections to configure the SRXN3205. Store this information in a safe place. 4-10 v1.0, October 2008 Wireless Configuration - Netgear SRXN3205 | SRXN3205 Reference Manual - Page 65
ProSafe Wireless-N VPN Firewall SRXN3205 Reference Manual Configuring WEP To configure WEP data encryption in the Wireless Settings menu: 1. Click the WEP radio button on the left to enable WEP data encryption. When you select the WEP data encryption, only the feature selections for WEP are made - Netgear SRXN3205 | SRXN3205 Reference Manual - Page 66
ProSafe Wireless-N VPN Firewall SRXN3205 Reference Manual Configuring WPA-PSK Not all wireless adapters support WPA. Furthermore, client software is required on the client. Windows XP and Windows 2000 with Service Pack 3 or above include the client software that supports WPA. Nevertheless, the - Netgear SRXN3205 | SRXN3205 Reference Manual - Page 67
ProSafe Wireless-N VPN Firewall SRXN3205 Reference Manual Configuring WPA-PSK and WPA2-PSK Not all wireless adapters support WPA and WPA2. Client software is required on the client: • Windows XP and Windows 2000 with Service Pack 3 or above do include the client software that supports WPA. The - Netgear SRXN3205 | SRXN3205 Reference Manual - Page 68
. - Server Name. The - IP Address. The IP address of the RADIUS Server. The default is 0.0.0.0. - RADIUS Port. The port number of the RADIUS Server. The default is 1812. - Shared Key. This is shared between the VPN firewall and the RADIUS Server while authenticating the supplicant (wireless client - Netgear SRXN3205 | SRXN3205 Reference Manual - Page 69
ProSafe Wireless-N VPN Firewall SRXN3205 Reference Manual • The Server Name, IP Address, RADIUS Port (number), and Shared Key are required for communication with the RADIUS Server. - Server Name. The - IP Address. The IP address of the RADIUS Server. The default is 0.0.0.0. - RADIUS Port. The port - Netgear SRXN3205 | SRXN3205 Reference Manual - Page 70
ProSafe Wireless-N VPN Firewall SRXN3205 Reference Manual - IP Address. The IP address of the RADIUS Server. The default is 0.0.0.0. - RADIUS Port. The port number of the RADIUS Server. The default is 1812. - Shared Key. This is shared between the VPN firewall and the RADIUS Server while - Netgear SRXN3205 | SRXN3205 Reference Manual - Page 71
ProSafe Wireless-N VPN Firewall SRXN3205 Reference Manual 4. Connect Ethernet cable(s) from the LAN ports on your firewall to a LAN port on your switch. Note: By default, SRXN3205 is set with the DHCP client Enabled. If your network uses dynamic IP addresses, you must change this setting. To connect - Netgear SRXN3205 | SRXN3205 Reference Manual - Page 72
stations through the firewall. When you enable access control, the SRXN3205 only accepts connections from wireless clients on the selected access control list. This provides an additional layer of security. Note: If configuring the SRXN3205 from a wireless computer whose MAC address is not in - Netgear SRXN3205 | SRXN3205 Reference Manual - Page 73
click the delete button. 9. To view the clients currently connected, click the Available Wireless Stations tab. This list auto-populates whether the ACL is enabled or disable and lists the MAC addresses found within range of this wireless VPN firewall. Wireless Configuration v1.0, October 2008 - Netgear SRXN3205 | SRXN3205 Reference Manual - Page 74
ProSafe Wireless-N VPN Firewall SRXN3205 Reference Manual 4-20 v1.0, October 2008 Wireless Configuration - Netgear SRXN3205 | SRXN3205 Reference Manual - Page 75
ProSafe Wireless-N VPN Firewall SRXN3205 Reference Manual Chapter 5 Firewall Security and Content Filtering This chapter describes how to set up your firewall and use the content filtering features of the SRXN3205 VPN firewall to protect your network. This chapter contains the following sections: • - Netgear SRXN3205 | SRXN3205 Reference Manual - Page 76
ProSafe Wireless-N VPN Firewall SRXN3205 Reference Manual A firewall incorporates the functions of a NAT (Network Address Translation) router, while adding features for dealing with a hacker intrusion or attack, and for controlling the types of traffic that can flow between the two networks. Unlike - Netgear SRXN3205 | SRXN3205 Reference Manual - Page 77
ProSafe Wireless-N VPN Firewall SRXN3205 Reference Manual • Quality of Service (QoS) priorities. Each service at its own native priority that impacts its quality of performance and tolerance for jitter or delays. You can change this QoS priority if desired to change the traffic mix through the - Netgear SRXN3205 | SRXN3205 Reference Manual - Page 78
ProSafe Wireless-N VPN Firewall SRXN3205 Reference Manual Table 5-1. Outbound Rules (continued) Item LAN users WAN Users QoS Priority Log Description These settings determine which computers on your network are affected by this rule. Select the desired options: • Any - All PCs and devices - Netgear SRXN3205 | SRXN3205 Reference Manual - Page 79
ProSafe Wireless-N VPN Firewall SRXN3205 Reference Manual • If your external IP address is assigned dynamically by your ISP (DHCP enabled), the IP address may change periodically as the DHCP lease expires. Consider using Dyamic DNS (under Network Configuration) so that external users can always find - Netgear SRXN3205 | SRXN3205 Reference Manual - Page 80
ProSafe Wireless-N VPN Firewall SRXN3205 Reference Manual Table 5-2. Inbound Rules (continued) Item Description WAN Users These settings determine which Internet locations are covered by the rule, based on their IP addresses. Select the desired option: • Any - All Internet IP address are - Netgear SRXN3205 | SRXN3205 Reference Manual - Page 81
ProSafe Wireless-N VPN Firewall SRXN3205 Reference Manual Viewing the Firewall Rules To view the firewall rules, go to Security > Firewall from the main. The LAN WAN Rules tab displays. Figure 5-1 Order of Precedence for Rules As you define new rules, they are added to the tables in the Rules menu - Netgear SRXN3205 | SRXN3205 Reference Manual - Page 82
ProSafe Wireless-N VPN Firewall SRXN3205 Reference Manual 4. Click Apply. Creating a LAN WAN Outbound Services Rule An outbound rule will block or allow the selected application from an internal IP LAN address to an external WAN IP address according to the schedule created in the Schedule menu. You - Netgear SRXN3205 | SRXN3205 Reference Manual - Page 83
ProSafe Wireless-N VPN Firewall SRXN3205 Reference Manual 1. Click Add under the Inbound Services Table. The Add LAN WAN Inbound Service screen is displayed. Figure 5-3 2. Configure the parameters and click Apply to save your changes and reset the rule is disabled. (By default, when a rule is added - Netgear SRXN3205 | SRXN3205 Reference Manual - Page 84
ProSafe Wireless-N VPN Firewall SRXN3205 Reference Manual Attack Checks This screen allows you to specify whether or not the firewall should be protected against common attacks in the LAN and WAN networks. The various types of attack checks are listed on the Attack Checks screen and defined below: • - Netgear SRXN3205 | SRXN3205 Reference Manual - Page 85
ProSafe Wireless-N VPN Firewall SRXN3205 Reference Manual For example, if a VPN Client or Gateway on the LAN side of this firewall wants to connect to another VPN endpoint on the WAN (placing this firewall between two VPN end points), encrypted packets are sent to this firewall. Since this firewall - Netgear SRXN3205 | SRXN3205 Reference Manual - Page 86
ProSafe Wireless-N VPN Firewall SRXN3205 Reference Manual Figure 5-5 LAN WAN Inbound Rule: Allowing Videoconference from Restricted Addresses If you want to allow incoming videoconferencing to be initiated from a restricted range of outside IP addresses, such as from a branch office, you can create - Netgear SRXN3205 | SRXN3205 Reference Manual - Page 87
ProSafe Wireless-N VPN Firewall SRXN3205 Reference Manual In the example shown in Figure 5-7, we have configured multi-NAT to support multiple public IP addresses on one WAN interface. The inbound rule instructs the firewall to host an additional public IP address (10.1.0.5) and to associate this - Netgear SRXN3205 | SRXN3205 Reference Manual - Page 88
ProSafe Wireless-N VPN Firewall SRXN3205 Reference Manual 2. Place the new rule below all other inbound rules. Note: For security, NETGEAR strongly recommends that you avoid creating an exposed host. When a computer on your LAN is designated as the exposed host, it loses much of the - Netgear SRXN3205 | SRXN3205 Reference Manual - Page 89
ProSafe Wireless-N VPN Firewall SRXN3205 Reference Manual Adding Customized Services Services are functions performed by server computers at the request of client computers. For example, Web servers serve Web pages, time servers serve time and date information, and game hosts serve data about other - Netgear SRXN3205 | SRXN3205 Reference Manual - Page 90
ProSafe Wireless-N VPN Firewall SRXN3205 Reference Manual 6. Click Add. The new custom service will be added to the Custom Services Table. Modifying a Service To edit the parameters of an existing service: 1. In the Custom Services Table, click the Edit button adjacent to the service you want to - Netgear SRXN3205 | SRXN3205 Reference Manual - Page 91
ProSafe Wireless-N VPN Firewall SRXN3205 Reference Manual Setting Schedules to Block or Allow Traffic If you enabled Content Filtering in the Block Sites menu, or if you defined an outbound or inbound rule to use a schedule, you can set up a schedule for when blocking occurs or when access is - Netgear SRXN3205 | SRXN3205 Reference Manual - Page 92
ProSafe Wireless-N VPN Firewall SRXN3205 Reference Manual Setting Block Sites (Content Filtering) To restrict internal LAN users from access to certain sites on the Internet, you can use the VPN firewall's Content Filtering and Web Components filtering. By default, these features are disabled; all - Netgear SRXN3205 | SRXN3205 Reference Manual - Page 93
ProSafe Wireless-N VPN Firewall SRXN3205 Reference Manual . Figure 5-10 2. Select Yes to enable Content Filtering. 3. Click Apply to activate the menu controls. 4. Select any Web Components you wish to block. Proxy, Java, ActiveX, or Cookies 5. Select the groups to which Keyword Blocking will apply - Netgear SRXN3205 | SRXN3205 Reference Manual - Page 94
ProSafe Wireless-N VPN Firewall SRXN3205 Reference Manual The Trusted Domain will appear in the Trusted Domains table. You can also edit any entry by clicking Edit in the Action column adjacent to the entry. 8. Click Apply to save your settings. Enabling Source MAC Filtering (Address Filter) In the - Netgear SRXN3205 | SRXN3205 Reference Manual - Page 95
ProSafe Wireless-N VPN Firewall SRXN3205 Reference Manual 4. Enter your list of source MAC addresses to be blocked in the MAC Address field in the form 01:23:45:67:89:AB, using colon-separated hexadecimal characters (0-9, A-F). 5. Click the Add icon. The MAC address is added to the MAC Addresses - Netgear SRXN3205 | SRXN3205 Reference Manual - Page 96
ProSafe Wireless-N VPN Firewall SRXN3205 Reference Manual 3. Click the Yes radio button to enable Source MAC Filtering. IP/MAC Bind Table lists the currently defined IP/MAC Bind rules: - Name: Displays the user-defined name for this rule. - MAC Addresses: Displays the MAC Addresses for this rule. - - Netgear SRXN3205 | SRXN3205 Reference Manual - Page 97
ProSafe Wireless-N VPN Firewall SRXN3205 Reference Manual Enabling Port Triggering Port triggering allows some applications running on a LAN network to be available to external applications that would otherwise be partially blocked by the firewall. Using this feature requires the port numbers used - Netgear SRXN3205 | SRXN3205 Reference Manual - Page 98
ProSafe Wireless-N VPN Firewall SRXN3205 Reference Manual 1. Select Security from the main menu and Port Triggering from the submenu. Figure 5-13 The Port Triggering up on WAN interface, while limits for inbound traffic are set up on the LAN interface for all WAN modes. 5-24 Firewall Security and - Netgear SRXN3205 | SRXN3205 Reference Manual - Page 99
ProSafe Wireless-N VPN Firewall SRXN3205 Reference Manual Example: When a new connection is established on the VPN firewall, the firewall rules are search for a corresponding rule limit to the connection. If the rule has a bandwidth profile setting, then the firewall will create a bandwidth class in - Netgear SRXN3205 | SRXN3205 Reference Manual - Page 100
. The UPnP Portmap Table shows the IP addresses and other settings of UPnP devices that have accessed this wireless VPN firewall. - Active: A Yes or No indicates if the UPnP device port that established a connection is currently active. 5-26 Firewall Security and Content Filtering v1.0, October - Netgear SRXN3205 | SRXN3205 Reference Manual - Page 101
ProSafe Wireless-N VPN Firewall SRXN3205 Reference Manual - Protocol: Indicates the network protocol (i.e. HTTP, FTP, etc.) used by the device to connect to the VPN firewall. - Int. Port (Internal Port): Indicates if any internal ports are opened by the UPnP device. - Ext. Port (External Port): - Netgear SRXN3205 | SRXN3205 Reference Manual - Page 102
ProSafe Wireless-N VPN Firewall SRXN3205 Reference Manual 5-28 Firewall Security and Content Filtering v1.0, October 2008 - Netgear SRXN3205 | SRXN3205 Reference Manual - Page 103
or Modifying IKE and VPN Policy Settings" • "Managing VPN Tunnel Policies" • "Manually Assigning IP Addresses to Remote Users (ModeConfig)" • "Extended Authentication (XAUTH) Configuration" Using the VPN Wizard for Client and Gateway Configurations Configuring a VPN tunnel connection requires that - Netgear SRXN3205 | SRXN3205 Reference Manual - Page 104
ProSafe Wireless-N VPN Firewall SRXN3205 Reference Manual Creating Gateway to Gateway VPN Tunnels with the Wizard You can configure multiple gateway VPN tunnel policies through the VPN Wizard. You can also set up multiple remote VPN client policies through the VPN Wizard. To set up a gateway VPN - Netgear SRXN3205 | SRXN3205 Reference Manual - Page 105
ProSafe Wireless-N VPN Firewall SRXN3205 Reference Manual 6. Enter the Remote WAN IP Address or Internet Name of the gateway to which you want to connect. • Both the remote WAN address and your local WAN address are required. • The remote WAN IP address must be a public address or the Internet name - Netgear SRXN3205 | SRXN3205 Reference Manual - Page 106
ProSafe Wireless-N VPN Firewall SRXN3205 Reference Manual Creating a Client to Gateway VPN Tunnel with the Wizard Follow these steps to configure the VPN client. 1. From the main menu, go to VPN > IPSec VPN > VPN Wizard. The VPN Wizard displays. . Figure 6-2 2. Select VPN Client as your VPN tunnel - Netgear SRXN3205 | SRXN3205 Reference Manual - Page 107
ProSafe Wireless-N VPN Firewall SRXN3205 Reference Manual Viewing or Modifying IKE and VPN Policy Settings Follow these steps to view or modify IKE and VPN policy settings. 1. For IKE policy settings, go to VPN > IPSec VPN > IKE Policies. Figure 6-3 To view or modify the IKE policy settings, click - Netgear SRXN3205 | SRXN3205 Reference Manual - Page 108
ProSafe Wireless-N VPN Firewall SRXN3205 Reference Manual 2. For VPN policy settings, go to VPN > IPSec VPN > VPN Policies. Figure 6-4 To view or modify the IKE Polic, click Edit in the Actioni columnof the policy you want to review. 6-6 Virtual Private Networking Using IPsec v1.0, October 2008 - Netgear SRXN3205 | SRXN3205 Reference Manual - Page 109
VPN Client software. Since the PC's IP address is assumed to be unknown, the PC must always be the initiator of the connection. This procedure was developed and tested using: • Netgear SRXN3205 ProSafe Wireless-N VPN Firewall • Netgear ProSafe VPN Client • NAT router: Netgear FVX538 Configuring - Netgear SRXN3205 | SRXN3205 Reference Manual - Page 110
ProSafe Wireless-N VPN Firewall SRXN3205 Reference Manual Configuring the VPN Client From a PC with the Netgear Prosafe VPN Client installed, you can configure a VPN client policy to connect to the SRXN3205. To configure your VPN client: 1. Right-click on the VPN client icon in your Windows toolbar - Netgear SRXN3205 | SRXN3205 Reference Manual - Page 111
ProSafe Wireless-N VPN Firewall SRXN3205 Reference Manual 7. In the left frame, click My Identity. Figure 6-6 8. From the Select Certificate pull-down menu, choose None. 9. From the ID Type pull-down menu, choose Domain Name. 10. Leave Virtual Adapter disabled, and click your computer's Network - Netgear SRXN3205 | SRXN3205 Reference Manual - Page 112
ProSafe Wireless-N VPN Firewall SRXN3205 Reference Manual 4. For the Phase 1 Negotiation Mode, check the Aggressive Mode radio box. Figure 6-7 5. PFS should be disabled, and Enable Replay Detection should be enabled. 6. In the - Netgear SRXN3205 | SRXN3205 Reference Manual - Page 113
ProSafe Wireless-N VPN Firewall SRXN3205 Reference Manual 7. In the left frame, expand Key Exchange (Phase 2) and choose Proposal 1. The fields in this proposal should also mirror those in the following figure. No changes should be necessary. Figure 6-9 8. In the upper left of the window, click the - Netgear SRXN3205 | SRXN3205 Reference Manual - Page 114
ProSafe Wireless-N VPN Firewall SRXN3205 Reference Manual Wizard setup identifies both the VPN policy and IKE policy. You can edit existing policies, or add new VPN and IKE policies directly in the policy tables. Note: An IKE policy cannot be edited if it is associated with an enabled VPN policy. - Netgear SRXN3205 | SRXN3205 Reference Manual - Page 115
set the default to Aggressive Mode. • Mode Config Record Specify whether this IKE policy uses a Mode Config Record (Mode Config Records can be defined on the Mode Config page under the VPN menu). Select the Yes radio button if you would like IP addresses to be assigned to remote VPN Clients. Since - Netgear SRXN3205 | SRXN3205 Reference Manual - Page 116
ProSafe Wireless-N VPN Firewall SRXN3205 Reference Manual - Authentication Method. Select Pre-shared Key for a simple password based key. Selecting RSA-Signature will disable the Pre-shared key text box and uses the Active Self Certificate uploaded in the Certificates page. In that case, a - Netgear SRXN3205 | SRXN3205 Reference Manual - Page 117
ProSafe Wireless-N VPN Firewall SRXN3205 Reference Manual IPSec Host: The router is authenticated by a remote gateway with a username and password combination. In this mode, the router acts as a VPN Client of the remote gateway. VPN Policy You can create two types of VPN policies. When using the - Netgear SRXN3205 | SRXN3205 Reference Manual - Page 118
ProSafe Wireless-N VPN Firewall SRXN3205 Reference Manual • Name. Each policy is given a unique name (the Connection Name when using the VPN Wizard). • Type. The Type is "Auto" or "Manual" as described previously (Auto is used during VPN Wizard configuration). • Local. IP address (either a single - Netgear SRXN3205 | SRXN3205 Reference Manual - Page 119
ModeConfig, and then configured a PC running ProSafe VPN Client software using these IP addresses. • NETGEAR SRXN3205 ProSafe Wireless-N VPN Firewall - WAN IP address: 172.21.4.1 - LAN IP address/subnet: 192.168.2.1/255.255.255.0 • NETGEAR ProSafe VPN Client software IP address: 192.168.1.2 Mode - Netgear SRXN3205 | SRXN3205 Reference Manual - Page 120
local network, enter its IP address. 8. Enter one or two DNS Server IP addresses to be used by remote VPN clients. 9. If you enable Perfect Forward Secrecy (PFS), choose DH Group 1 or 2. This setting must match exactly the configuration of the remote VPN client, 6-18 Virtual Private Networking - Netgear SRXN3205 | SRXN3205 Reference Manual - Page 121
ProSafe Wireless-N VPN Firewall SRXN3205 Reference Manual 10. Specify the Local IP Subnet to which the remote client will have access. Typically, this is your firewall's LAN subnet, such as 192.168.2.1/255.255.255.0. (If not specified, it will default to the LAN subnet of the firewall.) 11. Specify - Netgear SRXN3205 | SRXN3205 Reference Manual - Page 122
ProSafe Wireless-N VPN Firewall SRXN3205 Reference Manual • Authentication Algorithm: SHA-1 • Diffie-Hellman: Group 2 • SA Lifetime: 3600 seconds 7. Enter a Pre-Shared Key that will also be configured in the VPN client. 8. XAUTH is disabled by default. To enable XAUTH, choose one of the following: • - Netgear SRXN3205 | SRXN3205 Reference Manual - Page 123
and enter the WAN IP address of the firewall; in this example it is "172.21.4.1". 2. From the left side of the menu, click My Identity and enter the following information: a. Click Pre-Shared Key and enter the key you configured in the SRXN3205 IKE menu. b. From the Select Certificate pull-down menu - Netgear SRXN3205 | SRXN3205 Reference Manual - Page 124
ProSafe Wireless-N VPN Firewall SRXN3205 Reference Manual 1. Right-click on the VPN client icon in the Windows toolbar and click Connect. The connection policy you configured will appear; in this case "My Connections\modecfg_test". 2. Click on the connection. Within 30 seconds the message " - Netgear SRXN3205 | SRXN3205 Reference Manual - Page 125
ProSafe Wireless-N VPN Firewall SRXN3205 Reference Manual Configuring XAUTH for VPN Clients Once the XAUTH has been enabled, you must establish user accounts in the User Database to be authenticated against XAUTH, or you must enable a RADIUS-CHAP or RADIUS-PAP server. Note: If you are modifying an - Netgear SRXN3205 | SRXN3205 Reference Manual - Page 126
ProSafe Wireless-N VPN Firewall SRXN3205 Reference Manual - RADIUS-CHAP or RADIUS-PAP (depending on the authentication mode accepted by the RADIUS server) to add a RADIUS server. If RADIUS-PAP is selected, the firewall will first check in the user database to see if the user credentials are - Netgear SRXN3205 | SRXN3205 Reference Manual - Page 127
ProSafe Wireless-N VPN Firewall SRXN3205 Reference Manual Figure 6-13 3. To activate (enable) the Primary RADIUS server, click the Yes radio button. The primary server options become active. 4. Configure the following entries: • Primary RADIUS Server IP address. The IP address of the RADIUS server. - Netgear SRXN3205 | SRXN3205 Reference Manual - Page 128
ProSafe Wireless-N VPN Firewall SRXN3205 Reference Manual 8. Click Apply to save the settings. Note: Selection of the Authentication Protocol, usually PAP or CHAP, is configured on the individual IKE policy screens. 6-26 Virtual Private Networking Using IPsec v1.0, October 2008 - Netgear SRXN3205 | SRXN3205 Reference Manual - Page 129
Users" • "Configuring Applications for Port Forwarding" • "Configuring the SSL VPN Client" • "Using Network Resource Objects to Simplify Policies" • "Configuring User, Group, and Global Policies" Understanding the Portal Options The SRXN3205's SSL VPN portal can provide two levels of SSL service to - Netgear SRXN3205 | SRXN3205 Reference Manual - Page 130
ProSafe Wireless-N VPN Firewall SRXN3205 Reference Manual browser provides authentication and encryption, establishing a secure connection to the firewall. Upon successful connection, an ActiveX-based SSL VPN client is downloaded to the remote PC that will allow the remote user to virtually join the - Netgear SRXN3205 | SRXN3205 Reference Manual - Page 131
. 6. For VPN tunnel service, configure the virtual network adapter. In the VPN tunnel option, the firewall creates a virtual network adapter on the remote PC that will function as if it were on the local network. Configure the portal's SSL VPN Client to define a pool of local IP addresses to be - Netgear SRXN3205 | SRXN3205 Reference Manual - Page 132
the default radio button adjacent to the portal layout name. Note: The default portal address is https:///portal/SSL-VPN. The domain geardomain is attached to the SSL-VPN portal. The firewall administrator may define individual layouts for the SSL VPN portal. The layout configuration - Netgear SRXN3205 | SRXN3205 Reference Manual - Page 133
ProSafe Wireless-N VPN Firewall SRXN3205 Reference Manual Figure 7-2 3. In the Portal Layout and Theme Name section of the menu, configure the following entries: a. Enter a descriptive name for the portal layout in the Portal Layout Name field. This name will be part of the path of the SSL VPN - Netgear SRXN3205 | SRXN3205 Reference Manual - Page 134
ProSafe Wireless-N VPN Firewall SRXN3205 Reference Manual on login page checkbox to show the banner title and banner message text on the Login screen These directives help prevent clients browsers from caching SSL VPN portal pages and other web content. Note: NETGEAR strongly recommends enabling HTTP - Netgear SRXN3205 | SRXN3205 Reference Manual - Page 135
to specific defined network services. To define these services, you must specify the internal addresses and TCP applications (port numbers) that will be intercepted by the Port Forwarding client on the user's PC. The client will reroute this traffic to the firewall. Adding Servers To configure Port - Netgear SRXN3205 | SRXN3205 Reference Manual - Page 136
ProSafe Wireless-N VPN Firewall SRXN3205 Reference Manual 1. Select VPN > SSL VPN from the main/submenu, and then select the Port Forwarding tab. The Port Forwarding screen display. Figure 7-4 2. In the Add New Application for Port Forwarding section, enter the IP address of an internal server or - Netgear SRXN3205 | SRXN3205 Reference Manual - Page 137
access network applications once they have logged into the SSL VPN portal and launched Port Forwarding. Configuring the SSL VPN Client The SSL VPN Client within the SRXN3205 will assign IP addresses to remote VPN tunnel clients. Because the VPN tunnel connection is a point-to-point connection, you - Netgear SRXN3205 | SRXN3205 Reference Manual - Page 138
ProSafe Wireless-N VPN Firewall SRXN3205 Reference Manual • So that the virtual (PPP) interface address of a VPN tunnel client does not conflict with addresses on the corporate network, configure an IP address range that does not directly overlap with addresses on your local network. For example, if - Netgear SRXN3205 | SRXN3205 Reference Manual - Page 139
ProSafe Wireless-N VPN Firewall SRXN3205 Reference Manual Configuring the Client IP Address Range Determine the address range to be assigned to VPN tunnel clients, then define the address range. To configure the client IP address range: 1. Select VPN > SSL VPN from the main/submenu, and then select - Netgear SRXN3205 | SRXN3205 Reference Manual - Page 140
-N VPN Firewall SRXN3205 Reference Manual Adding Routes for VPN Tunnel Clients The VPN Tunnel Clients assume that the following networks are located across the VPN over the SSL tunnel: Note: VPN client routs need to be added in split tunnel mode only. • The subnet containing the client IP address - Netgear SRXN3205 | SRXN3205 Reference Manual - Page 141
ProSafe Wireless-N VPN Firewall SRXN3205 Reference Manual Using Network Resource Objects to Simplify Policies Network resources are groups of IP addresses, IP address ranges, and services. By defining resource objects, you can more quickly create and configure network policies. You will not need to - Netgear SRXN3205 | SRXN3205 Reference Manual - Page 142
ProSafe Wireless-N VPN Firewall SRXN3205 Reference Manual 5. Adjacent to the new resource, click the Edit button. The Add Resource Addresses screen displays. Figure 7-7 6. From the Object Type pull-down menu, select either IP Address or IP Network: • If you selected IP Address, enter an IP address - Netgear SRXN3205 | SRXN3205 Reference Manual - Page 143
ProSafe Wireless-N VPN Firewall SRXN3205 Reference Manual For example, a policy configured for a single IP address takes precedence over a policy configured for a range of addresses. And a policy that applies to a range of IP addresses takes precedence over a policy applied to all IP addresses. If - Netgear SRXN3205 | SRXN3205 Reference Manual - Page 144
ProSafe Wireless-N VPN Firewall SRXN3205 Reference Manual 1. Select VPN > SSL VPN from the main/submenu, and then select the relevant user's name from the pulldown menu. 3. Click the Display button. The List of SSL VPN Policies will display the list for your selected Query option. Change Query - Netgear SRXN3205 | SRXN3205 Reference Manual - Page 145
ProSafe Wireless-N VPN Firewall SRXN3205 Reference Manual the Add SSL VPN Policies section, review the Apply Policy To options and click one. Depending upon your selection, specific options to IP Address, you'll need to enter a descriptive Policy Name, the specific IP Address, then choose the Service - Netgear SRXN3205 | SRXN3205 Reference Manual - Page 146
ProSafe Wireless-N VPN Firewall SRXN3205 Reference Manual Figure 7-11 • If you choose IP Network, you'll need to enter a descriptive Policy Name, IP Address, Subnet Mask, then choose the Service and relevant Permission from the pull-down menus. Figure 7-12 • If you choose All Addresses, you'll need - Netgear SRXN3205 | SRXN3205 Reference Manual - Page 147
and SSL VPN clients. Accounts for IPsec VPN clients are only needed if you have enabled Extended Authentication (XAUTH) in your IPsec VPN configuration. Users connecting to the firewall must be authenticated before being allowed to access the firewall or the VPN-protected network. The login window - Netgear SRXN3205 | SRXN3205 Reference Manual - Page 148
ProSafe Wireless-N VPN Firewall SRXN3205 Reference Manual Figure 8-1 2. Click Add. The Add Domain screen displays. Figure 8-2 3. Configure the following fields: a. Enter a descriptive name for the domain in the Domain Name field. b. Select the Authentication Type. The required fields are activated - Netgear SRXN3205 | SRXN3205 Reference Manual - Page 149
ProSafe Wireless-N VPN Firewall SRXN3205 Reference Manual Authentication Type Active Directory LDAP Required Authentication Information Fields Authentication Server, Active Directory Domain Authentication Server, LDAP Base DN c. Select a portal to which this domain will be associated. 4. Click - Netgear SRXN3205 | SRXN3205 Reference Manual - Page 150
ProSafe Wireless-N VPN Firewall SRXN3205 Reference Manual 3. Click Add. The new group appears in the List of Groups, ready for use in user account setup. Creating a New User Account To add individual user accounts: 1. Select Users > Users from the main/submenu and the Users screen displays. . - Netgear SRXN3205 | SRXN3205 Reference Manual - Page 151
ProSafe Wireless-N VPN Firewall SRXN3205 Reference Manual e. Idle Timeout. For an Administrator, this is the period at which an idle user will be automatically logged out of the Web Configuration Manager. 4. Click Apply to save and apply your entries. The new user appears in the List of Users. - Netgear SRXN3205 | SRXN3205 Reference Manual - Page 152
ProSafe Wireless-N VPN Firewall SRXN3205 Reference Manual To restrict logging in based on IP address: 1. Select the by Source IP Address tab and the by Source IP Address screen displays. Figure 8-7 2. In the Defined Addresses Status section, select: • the Deny Login from Defined Addresses to deny - Netgear SRXN3205 | SRXN3205 Reference Manual - Page 153
ProSafe Wireless-N VPN Firewall SRXN3205 Reference Manual To restrict logging in based on the user's browser: 1. Select the by Client Browser tab. The by Client Browser screen will display. Figure 8-8 2. In the Defined Browsers Status section, select: • the Deny Login from Defined Browsers to deny - Netgear SRXN3205 | SRXN3205 Reference Manual - Page 154
ProSafe Wireless-N VPN Firewall SRXN3205 Reference Manual Managing Certificates The firewall uses digital certificates to authenticate connecting VPN gateways or clients, and to be authenticated by remote entities. A certificate that authenticates a server, for example, is a file that contains: • A - Netgear SRXN3205 | SRXN3205 Reference Manual - Page 155
ProSafe Wireless-N VPN Firewall SRXN3205 Reference Manual To view the VPN Certificates: Select VPN > Certificates from the main/sub-menu and the Certificates screen displays. The top section of the Certificates screen displays the Trusted Certificates (CA Certificates). Figure 8-9 When you obtain a - Netgear SRXN3205 | SRXN3205 Reference Manual - Page 156
ProSafe Wireless-N VPN Firewall SRXN3205 Reference Manual • Serial Number. This is a serial number maintained by the CA. It is used to identify the certificate with in the CA. • Issuer Name. The name of the CA that issued the certificate. • Expiry Time. The date on which the certificate expires. You - Netgear SRXN3205 | SRXN3205 Reference Manual - Page 157
ProSafe Wireless-N VPN Firewall SRXN3205 Reference Manual Figure 8-11 3. Complete the Optional fields, if desired, with the following information: • IP Address - If you have a fixed IP address, you may enter it here. Otherwise, you should leave this field blank. • Domain Name - If you have an - Netgear SRXN3205 | SRXN3205 Reference Manual - Page 158
ProSafe Wireless-N VPN Firewall SRXN3205 Reference Manual 5. In the Self Certificate Requests table, click View under "----BEGIN CERTIFICATE REQUEST---" and "---END CERTIFICATE REQUEST"). d. Submit the CA form. If no problems occur, the certificate will be issued. 8. Store the certificate file from - Netgear SRXN3205 | SRXN3205 Reference Manual - Page 159
ProSafe Wireless-N VPN Firewall SRXN3205 Reference Manual 10. Select the checkbox next to the certificate request, then click Browse and locate the certificate file on your PC. 11. Click Upload. The certificate file will be uploaded to this device and will appear in the Active Self Certificates list - Netgear SRXN3205 | SRXN3205 Reference Manual - Page 160
ProSafe Wireless-N VPN Firewall SRXN3205 Reference Manual 8-14 Managing Users, Authentication, and Certificates v1.0, October 2008 - Netgear SRXN3205 | SRXN3205 Reference Manual - Page 161
ProSafe Wireless-N VPN Firewall SRXN3205 Reference Manual Chapter 9 Firewall and Network Management This chapter describes how to use the network management features of your ProSafe Wireless-N VPN Firewall. These features can be found by clicking on the appropriate heading in the Main Menu of the - Netgear SRXN3205 | SRXN3205 Reference Manual - Page 162
ProSafe Wireless-N VPN Firewall SRXN3205 Reference Manual • WAN side: 1000 Mbps (one WAN port at 1000 Mbps) In practice, the WAN side bandwidth capacity will be much lower when DSL or cable modems are used to connect to the Internet. As a result and depending on the traffic being carried, the WAN - Netgear SRXN3205 | SRXN3205 Reference Manual - Page 163
ProSafe Wireless-N VPN Firewall SRXN3205 Reference Manual - Groups. The rule is applied to a Group (see "Managing Groups and Hosts (LAN Groups)" on page 3-4 to assign PCs to a Group using the LAN Groups Database). • WAN Users. These settings determine which Internet locations are covered by the - Netgear SRXN3205 | SRXN3205 Reference Manual - Page 164
ProSafe Wireless-N VPN Firewall SRXN3205 Reference Manual See "Managing Groups and Hosts (LAN Groups)" on page 3-4 for the procedure on how to use this feature. Schedule If you have set firewall rules on the Rules screen, you can configure three different schedules (for example, schedule 1, schedule - Netgear SRXN3205 | SRXN3205 Reference Manual - Page 165
ProSafe Wireless-N VPN Firewall SRXN3205 Reference Manual See "Enabling Source MAC Filtering (Address Filter)" on page 5-20 for the procedure on how to use this feature. Features that Increase Traffic Features that tend to increase WAN-side loading are as follows: • Port forwarding • Port - Netgear SRXN3205 | SRXN3205 Reference Manual - Page 166
ProSafe Wireless-N VPN Firewall SRXN3205 Reference Manual • Enable DNS Proxy. Allows the firewall to handle DNS queries from the LAN. • Enable Stealth Mode. Prevents the firewall from responding to incoming requests for unsupported services. As you define your firewall rules, you can further refine - Netgear SRXN3205 | SRXN3205 Reference Manual - Page 167
ProSafe Wireless-N VPN Firewall SRXN3205 Reference Manual • The remote system receives the PCs request and responds using the different port numbers that you have now opened. • This firewall matches the response to the previous request and forwards the response to the PC. Without port triggering, - Netgear SRXN3205 | SRXN3205 Reference Manual - Page 168
ProSafe Wireless-N VPN Firewall SRXN3205 Reference Manual Tools for Traffic Management The ProSafe Wireless-N VPN Firewall includes several tools that can be used to monitor the traffic conditions of the firewall and control who has access to the Internet and the types of traffic each individual is - Netgear SRXN3205 | SRXN3205 Reference Manual - Page 169
ProSafe Wireless-N VPN Firewall SRXN3205 Reference Manual The Edit User screen is displayed, with the current settings for Administrator displayed in the Select User Type pull-down menu. Figure 9-2 3. Select the Check to Edit Password checkbox. The password fields become active. 4. Enter the old - Netgear SRXN3205 | SRXN3205 Reference Manual - Page 170
IP addresses as practical. See "Setting User Login Policies" on page 8-5 for instructions on restricting administrator access. Be sure to use strong passwords. 3. Click Apply to have your changes take effect. When accessing your firewall from the Internet, the Secure Sockets Layer (SSL) will - Netgear SRXN3205 | SRXN3205 Reference Manual - Page 171
as the default user policy, are preventing access. Note: If you disable HTTPS remote management, all SSL VPN user connections will also be disabled. Tip: If you are using a dynamic DNS service such as TZO, you can identify the WAN IP address of your SRXN3205 by running tracert from the Windows Run - Netgear SRXN3205 | SRXN3205 Reference Manual - Page 172
want to make the VPN firewall globally accessible using the community string, but still receive traps on the host, enter 0.0.0.0 as the Subnet Mask and an IP Address for where the traps will be received. • Enter the trap port number of the configuration in the Port field. The default is 162. • Enter - Netgear SRXN3205 | SRXN3205 Reference Manual - Page 173
ProSafe Wireless-N VPN Firewall SRXN3205 Reference Manual Settings Backup and Firmware Upgrade Once you have installed the VPN firewall and have it to the factory default settings. • Upgrade the VPN firewall firmware from a saved file on your hard disk to use a different firmware version. Backup - Netgear SRXN3205 | SRXN3205 Reference Manual - Page 174
, click the Default button. You must manually restart the VPN firewall before the default settings to take effect. After rebooting, the firewall's password will be password and the LAN IP address will be 192.168.1.1. The VPN firewall will act as a DHCP server on the LAN, to the wireless clients, and - Netgear SRXN3205 | SRXN3205 Reference Manual - Page 175
ProSafe Wireless-N VPN Firewall SRXN3205 Reference Manual After downloading an upgrade file, you may need to unzip (uncompress) it before upgrading the firewall. If release notes are included in the download, read them before continuing. To upgrade the router software: 1. Select Administration > - Netgear SRXN3205 | SRXN3205 Reference Manual - Page 176
2 fields empty, they will be set to the default Netgear NTP servers. Note: If you select the default NTP servers or if you enter a custom server FQDN, the firewall must determine the IP address of the NTP server by a DNS lookup. You must configure a DNS server address in the Network menu before the - Netgear SRXN3205 | SRXN3205 Reference Manual - Page 177
-N VPN Firewall SRXN3205 Reference Manual Chapter 11 Monitoring System Performance This chapter describes the full set of system monitoring features of your ProSafe Wireless-N VPN Firewall. You can be alerted to important events such as {{WAN port rollover}}, WAN traffic limits reached, and login - Netgear SRXN3205 | SRXN3205 Reference Manual - Page 178
ProSafe Wireless-N VPN Firewall SRXN3205 Reference Manual Figure 11-1 2. Enable the traffic meter by clicking the Yes radio box under Do you want to enable Traffic Metering on WAN? The traffic meter will record the volume of Internet traffic passing through the WAN. Select the following options: • - Netgear SRXN3205 | SRXN3205 Reference Manual - Page 179
ProSafe Wireless-N VPN Firewall SRXN3205 Reference Manual • Increase this month limit by. Temporarily increase the Traffic Limit if you have reached the monthly limit, but need to continue accessing the Internet. Select - Netgear SRXN3205 | SRXN3205 Reference Manual - Page 180
ProSafe Wireless-N VPN Firewall SRXN3205 Reference Manual your LAN; denied incoming and outgoing service requests; hacker probes and login attempts; and other general information based on the settings you input on the Firewall Logs & E-mail menu. In addition, if you have set up Content Filtering on - Netgear SRXN3205 | SRXN3205 Reference Manual - Page 181
ProSafe Wireless-N VPN Firewall SRXN3205 Reference Manual Figure 11-2 7. To respond to IDENT protocol messages, check the Respond to Identd from SMTP Server radio box. The Ident Protocol is a weak scheme to verify the sender of e-mail (a common daemon program for providing the ident service is - Netgear SRXN3205 | SRXN3205 Reference Manual - Page 182
ProSafe Wireless-N VPN Firewall SRXN3205 Reference Manual 10. Click Apply to save your settings. Numerical Code Severity if any. The IP address of the initiating device for this log entry. The service port number of the initiating device, and whether it originated from the LAN or WAN. 11-6 v1 - Netgear SRXN3205 | SRXN3205 Reference Manual - Page 183
ProSafe Wireless-N VPN Firewall SRXN3205 Reference Manual Table 11-1. Firewall Logs Field Descriptions Field Destination Destination port and interface Description The name or IP address of the destination device or Web site. The service port number of the destination device, and whether it's on - Netgear SRXN3205 | SRXN3205 Reference Manual - Page 184
ProSafe Wireless-N VPN Firewall SRXN3205 Reference Manual Item LAN Port WAN Configuration Wireless Configuration Description Displays the current settings for MAC address, IP address, DHCP role and IP Subnet Mask that you set in the LAN IP Setup page. DHCP can be either Server or None. Indicates - Netgear SRXN3205 | SRXN3205 Reference Manual - Page 185
ProSafe Wireless-N VPN Firewall SRXN3205 Reference Manual . Figure 11-4 Monitoring Attached Devices The LAN Groups screen contains a table of all IP devices that the VPN firewall has discovered on the local network. To view the LAN Groups screen: 1. Select Network Configuration from the main menu - Netgear SRXN3205 | SRXN3205 Reference Manual - Page 186
ProSafe Wireless-N VPN Firewall SRXN3205 Reference Manual Figure 11-5 The Known PCs and Devices table lists all current entries in the LAN Groups database. For each PC or device, the following data is displayed Table 11-2. Known PCs and Devices options Item Name IP Address MAC Address Group - Netgear SRXN3205 | SRXN3205 Reference Manual - Page 187
ProSafe Wireless-N VPN Firewall SRXN3205 Reference Manual 1. Select Network Configuration > LAN Setup from the main/submenu, and then click the LAN Setup tab. The LAN Setup screen displays. Figure 11-6 2. Click the DHCP Log link to the right of the tabs. The DHCP Log appears in a popup window. - Netgear SRXN3205 | SRXN3205 Reference Manual - Page 188
ProSafe Wireless-N VPN Firewall SRXN3205 Reference Manual 1. Select Monitoring > Active Users from the main/submenu. The Active Users screen is displayed. Figure 11-8 The active user's username, group, and IP address are listed in the table with a timestamp indicating the time and date that the user - Netgear SRXN3205 | SRXN3205 Reference Manual - Page 189
ProSafe Wireless-N VPN Firewall SRXN3205 Reference Manual The status window displays the following information: Item Rule LAN IP Address Open Ports Time Remaining Description The name of the port triggering rule associated with this entry. The IP address of the PC currently using this rule. The - Netgear SRXN3205 | SRXN3205 Reference Manual - Page 190
ProSafe Wireless-N VPN Firewall SRXN3205 Reference Manual 2. Select the SSL VPN Connection Status tab and the SLL VPN Connection Status screen displays. Figure 11-12 The active SSL VPN user's username, group, and IP address are listed in the table with a timestamp indicating the time and date that - Netgear SRXN3205 | SRXN3205 Reference Manual - Page 191
ProSafe Wireless-N VPN Firewall SRXN3205 Reference Manual Chapter 12 Troubleshooting This chapter provides troubleshooting tips and information for your ProSafe Wireless-N VPN Firewall. After each problem description, instructions are provided to help you diagnose and solve the problem. This - Netgear SRXN3205 | SRXN3205 Reference Manual - Page 192
's configuration to factory defaults. This will set the firewall's IP address to 192.168.1.1. This procedure is explained in "Restoring the Default Configuration and Password" on page 12-7. If the error persists, you might have a hardware problem and should contact technical support. LAN or WAN Port - Netgear SRXN3205 | SRXN3205 Reference Manual - Page 193
ProSafe Wireless-N VPN Firewall SRXN3205 Reference Manual • Check the Ethernet connection between the PC and the firewall as described in the previous section. • Ensure your PC's IP address is on the same subnet as the firewall. If you are using the recommended addressing scheme, your PC's address - Netgear SRXN3205 | SRXN3205 Reference Manual - Page 194
ProSafe Wireless-N VPN Firewall SRXN3205 Reference Manual Troubleshooting the ISP Connection If your firewall is unable to access the Internet, you should first determine whether the firewall is able to obtain a WAN IP address from the ISP. Unless you have been assigned a static IP address, your - Netgear SRXN3205 | SRXN3205 Reference Manual - Page 195
ProSafe Wireless-N VPN Firewall SRXN3205 Reference Manual - Configure your firewall to spoof your PC's MAC address. This can be done in the Basic Settings menu. Refer to "Manually Configuring the Internet Connection" on page 2-6. If your firewall can obtain an IP address, but your PC is unable to - Netgear SRXN3205 | SRXN3205 Reference Manual - Page 196
ProSafe Wireless-N VPN Firewall SRXN3205 Reference Manual • Wrong physical connections - Make sure the LAN port LED is on. If the LED is off, follow the instructions in "LAN or WAN Port LEDs Not On" on page 12-2. - Check that the corresponding Link LEDs are on for your network interface card and for - Netgear SRXN3205 | SRXN3205 Reference Manual - Page 197
ProSafe Wireless-N VPN Firewall SRXN3205 Reference Manual Restoring the Default Configuration and Password This section explains how to restore the factory default configuration settings, changing the VPN firewall's administration password to password and the IP address to 192.168.1.1. You can erase - Netgear SRXN3205 | SRXN3205 Reference Manual - Page 198
ProSafe Wireless-N VPN Firewall SRXN3205 Reference Manual Diagnostics Functions You can perform diagnostics such as pinging an IP address, performing a DNS lookup, displaying the routing table, rebooting the VPN firewall, and capturing packets. 1. Select Monitoring > Diagnostics from the main/ - Netgear SRXN3205 | SRXN3205 Reference Manual - Page 199
ProSafe Wireless-N VPN Firewall SRXN3205 Reference Manual Table 12-1. Diagnostics (continued) Item Perform a DNS lookup Display the routing table Reboot the firewall Packet trace Description A DNS (Domain Name Server) converts the Internet name (for example, www.netgear.com) to an IP address. If - Netgear SRXN3205 | SRXN3205 Reference Manual - Page 200
ProSafe Wireless-N VPN Firewall SRXN3205 Reference Manual 12-10 v1.0, October 2008 Troubleshooting - Netgear SRXN3205 | SRXN3205 Reference Manual - Page 201
button for a shorter period of time will simply cause your device to reboot. Default Settings Table A-1. firewall Default Configuration Settings Feature Router Login User Login URL User Name (case sensitive) Login Password (case sensitive) Internet Connection WAN MAC Address WAN MTU Size Port - Netgear SRXN3205 | SRXN3205 Reference Manual - Page 202
ProSafe Wireless-N VPN Firewall SRXN3205 Reference Manual Table A-1. firewall Default Configuration Settings (continued) Feature Default Behavior Local Network (LAN) Lan IP Address 192.168.1.1 Subnet Mask 255.255.255.0 RIP Direction None RIP Version Disabled RIP Authentication Disabled - Netgear SRXN3205 | SRXN3205 Reference Manual - Page 203
ProSafe Wireless-N VPN Firewall SRXN3205 Reference Manual Table A-1. firewall Default Configuration Settings (continued) Feature Default Behavior Wireless Wireless Communication Enabled Network Name (SSID) NETGEAR Broadcast Network Name SSID Enabled Security Disabled Transmission Speed - Netgear SRXN3205 | SRXN3205 Reference Manual - Page 204
ProSafe Wireless-N VPN Firewall SRXN3205 Reference Manual Table A-2. firewall Technical Specifications (continued) Feature Environmental Specifications Operating temperature: Operating humidity: Electromagnetic Emissions Meets requirements of: Interface Specifications LAN: WAN: Specifications 0 - Netgear SRXN3205 | SRXN3205 Reference Manual - Page 205
ProSafe Wireless-N VPN Firewall SRXN3205 Reference Manual Table A-4. Wireless Technical Specifications Parameter 802.11a Data Rates 802.11na Data Rates 802.11a/na Operating Frequencies 802.11a/na Encryption 802.11g Data Rates 802.11ng Data Rates ProSafe Wireless-N VPN Firewall 6, 9, 12, 18, 24, - Netgear SRXN3205 | SRXN3205 Reference Manual - Page 206
VPN Firewall SRXN3205 Reference Manual Table A-4. Wireless Technical Specifications Parameter 802.11b/bg/ng Operating Frequencies 802.11 b/bg/ng Encryption Network Management Maximum Clients Status LEDs Power Adapter Electromagnetic Compliance Environmental Specifications ProSafe Wireless-N VPN - Netgear SRXN3205 | SRXN3205 Reference Manual - Page 207
ProSafe Wireless-N VPN Firewall SRXN3205 Reference Manual Appendix B Related Documents This appendix provides links to reference documents you can use to gain a more complete understanding of the technologies used in your NETGEAR product. Document Link Internet Networking and TCP/IP http:// - Netgear SRXN3205 | SRXN3205 Reference Manual - Page 208
ProSafe Wireless-N VPN Firewall SRXN3205 Reference Manual B-2 Related Documents v1.0, October 2008 - Netgear SRXN3205 | SRXN3205 Reference Manual - Page 209
ProSafe Wireless-N VPN Firewall SRXN3205 Reference Manual Index A access remote management 9-10 Access Controll screens 4-19 ActiveX web cache control 7-6 Add LAN WAN Inbound Service 5-9 Add LAN WAN Outbound Service 5-8 Add Mode Config Record screen 6-18 Add Resource Addresses menu 7-14 Adding 5-15 - Netgear SRXN3205 | SRXN3205 Reference Manual - Page 210
Disable DHCP Server 3-4 DMZ WAN Rule example of 5-12 DNS 7-2 ISP server addresses 2-9 server IP address 3-3 DNS proxy 9-6 enable 3-3 feature 1-3 DNS Suffix 7-11 Domain Name router 3-2 Domain Name Blocking 5-18 Domain Name Servers. See DNS. DoS about protection 1-2 Dynamic DNS configuration of 2-11 - Netgear SRXN3205 | SRXN3205 Reference Manual - Page 211
ProSafe Wireless-N VPN Firewall SRXN3205 Reference Manual enabling 4-17 E Edge Device 6-23 XAUTH, with ModeConfig 6-20 Edit Group Names 3-7 e-mail logs enabling notification 5-27, 11-4 E-mail Server address 11-4 Enable DHCP server 3-4 Enable DNS Proxy 3-3 Ending IP Address DHCP Address Pool 3-3 - Netgear SRXN3205 | SRXN3205 Reference Manual - Page 212
ProSafe Wireless-N VPN Firewall SRXN3205 Reference Manual inbound rules 5-4 example 5-12 Inbound Service Rule modifying 5-9 Inbound Services field descriptions 5-5 increasing traffic 9-5 Port Forwarding 9-5 Port Triggering 9-6 VPN Tunnels 9-7 installation 1-5 interference sources 4-2 Interior - Netgear SRXN3205 | SRXN3205 Reference Manual - Page 213
ProSafe Wireless-N VPN Firewall SRXN3205 Reference Manual M MAC address 4-18, 12-6 authentication by ISP 2-13 configuring 2-5 format 2-14, 5-21 in LAN groups database 3-7 restricting access 4-3 spoofing 12-5 trusted PCs 4-3 MAC addresses blocked, adding 5-20 main menu 2-3 metric in static routes 3- - Netgear SRXN3205 | SRXN3205 Reference Manual - Page 214
ProSafe Wireless-N VPN Firewall SRXN3205 Reference Manual ping 12-8 Ping On Internet Ports 5-10 point-to-point bridge 1-4 policy hierarchy 7-14 port filtering service blocking 5-3 Port Forwarding Inbound Rules 5-2, 5-4 increasing traffic 9-5 rules, about 5-4 port numbers 5-15 Port Speed 2-13 Port - Netgear SRXN3205 | SRXN3205 Reference Manual - Page 215
ProSafe Wireless-N VPN Firewall SRXN3205 Reference Manual RIP Configuration menu 3-11, 3-12 router upgrade software 9-15 router administration tips on 5-27 Router Status 2-10 Router Status screen 11-7 Router Upgrade about 9-14 Router's MAC Address 2-13 Routing Information Protocol. See RIP. routing - Netgear SRXN3205 | SRXN3205 Reference Manual - Page 216
Wireless-N VPN Firewall SRXN3205 Reference Manual firewall, use with 5-2 stateful packet inspection. See SPI. Static 3-10 static IP address configuring 2-8 detecting 2-5 static routes about 3-10 configuring 3-10 metric 3-11 stealth mode 5-10, 9-6 submenu 2-3 SYN flood 5-10, 9-5 SysLog Server IP - Netgear SRXN3205 | SRXN3205 Reference Manual - Page 217
ProSafe Wireless-N VPN Firewall SRXN3205 Reference Manual monitoring status 11-13 VPN tunnels about 6-1 Connection Status 6-16 increasing traffic 9-7 IPsec 5-11 L2TP 5-11 PPTP 5-11 VPN Wizard Gateway tunnel 6-2 VPN Client, configuring 6-4 VPN Wizard Default Values 6-3 VPNC 6-1 VPNs viewing VPN - Netgear SRXN3205 | SRXN3205 Reference Manual - Page 218
ProSafe Wireless-N VPN Firewall SRXN3205 Reference Manual X XAUTH IPsec host 6-22 types of 6-22 Index-10 v1.0, October 2008
-
 1
1 -
 2
2 -
 3
3 -
 4
4 -
 5
5 -
 6
6 -
 7
7 -
8
-
9
-
10
-
11
-
12
-
13
-
14
-
15
-
16
-
17
-
18
-
19
-
20
-
21
-
22
-
23
-
24
-
25
-
26
-
27
-
28
-
29
-
30
-
31
-
32
-
33
-
34
-
35
-
36
-
37
-
38
-
39
-
40
-
41
-
42
-
43
-
44
-
45
-
46
-
47
-
48
-
49
-
50
-
51
-
52
-
53
-
54
-
55
-
56
-
57
-
58
-
59
-
60
-
61
-
62
-
63
-
64
-
65
-
66
-
67
-
68
-
69
-
70
-
71
-
72
-
73
-
74
-
75
-
76
-
77
-
78
-
79
-
80
-
81
-
82
-
83
-
84
-
85
-
86
-
87
-
88
-
89
-
90
-
91
-
92
-
93
-
94
-
95
-
96
-
97
-
98
-
99
-
100
-
101
-
102
-
103
-
104
-
105
-
106
-
107
-
108
-
109
-
110
-
111
-
112
-
113
-
114
-
115
-
116
-
117
-
118
-
119
-
120
-
121
-
122
-
123
-
124
-
125
-
126
-
127
-
128
-
129
-
130
-
131
-
132
-
133
-
134
-
135
-
136
-
137
-
138
-
139
-
140
-
141
-
142
-
143
-
144
-
145
-
146
-
147
-
148
-
149
-
150
-
151
-
152
-
153
-
154
-
155
-
156
-
157
-
158
-
159
-
160
-
161
-
162
-
163
-
164
-
165
-
166
-
167
-
168
-
169
-
170
-
171
-
172
-
173
-
174
-
175
-
176
-
177
-
178
-
179
-
180
-
181
-
182
-
183
-
184
-
185
-
186
-
187
-
188
-
189
-
190
-
191
-
192
-
193
-
194
-
195
-
196
-
197
-
198
-
199
-
200
-
201
-
202
-
203
-
204
-
205
-
206
-
207
-
208
-
209
-
210
-
211
-
212
-
213
-
214
-
215
-
216
-
217
-
218
 |
 |

October 2008
202-10416-01
v1.0
NETGEAR
, Inc.
4500 Great America Parkway
Santa Clara, CA 95054 USA
ProSafe Wireless-N VPN
Firewall SRXN3205
Reference Manual