Netgear SRXN3205 SRXN3205 Reference Manual - Page 193
admin, password, the Web browser may be caching the old configuration.
 |
UPC - 606449057461
View all Netgear SRXN3205 manuals
Add to My Manuals
Save this manual to your list of manuals |
Page 193 highlights
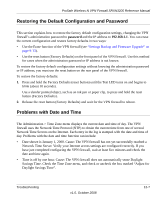
ProSafe Wireless-N VPN Firewall SRXN3205 Reference Manual • Check the Ethernet connection between the PC and the firewall as described in the previous section. • Ensure your PC's IP address is on the same subnet as the firewall. If you are using the recommended addressing scheme, your PC's address should be in the range of 192.168.1.2 to 192.168.1.254. Note: If your PC's IP address is shown as 169.254.x.x: Windows and MacOS will generate and assign an IP address if the computer cannot reach a DHCP server. These auto-generated addresses are in the range of 169.254.x.x. If your IP address is in this range, check the connection from the PC to the firewall and reboot your PC. • If your firewall's IP address has been changed and you don't know the current IP address, clear the firewall's configuration to factory defaults. This will set the firewall's IP address to 192.168.1.1. This procedure is explained in "Restoring the Default Configuration and Password" on page 12-7. Tip: If you don't want to revert to the factory default settings and lose your configuration settings, you can reboot the firewall and use a sniffer to capture packets sent during the reboot. Look at the ARP packets to locate the firewall's LAN interface address. • Ensure you are using the SSL https://address login rather than http://address. • Ensure your browser has Java, JavaScript, or ActiveX enabled. If you are using Internet Explorer, click Refresh to be sure the Java applet is loaded. • Try quitting the browser and launching it again. • Ensure you are using the correct login information. The factory default login name is admin and the password is password. Verify CAPS LOCK is off when entering this information. If the firewall does not save changes you have made in the Web Configuration Interface, check the following: • When entering configuration settings, be sure to click the APPLY button before moving to another menu or tab, or your changes are lost. • Click the Refresh or Reload button in the Web browser. The changes may have occurred, but the Web browser may be caching the old configuration. Troubleshooting v1.0, October 2008 12-3
-
 1
1 -
2
-
3
-
4
-
5
-
6
-
7
-
8
-
9
-
10
-
11
-
12
-
13
-
14
-
15
-
16
-
17
-
18
-
19
-
20
-
21
-
22
-
23
-
24
-
25
-
26
-
27
-
28
-
29
-
30
-
31
-
32
-
33
-
34
-
35
-
36
-
37
-
38
-
39
-
40
-
41
-
42
-
43
-
44
-
45
-
46
-
47
-
48
-
49
-
50
-
51
-
52
-
53
-
54
-
55
-
56
-
57
-
58
-
59
-
60
-
61
-
62
-
63
-
64
-
65
-
66
-
67
-
68
-
69
-
70
-
71
-
72
-
73
-
74
-
75
-
76
-
77
-
78
-
79
-
80
-
81
-
82
-
83
-
84
-
85
-
86
-
87
-
88
-
89
-
90
-
91
-
92
-
93
-
94
-
95
-
96
-
97
-
98
-
99
-
100
-
101
-
102
-
103
-
104
-
105
-
106
-
107
-
108
-
109
-
110
-
111
-
112
-
113
-
114
-
115
-
116
-
117
-
118
-
119
-
120
-
121
-
122
-
123
-
124
-
125
-
126
-
127
-
128
-
129
-
130
-
131
-
132
-
133
-
134
-
135
-
136
-
137
-
138
-
139
-
140
-
141
-
142
-
143
-
144
-
145
-
146
-
147
-
148
-
149
-
150
-
151
-
152
-
153
-
154
-
155
-
156
-
157
-
158
-
159
-
160
-
161
-
162
-
163
-
164
-
165
-
166
-
167
-
168
-
169
-
170
-
171
-
172
-
173
-
174
-
175
-
176
-
177
-
178
-
179
-
180
-
181
-
182
-
183
-
184
-
185
-
186
-
187
-
 188
188 -
 189
189 -
 190
190 -
 191
191 -
 192
192 -
 193
193 -
 194
194 -
 195
195 -
 196
196 -
 197
197 -
 198
198 -
199
-
200
-
201
-
202
-
203
-
204
-
205
-
206
-
207
-
208
-
209
-
210
-
211
-
212
-
213
-
214
-
215
-
216
-
217
-
218
 |
 |
