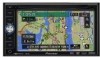
Pioneer AVIC-D3 Owner's Manual
Pioneer AVIC-D3 - Navigation System With DVD Player Manual
 |
UPC - 012562844169
View all Pioneer AVIC-D3 manuals
Add to My Manuals
Save this manual to your list of manuals |
Pioneer AVIC-D3 manual content summary:
- Pioneer AVIC-D3 | Owner's Manual - Page 1
Operation Manual DVD MULTIMEDIA AV NAVIGATION SERVER AVIC-D3 Notice to all users: This software requires that the navigation system be properly connected to your vehicle's parking brake. If not properly connected and depending on your vehicle, additional installation may be required. For more - Pioneer AVIC-D3 | Owner's Manual - Page 2
The screens shown in the examples may differ from the actual screens. The actual screens may be changed without notice for performance and function improvements. - Pioneer AVIC-D3 | Owner's Manual - Page 3
Introduction License Agreement PIONEER AVIC-D3 - for U.S.A. THIS IS A LEGAL AGREEMENT BETWEEN YOU, AS THE END USER, AND PIONEER ELECTRONICS (USA) INC. ("PIONEER"). PLEASE READ THE TERMS AND CONDITIONS OF THIS AGREEMENT CAREFULLY BEFORE USING THE SOFTWARE INSTALLED ON THE PIONEER PRODUCTS. BY USING - Pioneer AVIC-D3 | Owner's Manual - Page 4
PIONEER AVIC-D3 - for Canada THIS IS A LEGAL AGREEMENT BETWEEN YOU, AS THE END USER, AND PIONEER ELECTRONICS OF CANADA, INC. ("PIONEER"). PLEASE READ THE TERMS AND CONDITIONS OF THIS AGREEMENT CAREFULLY BEFORE USING THE SOFTWARE INSTALLED ON THE PIONEER PRODUCTS. BY USING THE SOFTWARE INSTALLED ON - Pioneer AVIC-D3 | Owner's Manual - Page 5
use and not to operate a service bureau or for any other use involving the processing of data of other persons or entities. You may make one (1) copy of the Data for archival or backup purposes only but you may not otherwise copy, reproduce, modify, make derivative works, derive the structure of or - Pioneer AVIC-D3 | Owner's Manual - Page 6
Atlas and may be enforced by Tele Atlas directly against you. About the Data for the Map Database • This database was developed and recorded up to April 2006. Changes to streets/highways made after that time may not be reflected in this database. • It is strictly prohibited to reproduce and use any - Pioneer AVIC-D3 | Owner's Manual - Page 7
Before Using the System and Additional Safety Information 12 Failure to operate 12 After-sales service for Pioneer products 12 Visit Our Web site 12 Precaution 12 Additional Safety Information 13 To ensure safe driving 13 Purchasing software upgrade 14 Playable Discs 14 DVD-Video disc region numbers - Pioneer AVIC-D3 | Owner's Manual - Page 8
the connections of leads and installation positions 68 Chapter 5 Customizing Your Navigation System Modifying the Default Settings 71 Items Users can Change 71 Volume 71 System Options 72 Short-Cut Selection 73 Map Display Options 73 Defined Locations 74 Demo Mode 75 Time 75 Modify Current Location - Pioneer AVIC-D3 | Owner's Manual - Page 9
traffic announcement function 98 Display the Radio ID 98 Advanced SIRIUS tuner operation 98 Hands-free Phoning 100 Hands-free phoning with cellular phones featuring Bluetooth technology 100 About the telephone source standby mode 100 Setting up for hands-free phoning 100 Making a call by entering - Pioneer AVIC-D3 | Owner's Manual - Page 10
141 Troubleshooting 142 Problems in the navigation screen 142 Problems in the audio screen (during DVD-Vid- eo playback) 144 Problems in the audio screen (during iPod playback) 146 Messages and how to react to them 146 Error Messages 151 Handling and Care of the Disc 152 DVD Map Discs 152 DVD drive - Pioneer AVIC-D3 | Owner's Manual - Page 11
(default settings), read the relevant section of this chapter. 6 Using the AV Source (Built-in DVD Drive and Radio) Describes how to use DVD-Video, CD, ROM, DivX and the radio. 7 Using the AV Source (Pioneer AV Equipment) When Pioneer audio equipment is connected to the navigation system, that - Pioneer AVIC-D3 | Owner's Manual - Page 12
for use in conjunction with this navigation unit will be referred to as the "Rear Display". "Video image" "Video image" in this manual indicates the moving image from DVD-Video in the built-in DVD drive or from the equipment that is connected to this system with a RCA cable, such as a general - Pioneer AVIC-D3 | Owner's Manual - Page 13
map DVDs will allow for most accurate destination mapping. Upgrade DVDs are available for purchase through your local Pioneer dealer. ❒ Never use headphones while driving. ❒ Do not attempt to install or service your navigation system by yourself. Installation or servicing of the navigation system - Pioneer AVIC-D3 | Owner's Manual - Page 14
number on the enclosed warranty card. Failure to operate Should the navigation system fail to operate properly, contact your dealer or the nearest authorized Pioneer service facility. After-sales service for Pioneer products Please contact the dealer or distributor from where you purchased the - Pioneer AVIC-D3 | Owner's Manual - Page 15
DVD-Video and certain touch key operations) offered by this navigation system GPS signal detection, speed pulse wire map display between day and night • To avoid the risk of damage and injury and the potential violation of applicable laws, the navigation system examples in this manual are illustrated - Pioneer AVIC-D3 | Owner's Manual - Page 16
navigation system as an aid to keep an eye on trailers, or backing into a tight parking spot. Purchasing software upgrade Using the most current map DVDs will allow for most accurate destination mapping. Upgrade DVDs are available for purchase through your local Pioneer dealer. Playable Discs camera - Pioneer AVIC-D3 | Owner's Manual - Page 17
About DVD Map Disc You can use discs intended for this navigation system. Use only discs approved by Pioneer. ➲ For details on other discs ➞ Page 152 DVD-Video disc region numbers DVD-Video discs that have incompatible region numbers cannot be played on this DVD drive. The region number of the - Pioneer AVIC-D3 | Owner's Manual - Page 18
When you use this navigation system with a Pioneer iPod cable (CD-I200) (sold separately), you can control your iPod via the touch screen and recharge it, by connecting it to the dock connector port included with the adapter. 16 Hands-free phoning Using Bluetooth adapter (e.g. CD-BTB200) (sold - Pioneer AVIC-D3 | Owner's Manual - Page 19
Service and Pioneer Navigation ❒ XM NavTraffic subscription is required and is available only in select markets. Check www.xmnavtraffic.com for service availability, pricing information, and other details. The availability of XM NavTraffic data depends on the ability of the antenna to receive - Pioneer AVIC-D3 | Owner's Manual - Page 20
slot indicates that the Satellite Radio Tuner for Pioneer (i. e., XM tuner and Sirius satellite tuner which are sold separately) can be controlled by this navigation system. Please inquire with your dealer or nearest authorized Pioneer service station regarding the satellite radio tuner that can - Pioneer AVIC-D3 | Owner's Manual - Page 21
. ❒ When using a cellular phone, keep the antenna of the cellular phone away from the display to DVD disc labels and packages. They indicate the type of images and audio recorded on the disc, and the functions you can use. Mark 2 2 3 16 : 9 LB 1 ALL Meaning Indicates the number of audio systems - Pioneer AVIC-D3 | Owner's Manual - Page 22
memory Pressing the RESET button of the navigation system lets you reset the microprocessor to its initial settings without changing the condition memory. The microprocessor must be reset under the following conditions: • Prior to using this product for the first time after installation. • If the - Pioneer AVIC-D3 | Owner's Manual - Page 23
DVD Map Discs for Your Navigation System Configuration of data recorded on discs The map for this navigation system is supplied on two discs: one for the west and the other for the east. Please set the disc to use according to your destination or current location. The areas recorded on each disc are - Pioneer AVIC-D3 | Owner's Manual - Page 24
22 - Pioneer AVIC-D3 | Owner's Manual - Page 25
loading slot ➲ "Inserting/Ejecting a Disc" ➞ Page 24 2 RESET button ➲ "Resetting the Microprocessor" ➞ Page 20 3 EJECT button 4 MENU button Press to display the navigation menu or audio menu. 5 MAP button Press to view the map or change view mode. 6 VOLUME knob Turn to adjust the AV volume or press - Pioneer AVIC-D3 | Owner's Manual - Page 26
NAVI/AV Inserting/Ejecting a Disc Inserting a disc 1 Insert a disc into the disc loading slot. 2 Insert the Pioneer DVD Map Disc to the disc loading slot. Basic Operation Chapter 1 ❒ The DVD drive plays one standard 12-cm or 8-cm (single) disc at a time. Do not use an adapter when playing 8-cm - Pioneer AVIC-D3 | Owner's Manual - Page 27
navigation operations, and the AV MENU, used for AV operations, are different depending on which screen is currently displayed. Map screen Press the MAP the basics of using the navigation system. • For safety reasons, you cannot use some of these basic navigation functions while your vehicle is - Pioneer AVIC-D3 | Owner's Manual - Page 28
in a safe place, and apply the parking brake. 2 Insert the Pioneer DVD Map Disc to the disc loading slot. 3 Press the MAP button to display the map screen. How to set your destination by address 1 Press the MAP button to display the map screen. 2 Press the MENU button to display the NAVI MENU - Pioneer AVIC-D3 | Owner's Manual - Page 29
you touch "City" without entering the name of the city or area, you can set the cities or areas that you have searched in the past from the list. (This function is not available in the first time and when you have selected an area that you have never searched before.) 9 Touch - Pioneer AVIC-D3 | Owner's Manual - Page 30
street. • Touching the displays a map of the place you have selected. navigation system gives you the following information with the timing adjusted to the speed of your vehicle: • Distance to the next turning point • Direction of travel • Road number of the freeway • Way point (If this is set - Pioneer AVIC-D3 | Owner's Manual - Page 31
or DVDVideo on the navigation system while navigating at the same time. The operation automatically switches to the memory navi mode when the DVD Map Disc is removed from the navigation system. Some functions are restricted and different from the navigation using the DVD Map Disc (DVD navi mode). If - Pioneer AVIC-D3 | Owner's Manual - Page 32
least 2 seconds or adjust the volume to stop the muting. How to listen to a CD You can listen to an audio CD by removing the DVD Map Disc from the navigation system. ➲ About Memory Navigation ➞ "Memory navi mode" on page 29. (For details, see page 133.) 1 Press the EJECT button to remove the - Pioneer AVIC-D3 | Owner's Manual - Page 33
with white letters: The function is not available during memory navi mode. Or, the function is not available for areas not stored on the disc. Touching this button activates a message indicating that the function is not available. You can also select a track by pressing the or button. 6 To fast - Pioneer AVIC-D3 | Owner's Manual - Page 34
32 Basic Operation Chapter 1 NAVI/AV - Pioneer AVIC-D3 | Owner's Manual - Page 35
memory navi mode are indicated in gray with black letters. If you want to use such functions, insert the DVD Map Disc. NAVI MENU Use this menu for basic operation of your navigation system. 1 With the map displayed, press the MENU button. 2 To change to the menu you want to use, touch the name of - Pioneer AVIC-D3 | Owner's Manual - Page 36
map. If you continue to touch the map, it will start scrolling. Navigation Menu and Map Display Chapter 2 Used to specify the conditions for setting the route to the destination. ➲ Setting are those that can be selected with the system as default setting. ❒ Items marked with an asterisk (*) cannot - Pioneer AVIC-D3 | Owner's Manual - Page 37
guidance only) • Vehicle Dynamics • Rear View (Only possible when the "Camera" is set to "On".) ❒ If you deviate from the route when the view mode is Route View or Guide View and enter a street not recorded on the disc, the screen changes to Map View. When you return to the route, the screen returns - Pioneer AVIC-D3 | Owner's Manual - Page 38
briefly, the screen changes Map View with shortcut menu. If you close the shortcut menu the screen returns to Rear View. ❒ If the "Camera" is set to "Off", the rear view image is not displayed. Please set it to "On". ➲ Camera setting ➞ Page 125 ❒ When using a camera set to turn ON/OFF in conjunction - Pioneer AVIC-D3 | Owner's Manual - Page 39
) is connected, and traffic information is received. (10) Current time (11) Estimated time of arrival (or travel time to your destination)* The display alternates by pressing it. The estimated time of arrival is automatically calculated from the Average Speed set and the actual average speed. ➲ How - Pioneer AVIC-D3 | Owner's Manual - Page 40
Navigation Menu and Map first time set to Map View or Guide View, "Direct scale key" is displayed. Touching "Direct scale key" changes the map disc, selection of the scales is limited. Direct scale key ❒ The icon of a registered location and the traffic information icons are displayed when the map - Pioneer AVIC-D3 | Owner's Manual - Page 41
NAVI Chapter 2 Navigation Menu and Map Display (4) The street name, city name, area name and other to make your destination. ➲ Moving the map to view the part you want to see ➞ Page 38 4 Touch . When appears to the right of the list You can also set a destination by touching to the right - Pioneer AVIC-D3 | Owner's Manual - Page 42
40 Navigation Menu and Map Display Chapter 2 NAVI - Pioneer AVIC-D3 | Owner's Manual - Page 43
parking brake before setting your route (see page 13 Interlock for details). ❒ Some information on traffic regulations depends on the time when the route calculation, the calculation is canceled and the map display appears. ❒ Inserting the DVD Map Disc will cause a forced reroute. (This rerouting - Pioneer AVIC-D3 | Owner's Manual - Page 44
your surroundings" for the following operations. ➲ "Finding a POI in your surroundings" ➞ Page 42 ❒ This can be used when setting the Vicinity Search icon to display as a shortcut on the map screen. ➲ Changing Shortcut ➞ Page 73 ❒ The distance indicated in the search result is the distance from the - Pioneer AVIC-D3 | Owner's Manual - Page 45
will be searched. Setting an Entrance or Exit of a Freeway as Your Destination You can set the entrance or the destination. ➲ Searching the destination by map ➞ Page 39 Route Calculation to Your Home "Destination History". Places that you have registered manually, such as your home, are stored in - Pioneer AVIC-D3 | Owner's Manual - Page 46
the NAVI MENU, then touch "Cancel Route". The message confirming whether to cancel the current route appears. 2 Touch "Yes (all)". Checking the set route with the map 1 Touch "Route Options" in the NAVI MENU, then touch "View Current Route". ❒ "View Current Route" is active only when the route is - Pioneer AVIC-D3 | Owner's Manual - Page 47
to the previous display. ❒ When a long distance route is calculated, your navigation system may not be able to list all the roads. (In this case, the only when the route is set. ❒ You can also see the location by touching on the right of the list. 2 Touch "Overview". A map of the whole route up - Pioneer AVIC-D3 | Owner's Manual - Page 48
and selected points can be sorted automatically or manually. ❒ "Edit Current Route" is active only when the route is set. 1 Touch "Route Options" in the NAVI the display to search for points. After searching for a point, display it on a map, then touch "OK" to add to the way points. (You can add up - Pioneer AVIC-D3 | Owner's Manual - Page 49
The system will manual order, "Automatic" or "Original" and touch "Done" to start the route search. 3 Touch "Done". ❒ If you set area not stored on the disc cannot be set as an Area to Avoid. first time, any item on the list is shown as "New Area". 4 Select the place to register and display the map. - Pioneer AVIC-D3 | Owner's Manual - Page 50
"OK". Displaying Certain POI on the Map If you want to stop registration, touch "Back". ❒ Depending on the setting of route search conditions, you may not be able to avoid the specified areas. A confirmation message is displayed on the screen at this time - Pioneer AVIC-D3 | Owner's Manual - Page 51
in the NAVI MENU, or by touching the icons such as and on the map. The steps for registration are the same as described above. Deleting a POI "Info/Traffic" in the NAVI MENU, then touch "Overlay POI". 2 Touch "Set". 3 Touch "Delete". Displays a list of already registered POI shortcuts. 4 Touch - Pioneer AVIC-D3 | Owner's Manual - Page 52
one route judged as being optimum by your navigation system is calculated. Multiple: Several route options are calculated (maximum 6 routes). Route Condition This setting controls whether the route should be calculated by taking into account the time or the distance. Fast*: Calculate a route with - Pioneer AVIC-D3 | Owner's Manual - Page 53
is "On". (2) Distance to your destination (3) Travel time to your destination ❒ The "Avoid Freeway" setting may not be reflected, depending on the distance to the destination. ❒ You can see other places while displaying a possible route by scrolling the map. Touching "Next" moves the next candidate - Pioneer AVIC-D3 | Owner's Manual - Page 54
52 Setting a Route to Your Destination Chapter 3 NAVI - Pioneer AVIC-D3 | Owner's Manual - Page 55
Registering places you visit frequently saves time and effort. ❒ The Address Book is automatically updated in alphabetic order. However, "Return ister ➞ Page 41 to 43 ❒ If you select "Map Search", move the scroll cursor to the location you want to set and touch "OK". 4 Point the scroll cursor to the - Pioneer AVIC-D3 | Owner's Manual - Page 56
Address Book appears. ➲ Address Search ➞ Page 25 ➲ Searching places to register ➞ Page 41 to 43 ❒ If you select "Map Search", move the scroll cursor to the place you want to set and touch "OK". 3 Touch "Edit Information". The Address Information menu appears. Refer to the item corresponding to the - Pioneer AVIC-D3 | Owner's Manual - Page 57
name between 1 and 23 characters long. 3 Touch "Save". The details you set are registered. ❒ You cannot change the name of your home. Entering or pictograph to appear on the map 1 Touch "Select Image". 2 Touch the Pictograph to appear on the map. The Address Information menu Navigation Utilities 55 - Pioneer AVIC-D3 | Owner's Manual - Page 58
locations data from a Disc Address Book data stored on a CD-R/-RW and DVD-R/-RW can be loaded to the navigation system. This function is used when moving Address Book data from a Pioneer navigation system with a PC card slot (e.g., AVIC-88DVD) to a Pioneer navigation system without a PC card - Pioneer AVIC-D3 | Owner's Manual - Page 59
service, you can view current traffic conditions and information on your navigation display. When the unit receives updated traffic information, the navigation system will overlay the traffic information on your map these events cannot be turned off. Additionally, the system also takes into - Pioneer AVIC-D3 | Owner's Manual - Page 60
on "City Map". 58 Information on avoiding traffic congestion on route ahead If you are approaching traffic on your current route, the navigation system has the ability to recommend an alternative route. Depending on the information of traffic congestion you have received and the setting of Use - Pioneer AVIC-D3 | Owner's Manual - Page 61
manually route being guided, it is When receiving information about disappears, and the map display reappears. List: returns to the map screen. ❒ Traffic flow information When the map scale is between 0.02 streets. Here is a guide to the colors and may appear on the map. The number in the icon - Pioneer AVIC-D3 | Owner's Manual - Page 62
received via the XM NavTraffic service, and you can select which types will be incorporated and displayed on your navigation system. 1 Touch "Info/Traffic" in the NAVI MENU, and then touch "Traffic Settings to turn the button "On" in the Traffic Settings screen. Editing the Navigation Utilities - Pioneer AVIC-D3 | Owner's Manual - Page 63
an XM tuner (GEX-P10XMT) is connected, you can receive stock price, sports, and other information, and display it onscreen. You may also register favorite information on the navigation system. Displaying stock prices This navigation system can display the prices of up to 12 stocks. 1 Touch "Info - Pioneer AVIC-D3 | Owner's Manual - Page 64
touch "Set My Favorites". The screen will display a list of categories. The information appearing onscreen is automatically updated at be accessed without having to search every time an update is needed. The following are the instructions on how to do so: 1 Store Navigation Utilities Chapter 4 62 - Pioneer AVIC-D3 | Owner's Manual - Page 65
into the navigation system by the user. Chapter 4 Editing the Navigation Utilities (1) (2) (3) (1) Status Depending on the XM tuner's (GEX-P10XMT) reception status, any one of the following may appear. OK No problem. Updating Updating encryption code. Check antenna Improper antenna connection. Not - Pioneer AVIC-D3 | Owner's Manual - Page 66
Club, Inc. at the time you register your navigation system with Pioneer. If you have not signed up for this service with Signature's Nationwide Auto car service in an emergency In times of emergency, you can search the Emergency Info for Auto Services in the vicinity of your current position and set - Pioneer AVIC-D3 | Owner's Manual - Page 67
- ries. Touch the subcategories you wish to use from among those displayed and touch "OK" to select the Auto Service from the subcategories. 5 Touch the name of the facility to set the route you want. Chapter 4 Editing the Navigation Utilities Displays the route to the selected facility. 65 - Pioneer AVIC-D3 | Owner's Manual - Page 68
are stored in the Pioneer DVD Map Disc. If you want to use these pictures, insert the Pioneer DVD Map Disc. Here, a method for changing the background picture is described with an example of loading a picture stored on a CD-R/-RW and DVD-R/-RW onto the navigation system as the background picture - Pioneer AVIC-D3 | Owner's Manual - Page 69
Select if you want to successively change the Splash Screen, Audio Operating screen backgrounds or the navigation backgrounds. Return to step 3. ❒ When the navigation system is reset, or the language setting is changed, the background picture may change back to the original picture. (There is also - Pioneer AVIC-D3 | Owner's Manual - Page 70
reset. ❒ You cannot change the speedometer at the center. ❒ Selecting Demo Mode in the Settings menu enables you to perform a demonstration with random values. Checking the Navigation Status The navigation installation positions Check that leads are properly connected between the navigation system - Pioneer AVIC-D3 | Owner's Manual - Page 71
the GPS antenna, the reception sensitivity and from how many satellites the signal is received. If the signal is received correctly, "OK" is displayed. If reception is poor, "NOK" appears. (3) Installation Position The installation position of the navigation system is shown. If installed correctly - Pioneer AVIC-D3 | Owner's Manual - Page 72
70 Editing the Navigation Utilities Chapter 4 NAVI - Pioneer AVIC-D3 | Owner's Manual - Page 73
, such as navigation functions and information display, for ease of use. The following example describes how to change settings. In this example, the "KM/Mile Setting" settings is set to "Mile & Yard". 1 Touch "Settings" in the NAVI MENU. The Settings menu appears. 2 Touch "System Options". The - Pioneer AVIC-D3 | Owner's Manual - Page 74
of your vehicle and do not switch off the navigation system until the installation is completed and the map of your surroundings appears. KM/Mile Setting This setting controls the unit of distance displayed on your navigation system. Mile *: Show distances in miles. Mile & Yard: Show distances - Pioneer AVIC-D3 | Owner's Manual - Page 75
NAVI Chapter 5 Customizing Your Navigation System Freeway • When the "KM/Mile Setting" is set to "Mile" or "Mile & Yard", it can be set in 5 mile increments from 30 miles to (120 miles (60 miles*). • When the "KM/Mile Setting" is set to "km", it can be set in 5 km increments from 60 km to 150 km ( - Pioneer AVIC-D3 | Owner's Manual - Page 76
. This Trip: Display tracking dots but erase them when the navigation system is turned off (when turning off the engine of your vehicle). Off*: Do not display tracking dots. AV Guide Mode Set whether to automatically switch to the navigation screen from the AV screen when your vehicle approaches - Pioneer AVIC-D3 | Owner's Manual - Page 77
to "Off". Repeat: Repeat demo drive. Off*: Demo Mode is set off. ❒ If you eject the DVD Map Disc during the demo drive, the demo mode will be stopped. Time Adjusts the systems clock. The time difference (+, -) between the time originally set in your navigation system is set here. You can also select - Pioneer AVIC-D3 | Owner's Manual - Page 78
76 Customizing Your Navigation System Chapter 5 NAVI - Pioneer AVIC-D3 | Owner's Manual - Page 79
AV Chapter 6 Using the AV Source (Built-in DVD Drive and Radio) Chapter 6 Using the AV Source (Built-in DVD Drive and Radio) This chapter describes how to display the AV MENU for AV operations and perform operations with the DVD drive and radio. How to Display each Menu 1 Press the VOLUME knob to - Pioneer AVIC-D3 | Owner's Manual - Page 80
" or "System" to enter chages to the AV Source screen. Function menu (2) (3) (1) Sound menu System menu ❒ When the source is "OFF", the "Function" key changes to the Sound menu ➞ Page 117 (3) System key Touch to select various setup functions. ➲ Using the System menu ➞ Page 124 4 Press the MENU - Pioneer AVIC-D3 | Owner's Manual - Page 81
(12) (3) (4) (15) (6) (14) ➲ Common operation of the DISC sources ➞ Page 80 ➲ More advanced DVD-Video operation ➞ Page 83 (1) Source icon (2) Title number indicator (3) Chapter or file number indicator (4) Play time indicator (5) Viewing angle indicator (6) Subtitle language indicator (7) Audio - Pioneer AVIC-D3 | Owner's Manual - Page 82
folder, some time may be required to display the track list. Touch key operation 1 Touch "DISC" in the AV Source screen to select the built-in DVD drive. When the source icon is not displayed, you can display it by touching the screen. If no disc is loaded in navigation system, you cannot select - Pioneer AVIC-D3 | Owner's Manual - Page 83
the touch keys. Touch anywhere on the LCD screen, display the touch keys again. (4) Switch the display • DVD: Touching "Disp" changes the infor- mation as follows: Disc information display - Repeat range display • DivX: Touching "Disp" changes the information as follows: Audio, SubTitle, Repeat - Pioneer AVIC-D3 | Owner's Manual - Page 84
(year) If specific information has not been recorded on MP3/WMA/AAC files on disc, nothing may be displayed. (CD, ROM) Select the track from the list be used during a DVD-Video or DivX playback. (1) Repeating play Each touch of "Repeat" changes the settings as follows: DVD: • Title - Repeat - Pioneer AVIC-D3 | Owner's Manual - Page 85
the DVD menu Some DVDs allow you to select the disc contents using a menu. • You can display the menu by touching "Menu" or "TOP M." while a disc is playing. Touching either of these keys again lets you start playback from the location selected from the menu. For details, refer to the instructions - Pioneer AVIC-D3 | Owner's Manual - Page 86
file search are not possible when disc playback has been stopped. 1 Touch "Search" and then touch desired item. • When playing a DVD, touch "Title" (title), "Chapter" (chapter) or "Time" (time). • When playing DivX, touch "Folder" (folder), "File" (file) or "Time" (time). 2 Touch 0 - 9 to input the - Pioneer AVIC-D3 | Owner's Manual - Page 87
Each time you touch "Audio" switches between audio mode. ❒ With some DVDs, switching between lan- guages/audio systems may only be possible while using a menu display. ❒ Display indications such as Dolby D and 5.1ch indicate the audio system recorded on the DVD or DivX file. Depending on the setting - Pioneer AVIC-D3 | Owner's Manual - Page 88
AV Using the AV Source (Built-in DVD Drive and Radio) Chapter 6 RADIO (DivX) Playing DivX® VOD content Some DivX VOD (video on demand) content may only be playable a fixed number of times. When you load a disc containing this type of DivX VOD content, the remaining number of plays is shown on- - Pioneer AVIC-D3 | Owner's Manual - Page 89
6 Using the AV Source (Built-in DVD Drive and Radio) 3 To perform manual tuning, touch or briefly. The frequencies of the three FM bands, and 6 AM stations can be stored in memory. 2 The next time you touch the same preset tuning key P1 - P6, the radio station frequency is recalled from memory - Pioneer AVIC-D3 | Owner's Manual - Page 90
on. To turn local seek tuning off, touch "Off". 3 Touch or to set the sensitivity. There are four levels of sensitivity for FM and two levels for AM: FM: 1 - 2 - 3 - 4 AM: 1 - 2 The FM "4" (AM "2") setting allows reception of only the strongest stations, while lower settings let you receive - Pioneer AVIC-D3 | Owner's Manual - Page 91
) Chapter 7 Using the AV Source (Pioneer AV Equipment) When Pioneer audio equipment is connected to the navigation system using IP-BUS, such equipment can be operated from the navigation system. When reading this chapter, please also refer to the operation manual of the AV equipment connected to - Pioneer AVIC-D3 | Owner's Manual - Page 92
: Displays the repeat range : Random : Scan 50-disc multi-CD player Only those functions described in this manual are supported for 50-disc multi-CD players. (But the navigation system can perform the disc list display up to Disc 12 with a 50-disc multi-CD player.) Advanced multi-CD player operation - Pioneer AVIC-D3 | Owner's Manual - Page 93
, refer to the XM tuner's operation manuals. This section provides information on XM operations with navigation system which differs from that described in the XM tuner's operation manual. Only the logo data that is contained in the navigation DVD Map Disc can be displayed for each channel. The - Pioneer AVIC-D3 | Owner's Manual - Page 94
AV (Pioneer AV Equipment) Chapter 7 XM 3 To perform tuning, touch or . The channels move up or down step by step. If you keep touching or , you can increase or decrease channel number contin- uously. You can also perform manual tuning by pressing the or button. ❒ You can also perform - Pioneer AVIC-D3 | Owner's Manual - Page 95
Pioneer in the display. Each touch of "List" changes the settings as follows: Detail information display or Preset list display artist name of the song currently being received. When a track that matches the that song. ❒ A track itself is NOT downloaded BUT only the song title and the artist - Pioneer AVIC-D3 | Owner's Manual - Page 96
AV (Pioneer AV Equipment) Chapter 7 XM 1 Touch "Memo". The song title and artist name track is broadcast. ❒ Notification may not be provided depending on the situation of the Navigation System. ➲ "Setting the notification of memorized tracks" ➞ Page 95 ❒ If there is slight difference between the - Pioneer AVIC-D3 | Owner's Manual - Page 97
(7) You can use the navigation system to control a Pioneer Sirius satellite digital tuner, which is sold separately. For details concerning operation, refer to the SIRIUS tuner's operation manuals. This section provides information on SIRIUS operations with navigation system which differs from that - Pioneer AVIC-D3 | Owner's Manual - Page 98
continuously. You can also perform manual tuning by press- ing the or button. Switching the SIRIUS channel select mode You can switch will flash in the SIRIUS preset number indicator and then remain lit. The selected station has been stored in memory. The next time you touch the same preset - Pioneer AVIC-D3 | Owner's Manual - Page 99
SIRIUS Chapter 7 (Pioneer and artist name of the song currently being received. When a track that matches the memorized that song. ❒ A track itself is NOT downloaded BUT only the song title and the artist name on the situation of the Navigation System. ➲ "Setting the notification of memorized tracks" - Pioneer AVIC-D3 | Owner's Manual - Page 100
Touch "TRFC". ❒ You can call up a traffic channel from sources other than SIRIUS. ❒ To cancel traffic announcement, touch "TRFC Off". Display the Radio ID If the alert setting You can enable or disable alerts for all items at the same time. This function is useful when you want to turn alerts off - Pioneer AVIC-D3 | Owner's Manual - Page 101
AV SIRIUS Chapter 7 (Pioneer AV Equipment) 1 Touch "Memo" in the Function menu. 2 Touch "Alert On" or "Alert Off". ❒ Touch to toggle the selection. Selecting teams for Game Alert This navigation system can alert you when games involving your favorite sports teams are about to start. To use this - Pioneer AVIC-D3 | Owner's Manual - Page 102
concerning operation, refer to the Bluetooth adapter's operation manual. This section provides brief information on set to ACC or ON. ❒ The line-of-sight distance between this navigation system and your cellular phone must be 10 meters or less when sending and receiving voice and data via Bluetooth - Pioneer AVIC-D3 | Owner's Manual - Page 103
navigation system, make sure to adjust the volume to a proper level. "Set time appears in the display. ❒ The estimated call time in the display may differ from the actual call time. BT-TEL Chapter 7 (Pioneer The most recent calls made (dialled), received and missed are stored in the call history - Pioneer AVIC-D3 | Owner's Manual - Page 104
next time you time. 3 Touch to end the call. Calling a number in the phone book After finding the entry in the phone book you want to call, you can select the number and make the call. ❒ Before using this function, you need to trans- fer the phone book in your cellular phone to this navigation system - Pioneer AVIC-D3 | Owner's Manual - Page 105
phone's instruction manual. 3 ❒ Touching "Clear" resets the search result and time. ❒ If a phone call comes in while in the navi- gation map screen, the message will appear on the bottom of the display. ❒ You can set this navigation system to automatically answering incoming calls. ➲ "Setting - Pioneer AVIC-D3 | Owner's Manual - Page 106
from your cellular phone, the connection may be made by HSP (Head Set Profile) and several functions may not be available. ❒ A phone may be connected via Bluetooth wireless technology but not yet registered with the navigation system. In this case it is said to be temporarily connected, and the - Pioneer AVIC-D3 | Owner's Manual - Page 107
that has already been registered is connected automatically. ➲ "Setting the automatic connection" ➞ Page 109 Using a cellular phone to initiate a connection Putting the navigation system in Connection open mode allows you to establish a Bluetooth wireless connection from your cellular phone. 1 Touch - Pioneer AVIC-D3 | Owner's Manual - Page 108
AV (Pioneer AV Equipment) Chapter 7 BT-TEL Registering your cellular phone You can register a phone that is temporarily connected to the navigation system in order to take full advantage of the features available with Bluetooth wireless technology. A total of five phones can be registered: three - Pioneer AVIC-D3 | Owner's Manual - Page 109
entire phone book at once. In this case, transfer addresses one at a time from your phone book using your cellular phone. ❒ The phone book can on the cellular phone that is connected to this navigation system via Bluetooth technology, this navigation system may not be able to display the phone book - Pioneer AVIC-D3 | Owner's Manual - Page 110
item that corresponds to the connected cellular phone: phone book, dialled/received/missed call history list and preset dials. 1 Touch "Clear is cleared from this navigation system's memory. ❒ If you do not want to clear memory that you have selected, touch "No". (Pioneer AV Equipment) Chapter - Pioneer AVIC-D3 | Owner's Manual - Page 111
list. Setting a ring tone The navigation system offers to turn the ring tone for incoming calls on or off. ❒ The ring tone you select for this navigation system has no effect on the ring tone used by your phone. If you do not want your phone and this navigation system to ring at the same time, we - Pioneer AVIC-D3 | Owner's Manual - Page 112
AV (Pioneer AV Equipment) Chapter 7 iPod iPod Operating the iPod Music (1) (2)(6) (5) (3), (7) (4) You can control an iPod by combining the iPod cable (CD-I200) (sold separately) to the navigation system. For details concerning operation, refer to the iPod's owner's manual. This section - Pioneer AVIC-D3 | Owner's Manual - Page 113
menu. Playing video This navigation system can play video if an iPod with video capabilities is iPod video is output in NTSC format. ❒ For details concerning setting and operation, refer to the iPod's owner's manual point that you turned pause on, touch again. Advanced iPod operation (1) (1) - Pioneer AVIC-D3 | Owner's Manual - Page 114
on the market, operations with your Bluetooth audio player using this navigation system vary greatly in range. Please refer to the instruction manual that came with your Bluetooth audio player as well as this manual while operating your player on this navigation system. Using the AV Source 112 - Pioneer AVIC-D3 | Owner's Manual - Page 115
the Function menu to turn the connection open on. Pairing is displayed. This navigation system is now on standby for connection from Bluetooth audio player. If your Bluetooth audio player is set ready for Bluetooth wireless connection, the connection to this navigation system will be automatically - Pioneer AVIC-D3 | Owner's Manual - Page 116
(system address) • SYSTEM NAME (system name) • SYSTEM VER. (version) • BT MODULE VER. (Bluetooth module version) The term "external unit" refers to a Pioneer product (such as one available in the future) that, although incompatible as a source, enables control of basic functions by the navigation - Pioneer AVIC-D3 | Owner's Manual - Page 117
source, select "Video" in "AV1 Input" or "AV2 Input". ➲ "Setting the video input" ➞ Page 124 Switching the automatic and manual function You can turn automatic and manual function on or off. You can switch between Auto and Manual functions of the external unit connected. Initially, this function is - Pioneer AVIC-D3 | Owner's Manual - Page 118
Using the AV Source (Pioneer AV Equipment) Chapter 7 AV AV 116 - Pioneer AVIC-D3 | Owner's Manual - Page 119
requests. This chapter describes the methods of changing the various settings and how to set of the LCD panel. Audio Adjustments Introduction to audio adjustments are seven stored equalizer curves which you can easily recall at any time. Here is a list of the equalizer curves: Equalizer curve S.Bass - Pioneer AVIC-D3 | Owner's Manual - Page 120
setting as desired. Adjusted equalizer curve settings are memorized in Custom1. • If you make Custom2 adjustments, Custom2 curve is updated .5K (Hz) 5 Touch or to adjust the level of the equalizer band. Each time you touch or increases or decreases the level of the equalization band. +12 to - - Pioneer AVIC-D3 | Owner's Manual - Page 121
time you touch or selects level in the following order: Low - Mid - High Using subwoofer output The navigation system is equipped with a subwoofer output which can be turned When the non fading output setting is on, the audio signal does not pass through navigation system's low pass filter (for - Pioneer AVIC-D3 | Owner's Manual - Page 122
turn high pass filter on. To turn high pass filter off, touch "Off". 3 Touch or to select cut-off frequency. Each time SIRIUS Setting Up the DVD/DivX Player Configure the DVD/DivX player. DVD/DivX setup adjustments (1) (1) DVD/DivX setup menu display 1 Touch the source icon and then touch "DVD - Pioneer AVIC-D3 | Owner's Manual - Page 123
select the Panscan setting. Confirm whether the disc package bears the 16 : 9 LB mark. (See "What the Marks on DVDs Indicate" on page 19.) ❒ Some discs do not enable changing of the TV aspect. For details, refer to the disc's instructions. Setting the parental lock Some DVD-Video discs let you use - Pioneer AVIC-D3 | Owner's Manual - Page 124
the disc's instructions. ❒ If you forget the registered code number, touch "Clear" 10 times Settings Adjusting initial settings (1) Initial settings lets you perform initial set up of different settings for navigation system. (1) Function display 1 Touch the source icon and then touch "OFF" to turn - Pioneer AVIC-D3 | Owner's Manual - Page 125
when you use a cellular phone connected to the navigation system via the Bluetooth adapter, which is sold separately. 1 Touch "Mute Input/Guide" in the Initial menu. Each touch of the "Mute Input/Guide" changes the settings as follows: • Mute- Muting • ATT - Attenuation • Normal - Volume does not - Pioneer AVIC-D3 | Owner's Manual - Page 126
by adjusting the dot clock. 1 Touch "Pixel Align" in the Initial menu. 2 Touch or to adjust the setting. Other Functions Setup adjustments Adjust the value so that the dashed lines appear correctly as three separate lines. ❒ Adjust the value between 0 and 7. (1) (1) System menu display ➲ How - Pioneer AVIC-D3 | Owner's Manual - Page 127
AV Setting for rear view camera The navigation system features a function that automatically switches to the rear camera image (REAR VIEW CAMERA IN jack) when a rear view camera is installed on your vehicle. When the shift lever is in REVERSE (R) position, the screen automatically switches to a - Pioneer AVIC-D3 | Owner's Manual - Page 128
create a favorite color and set it as the illumination color. 1 Touch "Illumi Color" in the System menu. 2 Touch "Custom". ❒ If Scan is set, Custom cannot be selected. . ❒ The navigation map and the rear view camera picture is always Full. Customizing the Audio Source Setting Chapter 8 Other Functions - Pioneer AVIC-D3 | Owner's Manual - Page 129
separately in the memory. ❒ The picture adjustment may not be able to be used with some rear view cameras. ❒ The same setting is selected for the normal background picture and the navigation map display. ❒ Because of the LCD screen characteristics, you may not be able to adjust the screen at low - Pioneer AVIC-D3 | Owner's Manual - Page 130
AV Customizing the Audio Source Setting Chapter 8 Language Code Chart for DVD Language Code Chart for DVD Language (code), input code Japanese (ja), 1001 English (en), 0514 French (fr), 0618 Spanish (es), 0519 German (de), 0405 Italian (it), 0920 Chinese (zh), 2608 - Pioneer AVIC-D3 | Owner's Manual - Page 131
or RESET button is pressed after the password is set, the navigation system prompts for the password next bootup. If the incorrect password is entered, the navigation and AV functions cannot be performed. Setting the password Set both the password and a hint phrase at the same time. Set a password - Pioneer AVIC-D3 | Owner's Manual - Page 132
- gation system. 3 Set the time difference. 1 Park your vehicle in a safe place. Leave the engine on, and make sure that the parking brake is applied. 2 Insert the Pioneer DVD Map Disc into the disc loading slot of the navigation system. When the upgraded program has been found, installation of the - Pioneer AVIC-D3 | Owner's Manual - Page 133
the daylight saving period. This turns the display below summer time "On". When the installation is complete, the opening display appears. 9 To complete the setting, touch "Back". 5 Press the MAP button to change to the navigation screen. Some time is needed until navigation is ready. 6 Check the - Pioneer AVIC-D3 | Owner's Manual - Page 134
mechanical pen. Otherwise the screen is damaged. Stylus (supplied with navigation system) 1 Press the VOLUME knob to switch to the Audio operation marks, the adjusted position data is saved. ❒ Do not turn off the engine while saving the adjusted position data. ❒ Press Pioneer dealer. Appendix 132 - Pioneer AVIC-D3 | Owner's Manual - Page 135
the DVD Map Disc and store new data in the memory during navigation operation, such as when the destination is far away. The memory navi mode uses the following map data to perform navigation. The following are collectively known as Memory Data: • Manually downloaded memory area data in "Map In - Pioneer AVIC-D3 | Owner's Manual - Page 136
: Stock Info ✓ : Set My Favorites ✓ : My Favorites ✓ *: Product Number in the Service Info Screen is not displayed. About the icon for the memory navi mode When new route guidance starts, the route data from the DVD Map Disc is read into the memory of the navigation system. The status of the - Pioneer AVIC-D3 | Owner's Manual - Page 137
the map at the same scale, set the DVD Map Disc in the navigation system. • GPS The Global Positioning System (GPS) uses a network of satellites orbiting the Earth. Each of the satellites, which orbit at a height of 68 900 000 feet (21 000 km), continually broadcasts radio signals giving time - Pioneer AVIC-D3 | Owner's Manual - Page 138
GPS and dead reckoning work together? For maximum accuracy, your navigation system continually compares GPS system gradually gathers more data, learns more, and the accuracy of its estimates gradually increases. So, after you have driven some distance, you can expect your position as shown on the map - Pioneer AVIC-D3 | Owner's Manual - Page 139
a minimum by combining GPS, Dead Reckoning and map matching. However, in some situations, these functions may not work properly, and the error may become bigger. When the positioning by GPS is impossible • If signals cannot be received from more than two GPS satellites, GPS positioning does not take - Pioneer AVIC-D3 | Owner's Manual - Page 140
the antenna clear. ❒ If, for any reason, GPS signals cannot be received, learning and error correction are not possible. If GPS positioning has been operating for only a short time, your vehicle's actual position and the current location mark on the map may diverge considerably. Once GPS reception - Pioneer AVIC-D3 | Owner's Manual - Page 141
is a loop or similar road configuration. • If your vehicle is turned on a turntable or similar structure. • If you take a steep mountain road with many height changes. • If trees or other obstacles block the GPS signals for a considerable period. • If you enter or exit a multi-storey parking - Pioneer AVIC-D3 | Owner's Manual - Page 142
. • If you insert the disc and turn your navigation system on while driving. Some types of map • Maps with a scale of between 0.02 mile and 0.25 mile cannot be displayed. (If the scale was set to between 0.02 mile and 0.25 mile, it is automatically switched to 0.5 mile.) • When driving with Guide - Pioneer AVIC-D3 | Owner's Manual - Page 143
the disc, the system may not be able to set the route up to the destination. • If the vehicle deviates from the set route in an area not stored on the disc, the Auto Reroute function will not work. • Even if "Close-up of Junction" is "On", the display will not switch to an enlarged map of - Pioneer AVIC-D3 | Owner's Manual - Page 144
dealer or the nearest authorized Pioneer service facility. Problems in the navigation screen Symptom Power doesn't turn on. The unit doesn't operate. When the ignition switch is turned ON (or turned to ACC), the motor sounds. You cannot position your vehicle on the map or the positioning error is - Pioneer AVIC-D3 | Owner's Manual - Page 145
signal input (pink lead wire) of the power cable correctly, and reset the 3D Hybrid Sensor memory ("Learning Status"). Confirm the installation angle. (The navigation system must be installed within the allowed installation angle. For details, refer to "Installation Manual".) Check whether or not - Pioneer AVIC-D3 | Owner's Manual - Page 146
the ignition key back to "Acc off". Then start the engine again, and turn the power to the navigation system back on. If this does not solve the problem, press the RESET button on the navigation system. Symptom Playback is not possible. There's no picture. The audio and video skip. Rear display - Pioneer AVIC-D3 | Owner's Manual - Page 147
on the map. "UPDATING" is displayed at the right corner on the map. No sounds setting is incorrect. The navigation system is not firmly secured. There was a problem with the "Rear display" or a faulty wiring connection, for example. "DVD/DivX Setup" is carried out The setting for the rear view camera - Pioneer AVIC-D3 | Owner's Manual - Page 148
down. If the disc is dirty. If the disc is cracked or otherwise damaged. If the navigation system does not receive the vehicle speed pulse. What to do Insert a suitable disc. Insert the disc with the label upward. Clean the disc. Insert a normal, round disc. Consult your Pioneer dealer. Appendix - Pioneer AVIC-D3 | Owner's Manual - Page 149
. See the "Installation Manual" and set the direction of the navigation unit correctly. Note down the error code shown on the screen. Turn off the power, and then contact your nearest Pioneer service facility. If the sensor learning status reaches the Sensor Initializing status, the system is ready - Pioneer AVIC-D3 | Owner's Manual - Page 150
When Route calculation has failed because of a malfunction of map data, software, hardware or disc. The destination is too far. The destination or way disc. • Consult the Pioneer Local dealer if this message persists. • Set a destination closer to the starting point. • Set one or more way points. Set - Pioneer AVIC-D3 | Owner's Manual - Page 151
Map Disc to destination or way points. Set the destination or way point(s) in the areas stored on the DVD Map Disc, or replace the DVD Map Disc and perform the search again. Insert the DVD Map Disc and retry. Delete unnecessary data and try to register again. Delete unnecessary data on the system - Pioneer AVIC-D3 | Owner's Manual - Page 152
memory recovery process. Memory navigation is presently not possible. The map data could not be stored. Previous setting will be kept. This function is not available with the current map disc. Failed to save to memory. Please reenter setting. CAUTION! System detected improper connection of Parking - Pioneer AVIC-D3 | Owner's Manual - Page 153
upside down Electrical or mechanical The disc does not have the same region number as the navigation system Action (See) Clean disc. Replace disc. Check that the disc is loaded correctly. Press the RESET button. (Refer to page 140 in this manual.) Replace the DVD-Video with one bearing the correct - Pioneer AVIC-D3 | Owner's Manual - Page 154
by this product. • If you insert a CD-RW/DVD-RW disc into this product, time to playback will be longer than when you insert a conventional CD/DVD or CDR/DVD-R disc. • Read the precautions with the package of discs before using them. • When DVD-R/DVD-RW discs are used, playback is possible only for - Pioneer AVIC-D3 | Owner's Manual - Page 155
disc may not be recognized by the built-in DVD drive. - CD-R/-RW: 1.8 MB - DVD the Romeo file system, only the time of playback may not coincide with the actual playback sequence. However, there also is some writing software which permits setting • This unit doesn't support the following formats. - - Pioneer AVIC-D3 | Owner's Manual - Page 156
discs. • Some special operation may be prohibited because of the composition of DivX files. • DivX files downloaded minutes 43 seconds. Also, search operation beyond this time limit is prohibited. • This unit corresponds to Mbps for CDs and 10.08 Mbps for DVDs. • DivX VOD file playback requires ID - Pioneer AVIC-D3 | Owner's Manual - Page 157
short time frame, such as 0.1 seconds, the subtitles may not be displayed at the correct time. Ambient conditions for playing a disc • this navigation system, turn off the power immediately and consult your dealer or the nearest authorized PIONEER Service Station. Do not use the navigation system in - Pioneer AVIC-D3 | Owner's Manual - Page 158
this happens, consult your dealer or the nearest authorized Pioneer service station. Route Setting Information Route search specifications Your navigation system sets a route to your destination by applying certain built-in rules to the map data. This section provides some useful information about - Pioneer AVIC-D3 | Owner's Manual - Page 159
time to your destination as a priority. Condition 2: whether to use freeway or not Avoid Freeway: Calculate a route that avoids freeways. (A route using the freeway may be set if your destination is far away.) • The system the area stored in the disc during DVD navigation mode - when the vehicle - Pioneer AVIC-D3 | Owner's Manual - Page 160
of vehicle tracking with white dots. ➲ Tracking can also be set to erase automatically whenever the navigation system is switched off ➞ Page 74 the map (only the arrival guidance for the destination or a way point is available). Please review and obey all local traffic rules along the highlighted - Pioneer AVIC-D3 | Owner's Manual - Page 161
registered manually. download Map Discs The DVD-ROM disc contain Pioneer navigation software. Map data is also recorded on the discs. Favorite location A frequently visited location (such as your workplace or a relative's home) that you can register to allow easy routing. GPS Global Positioning System - Pioneer AVIC-D3 | Owner's Manual - Page 162
determining the ideal route to a specific location; route setting is done automatically by the system when you specify a destination. Set route The route marked out by the system to your destination. It is highlighted on the map. Title DVD-Video discs have a high data capacity, enabling recording of - Pioneer AVIC-D3 | Owner's Manual - Page 163
the map indicating Navigation GPS Receiver: System L1, C/Acode GPS SPS (Standard Positioning Service) Reception system ........ 8-channel multi-channel reception system Reception frequency ... 1 575.42 MHz Sensitivity 130 dBm Position update frequency Approx. once per second GPS antenna: Antenna - Pioneer AVIC-D3 | Owner's Manual - Page 164
Subwoofer: Frequency 50/80/125 Hz Slope 18 dB/oct Gain 12dB Phase Normal/Reverse DVD Drive System DVD-Video, Compact disc audio, MP3, WMA, AAC, DivX system Usable discs DVD-Video, Compact disc, MP3, WMA, AAC, DivX Region number 1 Signal format: Sampling frequency .... 44.1/48/96 kHz Number - Pioneer AVIC-D3 | Owner's Manual - Page 165
/AV Display Information *1: If you touch "Restore Factory Settings", the registered POI Shortcuts return to the default or factory settings. *2: If you touch "Restore Factory Settings", the setting value return to the default or factory settings. NAVI MENU Destination Address Search Return Home Go - Pioneer AVIC-D3 | Owner's Manual - Page 166
NAVI/AV Route Options Edit Current Route View Current Route Recalculate Number of Routes*2 Route Condition*2 Avoid Freeway*2 Avoid Ferry*2 Avoid Toll Road*2 Designate Areas to Avoid P. 46, 50 P. 45, 50 P. 50 P. 50 P. 50 P. 50 P. 50 P. 51 P. 47 Appendix 164 - Pioneer AVIC-D3 | Owner's Manual - Page 167
NAVI/AV Settings Volume*2 System Options Short-Cut Selection Map Display Options*2 Defined Locations Demo Mode*2 Time Modify Current Location Hardware Info Restore Factory Settings P. 71 P. 75 P. 75, 131 P. 75 Language Selection KM/Mile Setting*2 Installation Angle Setup*2 Average Speed*2 - Pioneer AVIC-D3 | Owner's Manual - Page 168
Shortcut menu ❒ The shortcuts displayed onscreen can be changed. The shortcuts described here are those that can be selected with the system as default setting. ❒ Items marked with an asterisk (*3) cannot be removed from the shortcut menu. ➲ Changing a shortcut ➞ Page 73 Shortcut menu : Destination - Pioneer AVIC-D3 | Owner's Manual - Page 169
Menu Staging Loudness Sub Woofer (Non Fading) HPF SLA P. 118 P. 118 P. 119 P. 119 P. 119 P. 120 P. 120 Initial menu Initial REAR SP PIN Edit Mute Input/Guide Pixel Align P. 123 P. 123 P. 124 REAR SP PREOUT P. 122 P. 122 Appendix 167 - Pioneer AVIC-D3 | Owner's Manual - Page 170
NAVI/AV System menu System AV1 Input AV2 Input Camera ANT CTRL Wide Mode V.Adjust Screen Off Illumi Color Screen Color P. 124 P. 124 P. 125 P. 126 P. 127 P. 127 P. 125 P. 126 Camera Polarity P. 125 P. 125 Appendix 168 - Pioneer AVIC-D3 | Owner's Manual - Page 171
NAVI/AV Function menu DISC [DVD-Video, CD, MP3, DivX] Function Repeat Random Scan P. 82 P. 83 P. 83 RADIO Memory Auto Answer Refuse All Calls Ring Tone Auto Connect Echo Cancel iPod Function Repeat Shuffle iPod Charge BT-AUDIO Function SIRIUS Function Memo Game Alert Game Info P. 98 P. 99 P. - Pioneer AVIC-D3 | Owner's Manual - Page 172
NAVI/AV DVD/DivX Setup menu DVD/DivX Setup Language Assist Subtitle Multi Angle TV Aspect Parental DivX VOD Auto Play Subtitle File P. 120 P. 121 P. 121 P. 121 P. 121 P. 122 P. 122 P. 122 Subtitle Language Audio Language Menu Language P. 120 P. 120 P. 120 Appendix 170 - Pioneer AVIC-D3 | Owner's Manual - Page 173
ELECTRONICS (USA) INC. P.O. Box 1540, Long Beach, California 90801-1540, U.S.A. TEL: (800) 421-1404 PIONEER EUROPE NV Haven 1087, Keetberglaan 1, B-9120 Melsele, Belgium TEL: (0) 3/570.05.11 PIONEER ELECTRONICS ASIACENTRE PTE. LTD. 253 Alexandra Road, #04-01, Singapore 159936 TEL: 65-6472-7555
-
 1
1 -
 2
2 -
 3
3 -
 4
4 -
 5
5 -
 6
6 -
 7
7 -
8
-
9
-
10
-
11
-
12
-
13
-
14
-
15
-
16
-
17
-
18
-
19
-
20
-
21
-
22
-
23
-
24
-
25
-
26
-
27
-
28
-
29
-
30
-
31
-
32
-
33
-
34
-
35
-
36
-
37
-
38
-
39
-
40
-
41
-
42
-
43
-
44
-
45
-
46
-
47
-
48
-
49
-
50
-
51
-
52
-
53
-
54
-
55
-
56
-
57
-
58
-
59
-
60
-
61
-
62
-
63
-
64
-
65
-
66
-
67
-
68
-
69
-
70
-
71
-
72
-
73
-
74
-
75
-
76
-
77
-
78
-
79
-
80
-
81
-
82
-
83
-
84
-
85
-
86
-
87
-
88
-
89
-
90
-
91
-
92
-
93
-
94
-
95
-
96
-
97
-
98
-
99
-
100
-
101
-
102
-
103
-
104
-
105
-
106
-
107
-
108
-
109
-
110
-
111
-
112
-
113
-
114
-
115
-
116
-
117
-
118
-
119
-
120
-
121
-
122
-
123
-
124
-
125
-
126
-
127
-
128
-
129
-
130
-
131
-
132
-
133
-
134
-
135
-
136
-
137
-
138
-
139
-
140
-
141
-
142
-
143
-
144
-
145
-
146
-
147
-
148
-
149
-
150
-
151
-
152
-
153
-
154
-
155
-
156
-
157
-
158
-
159
-
160
-
161
-
162
-
163
-
164
-
165
-
166
-
167
-
168
-
169
-
170
-
171
-
172
-
173
 |
 |

DVD MULTIMEDIA AV NAVIGATION SERVER
AVIC-D3
Operation Manual
Notice to all users:
This software requires that the navigation system be properly connected to your vehicle’s
parking brake. If not properly connected and depending on your vehicle, additional instal-
lation may be required. For more information, please contact your Authorized Pioneer
Electronics retailer or call us at (800) 421-1404.