Pioneer AVIC-D3 Owner's Manual - Page 129
Operating the Picture Adjust, Switching the backlight On/Off
 |
UPC - 012562844169
View all Pioneer AVIC-D3 manuals
Add to My Manuals
Save this manual to your list of manuals |
Page 129 highlights
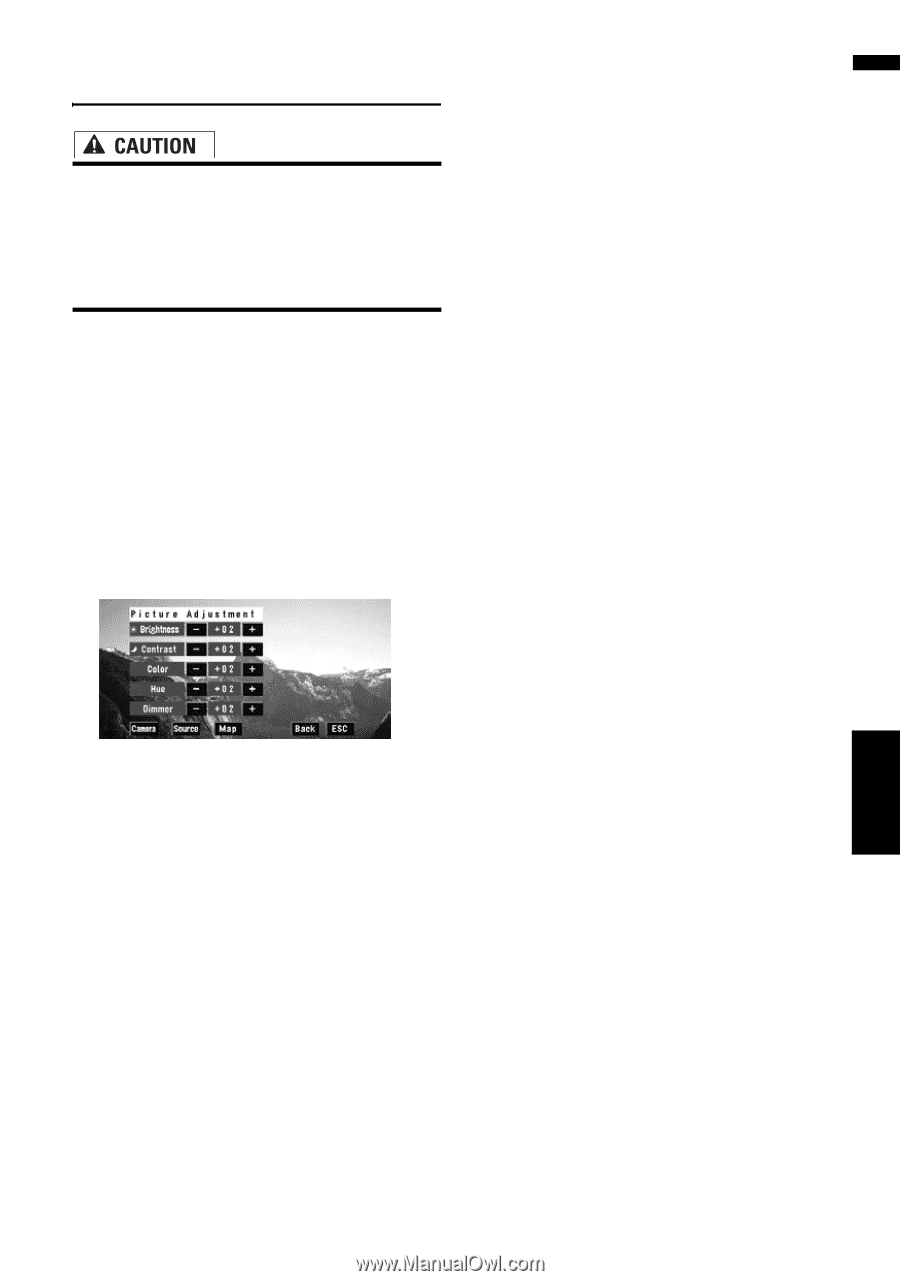
AV Operating the Picture Adjustment Chapter 8 Customizing the Audio Source Setting Operating the Picture Adjustment • For safety reasons, visual images cannot be viewed while your vehicle is in motion. To view visual images, you must stop in a safe place and put on the parking brake before setting your route (see page 13 Interlock for details). 1 Touch "V.Adjust" in the System menu. 2 Select the desired item you want to adjust. • Camera - Switch to the picture adjust- ment display for the rear view camera • Source - Switch to the picture adjust- ment display for the source screen • Map - Switch to the picture adjustment display for the map screen ❒ When the display is already on the screen, a message to that effect appears. Brightness - Adjust the black intensity Contrast - Adjust the contrast Color - Adjust the color saturation Hue - Adjust the tone of color (red is emphasized or green is emphasized) Dimmer - Adjust the brightness of display ❒ Touching "Source" while adjusting the rear view camera image returns you to the previous screen. ❒ The adjustments of Brightness, Contrast and Dimmer are stored separately when your vehicle's headlights are off (daytime) and when your vehicle's headlight are on (nighttime). These are switched automatically depending on the vehicle's headlights are on or off. ❒ You cannot adjust Color and Hue for the source without a video and navigation map display. ❒ If you select "Source", sources without video and sources with video are saved separately in the memory. ❒ The picture adjustment may not be able to be used with some rear view cameras. ❒ The same setting is selected for the normal background picture and the navigation map display. ❒ Because of the LCD screen characteristics, you may not be able to adjust the screen at low temperatures. 3 Touch "+" or "-" to adjust the selected item. Each time you touch "+" or "-" increases or decreases the level of selected item. +24 to -24 is displayed as the level is increased or decreased. ❒ Adjust the Dimmer in the range of +1 to +48. 4 Touch "ESC" to return to the previous screen. Switching the backlight On/Off By turning off the backlight of the LCD screen, you can turn off the screen display without turning off the voice guidance. 1 Touch "Screen Off" in the System menu. The backlight turns off, and the screen turns off. ❒ To turn on the backlight, touch the screen again. 127
-
 1
1 -
2
-
3
-
4
-
5
-
6
-
7
-
8
-
9
-
10
-
11
-
12
-
13
-
14
-
15
-
16
-
17
-
18
-
19
-
20
-
21
-
22
-
23
-
24
-
25
-
26
-
27
-
28
-
29
-
30
-
31
-
32
-
33
-
34
-
35
-
36
-
37
-
38
-
39
-
40
-
41
-
42
-
43
-
44
-
45
-
46
-
47
-
48
-
49
-
50
-
51
-
52
-
53
-
54
-
55
-
56
-
57
-
58
-
59
-
60
-
61
-
62
-
63
-
64
-
65
-
66
-
67
-
68
-
69
-
70
-
71
-
72
-
73
-
74
-
75
-
76
-
77
-
78
-
79
-
80
-
81
-
82
-
83
-
84
-
85
-
86
-
87
-
88
-
89
-
90
-
91
-
92
-
93
-
94
-
95
-
96
-
97
-
98
-
99
-
100
-
101
-
102
-
103
-
104
-
105
-
106
-
107
-
108
-
109
-
110
-
111
-
112
-
113
-
114
-
115
-
116
-
117
-
118
-
119
-
120
-
121
-
122
-
123
-
 124
124 -
 125
125 -
 126
126 -
 127
127 -
 128
128 -
 129
129 -
 130
130 -
 131
131 -
 132
132 -
 133
133 -
 134
134 -
135
-
136
-
137
-
138
-
139
-
140
-
141
-
142
-
143
-
144
-
145
-
146
-
147
-
148
-
149
-
150
-
151
-
152
-
153
-
154
-
155
-
156
-
157
-
158
-
159
-
160
-
161
-
162
-
163
-
164
-
165
-
166
-
167
-
168
-
169
-
170
-
171
-
172
-
173
 |
 |