Pioneer AVIC-D3 Owner's Manual - Page 35
Navigation Menu and Map Display - service menu
 |
UPC - 012562844169
View all Pioneer AVIC-D3 manuals
Add to My Manuals
Save this manual to your list of manuals |
Page 35 highlights
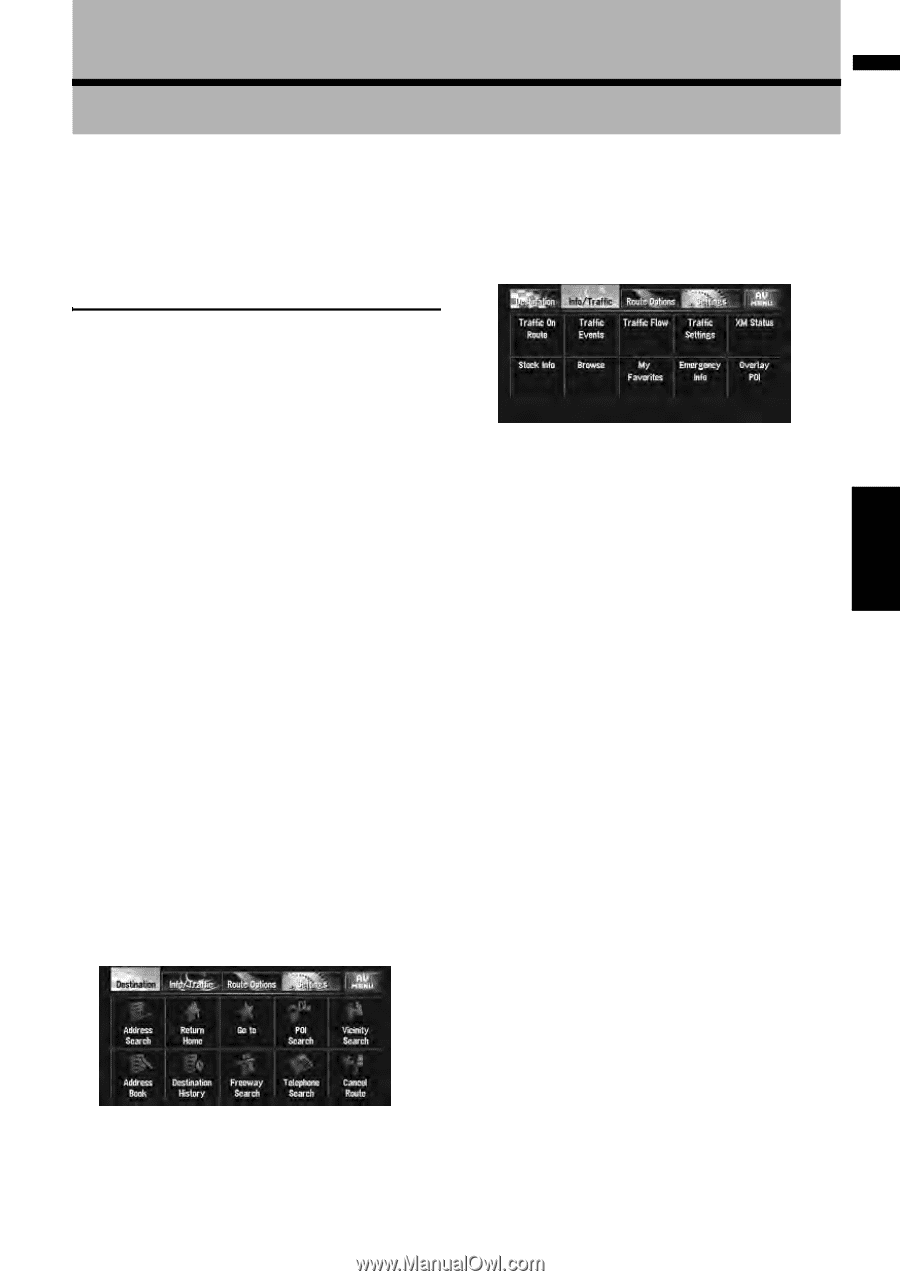
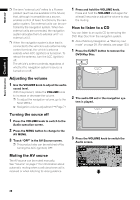
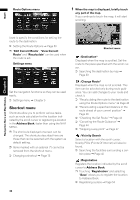
NAVI Chapter 2 Navigation Menu and Map Display Navigation Menu and Map Display Chapter 2 This section describes the basic navigation operations, including how to display the NAVI MENU and how to use the shortcut menu and the map screen. How to Use Menu Screens ➲ Specifying the address and searching the destination ➞ Page 26 ➲ Other search methods ➞ Page 41 to 43 Info/Traffic menu There are two types of navigation menu: the "NAVI MENU" and the "Shortcut menu". ❒ The functions that cannot be used during the memory navi mode are indicated in gray with black letters. If you want to use such functions, insert the DVD Map Disc. NAVI MENU Use this menu for basic operation of your navigation system. 1 With the map displayed, press the MENU button. 2 To change to the menu you want to use, touch the name of the menu displayed at the top of the screen. The NAVI MENU is divided into four submenus: "Destination", "Info/Traffic", "Route Options", "Settings". ❒ Touch "AV MENU" changes to the Audio operation screen. ➲ Audio operation screen ➞ Page 77 3 If you want to return to the map, press the MAP button. Destination menu Use this menu to check traffic information mainly using the GEX-P10XMT*. ❒ "Traffic On Route", "Traffic Events", "Traffic Flow", "Stock Info", "Set My Favorites", and "My Favorites" can be used only when the GEX-P10XMT* is connected to the navigation system. GEX-P10XMT*: XM Digital Satellite Data & Audio Receiver (sold separately). Traffic information only available for cities where information is provided by XM NavTraffic service. Active subscription to XM NavTraffic required to receive traffic information on the navigation system. ❒ "Traffic On Route", "Traffic Events", and "Traffic Flow" can only be used in DVD navi mode. ➲ Confirming traffic information ➞ Page 57 ➲ Registering information for emergencies ➞ Page 63 Select the destination search method. The route also can be canceled from this menu. 33
-
 1
1 -
2
-
3
-
4
-
5
-
6
-
7
-
8
-
9
-
10
-
11
-
12
-
13
-
14
-
15
-
16
-
17
-
18
-
19
-
20
-
21
-
22
-
23
-
24
-
25
-
26
-
27
-
28
-
29
-
 30
30 -
 31
31 -
 32
32 -
 33
33 -
 34
34 -
 35
35 -
 36
36 -
 37
37 -
 38
38 -
 39
39 -
 40
40 -
41
-
42
-
43
-
44
-
45
-
46
-
47
-
48
-
49
-
50
-
51
-
52
-
53
-
54
-
55
-
56
-
57
-
58
-
59
-
60
-
61
-
62
-
63
-
64
-
65
-
66
-
67
-
68
-
69
-
70
-
71
-
72
-
73
-
74
-
75
-
76
-
77
-
78
-
79
-
80
-
81
-
82
-
83
-
84
-
85
-
86
-
87
-
88
-
89
-
90
-
91
-
92
-
93
-
94
-
95
-
96
-
97
-
98
-
99
-
100
-
101
-
102
-
103
-
104
-
105
-
106
-
107
-
108
-
109
-
110
-
111
-
112
-
113
-
114
-
115
-
116
-
117
-
118
-
119
-
120
-
121
-
122
-
123
-
124
-
125
-
126
-
127
-
128
-
129
-
130
-
131
-
132
-
133
-
134
-
135
-
136
-
137
-
138
-
139
-
140
-
141
-
142
-
143
-
144
-
145
-
146
-
147
-
148
-
149
-
150
-
151
-
152
-
153
-
154
-
155
-
156
-
157
-
158
-
159
-
160
-
161
-
162
-
163
-
164
-
165
-
166
-
167
-
168
-
169
-
170
-
171
-
172
-
173
 |
 |