Brother International EM550 Owners Manual - English - Page 30
Setting, Starting, Ending, Lines
 |
View all Brother International EM550 manuals
Add to My Manuals
Save this manual to your list of manuals |
Page 30 highlights
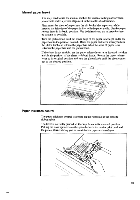
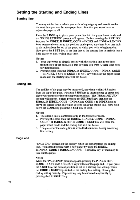
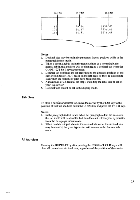
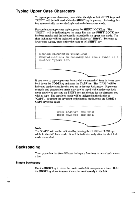
Setting the Starting and Ending Lines Starting line You may set the line at which you wish to begin typing and save it, so that the next time you use the auto paper insert function you won't have to adjust the paper at all. Press the P INS key to place your typewriter into the paper insert mode and the "PRESS RETURN" prompt will appear. Before pressing the RETURN key, use the INDEX, R INDEX, CODE + INDEX and CODE + R INDEX keys to move the carrier to the position on the page, anywhere from one inch to six inches from the top of the page, at which you wish to begin typing. Now press the S SET key to set that line as the starting line to make it just a little easier to start typing next time. Notes: 1. Your typewriter is already preset with the starting line at one inch from the top of the page, so if that is where you want it, there is no need for modification. 2. Pressing other than the INDEX, R INDEX, CODE + INDEX, CODE + R INDEX, S SET or CODE + E SET key will clear the paper insert mode and the starting line will not be set. Ending line The end line of the page may be set as well, anywhere within 16.5 inches from the top of the page. First use P INS key to insert a piece of paper and place your typewriter into the paper insert mode. The "PRESS RETURN" prompt will appear. Before pressing the RETURN key, then use the INDEX, R INDEX, CODE + INDEX and CODE + R INDEX keys to move the carrier to the line which is to be set as the ending line. Now hold down the CODE key press the E SET key to set it. Notes: 1. The ending line is controlled only in the typewriter mode. 2. Pressing the other than the INDEX, R INDEX, CODE + INDEX, CODE + R INDEX, S SET or CODE + E SET key will clear the paper insert mode and the ending line will not be set. 3. The pre-set of the ending line is set to 0 which means having no ending line setting. Page end 22 "PAGE END" appears on the display when the carrier passes the ending line. You should replace with a new paper by using the INDEX, R INDEX, CODE + INDEX, or CODE + R INDEX key, or manually to take out the paper. Note: When the "PAGE END" prompt appears, pressing the P INS, S SET, CODE + E SET and CORRECT keys will clear the page end . If you press the S SET key, the current position is set as a starting line setting, while the CODE + E SET keys initialize the ending line setting, clearing the ending setting entirely. Page ending may be canceled temporarily by pressing the CORRECT key. CEA
-
 1
1 -
2
-
3
-
4
-
5
-
6
-
7
-
8
-
9
-
10
-
11
-
12
-
13
-
14
-
15
-
16
-
17
-
18
-
19
-
20
-
21
-
22
-
23
-
24
-
 25
25 -
 26
26 -
 27
27 -
 28
28 -
 29
29 -
 30
30 -
 31
31 -
 32
32 -
 33
33 -
 34
34 -
 35
35 -
36
-
37
-
38
-
39
-
40
-
41
-
42
-
43
-
44
-
45
-
46
-
47
-
48
-
49
-
50
-
51
-
52
-
53
-
54
-
55
-
56
-
57
-
58
-
59
-
60
-
61
-
62
-
63
-
64
-
65
-
66
-
67
-
68
-
69
-
70
-
71
-
72
-
73
-
74
-
75
-
76
-
77
-
78
-
79
-
80
-
81
-
82
-
83
-
84
-
85
-
86
-
87
-
88
-
89
-
90
-
91
-
92
-
93
-
94
-
95
-
96
-
97
-
98
-
99
-
100
-
101
-
102
-
103
-
104
 |
 |