Canon MP370 MultiPASS MP370/360 Software Guide - Page 101
Advanced Mode - [Color] tab settings, To correct tone automatically
 |
UPC - 013803037111
View all Canon MP370 manuals
Add to My Manuals
Save this manual to your list of manuals |
Page 101 highlights
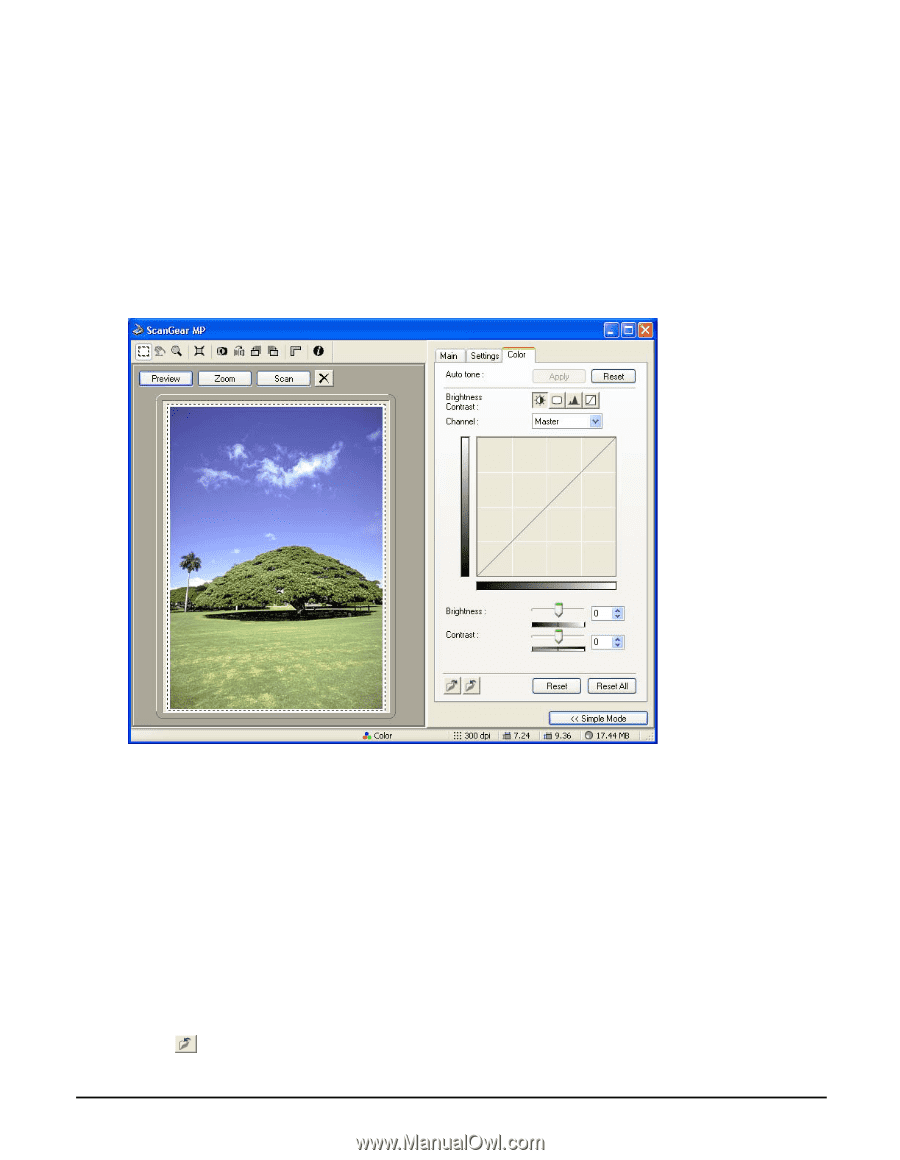
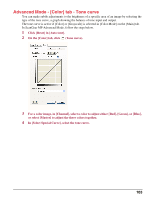
Advanced Mode - [Color] tab settings On the [Color] tab, you can set preferences for brightness and tone of an image such as preferences for adjusting brightness and contrast of the whole image, for making adjustments to match the brightness of the monitor (gamma correction), for specifying highlights and shadows, and adjusting contrast and balance in an image (with the histogram and tone curve). The [Color] tab will be displayed when [Color] or [Grayscale] is selected in [Color Mode] on the [Main] tab. In [Black and White] mode, the [Color] tab will change to the [Halftone] tab but no tab will be displayed in [Text Enhanced] mode or when [Canon ColorGear Color matching] is selected. When you adjust settings on the [Color] tab, your changes will be immediately reflected in the preview image or in the scan. [ScanGear MP] (Advanced Mode) dialog box To correct tone automatically Specify the parameters of the adjustment and click [Apply] in [Auto tone]. The brightness of the image within the parameters you have specified will be automatically adjusted for best results. The results of color adjustment are reflected in the whole image and when the image is actually scanned. You cannot apply this setting if the preview image is not displayed. The default setting applies auto tone adjustment to the cropped image when previewing the image. Consequently, when you preview the image, the [Apply] will not be available. To view the preview image without auto tone adjustment, click [Reset]. The [Apply] will then become available and you will be able to re-apply auto tone adjustment if required. To save settings to a color adjustment file Click (Save button). If you intend to scan the same image several times, you can save the settings for use in future scans with the same settings. The file suffix will be (.adc) for color and (.adg) for grayscale. 99
-
 1
1 -
2
-
3
-
4
-
5
-
6
-
7
-
8
-
9
-
10
-
11
-
12
-
13
-
14
-
15
-
16
-
17
-
18
-
19
-
20
-
21
-
22
-
23
-
24
-
25
-
26
-
27
-
28
-
29
-
30
-
31
-
32
-
33
-
34
-
35
-
36
-
37
-
38
-
39
-
40
-
41
-
42
-
43
-
44
-
45
-
46
-
47
-
48
-
49
-
50
-
51
-
52
-
53
-
54
-
55
-
56
-
57
-
58
-
59
-
60
-
61
-
62
-
63
-
64
-
65
-
66
-
67
-
68
-
69
-
70
-
71
-
72
-
73
-
74
-
75
-
76
-
77
-
78
-
79
-
80
-
81
-
82
-
83
-
84
-
85
-
86
-
87
-
88
-
89
-
90
-
91
-
92
-
93
-
94
-
95
-
 96
96 -
 97
97 -
 98
98 -
 99
99 -
 100
100 -
 101
101 -
 102
102 -
 103
103 -
 104
104 -
 105
105 -
 106
106 -
107
-
108
-
109
-
110
-
111
-
112
-
113
-
114
-
115
-
116
-
117
-
118
-
119
-
120
-
121
-
122
-
123
-
124
-
125
-
126
-
127
-
128
-
129
-
130
-
131
-
132
-
133
-
134
-
135
-
136
-
137
-
138
 |
 |