Canon MP370 MultiPASS MP370/360 Software Guide - Page 87
[Multi-Crop] in ScanGear MP (Advanced Mode), In [Multi-Crop], click [Apply].
 |
UPC - 013803037111
View all Canon MP370 manuals
Add to My Manuals
Save this manual to your list of manuals |
Page 87 highlights
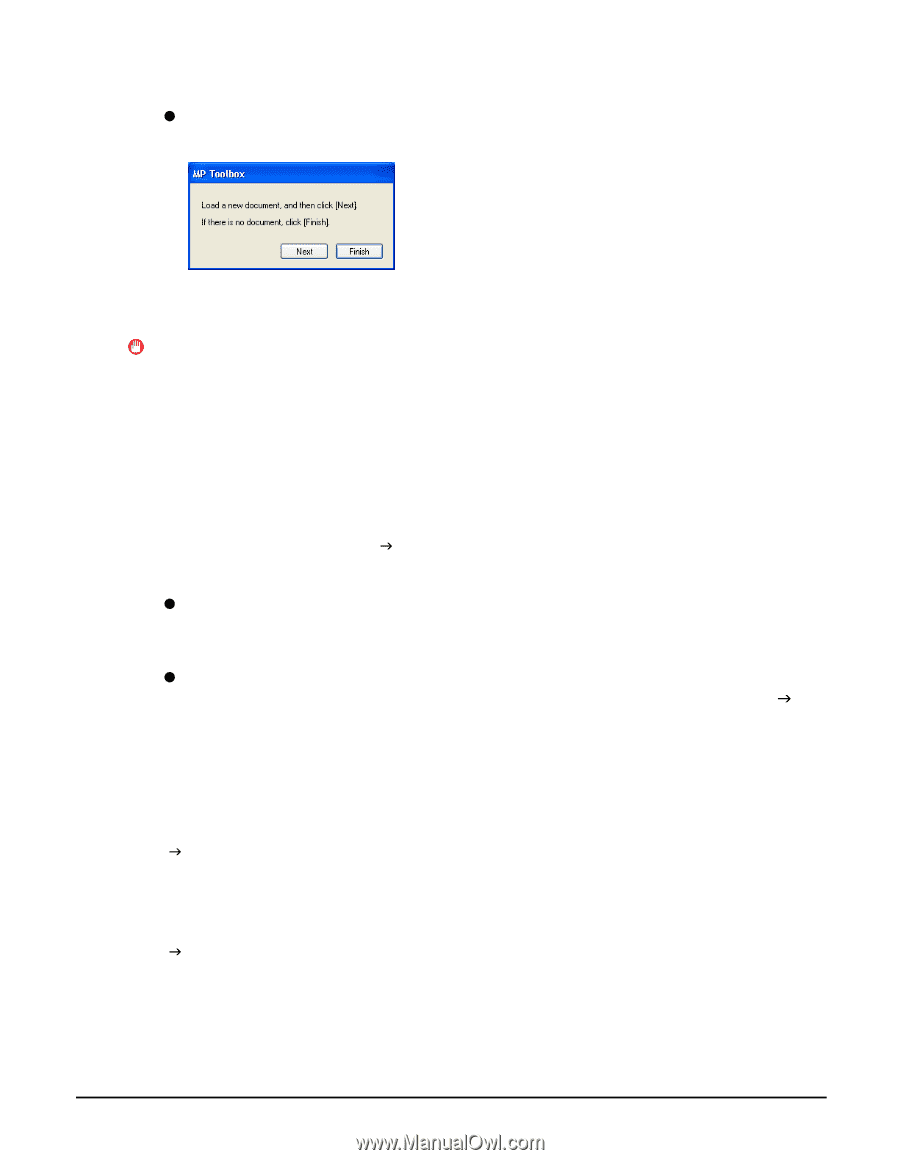
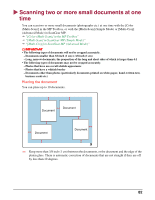
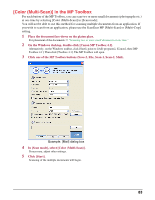
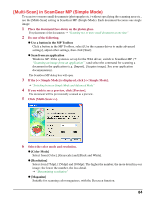
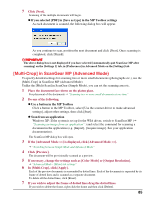
7 Click [Next]. Scanning of the multiple documents will begin. z If you selected [PDF] in [Save as type] in the MP Toolbox settings As each document is scanned, the following dialog box will appear. As you continue to scan, position the next document and click [Next]. Once scanning is completed, click [Finish]. IMPORTANT The above dialog box is not displayed if you have selected [Automatically quit ScanGear MP after scanning] on the [Settings 1] tab, in [Preferences] in Advanced Mode on the [Settings] tab. [Multi-Crop] in ScanGear MP (Advanced Mode) To specify detailed settings for scanning two or more small documents (photographs etc.), use the [Multi-Crop] in ScanGear MP (Advanced Mode). Unlike the [Multi-Scan] in ScanGear (Simple Mode), you can set the scanning area etc. 1 Place the document face-down on the platen glass. For placement of the documents J "Scanning two or more small documents at one time" 2 Do one of the following. z Use a button in the MP Toolbox Click a button in the MP Toolbox, select [Use the scanner driver to make advanced settings], adjust other settings, then click [Start]. z Scan from an application Windows XP: If the system is set up for the WIA driver, switch to ScanGear MP (J "Scanning an image from an application" ) and select the command for scanning a document in the application (e.g. [Import], [Acquire image]. See your application documentation). The ScanGear MP dialog box will open. 3 If the [Advanced Mode >>] is displayed, click [Advanced Mode >>]. J "Switching between Simple Mode and Advanced Mode" 4 Click [Preview]. The document will be provisionally scanned as a preview. 5 If necessary, change the settings such as [Color Mode] or [Output Resolution]. J "Advanced Mode - [Main] tab settings" 6 In [Multi-Crop], click [Apply]. Each of the preview documents is surrounded by dotted lines. Each of the documents is separated by its frame of dotted lines and is scanned as a separate document. To delete all the dotted lines, click [Reset]. 7 If you wish to adjust the frame of dotted lines drag the dotted lines. If you wish to delete the frame, right-click the frame and then click [Delete]. 85
-
 1
1 -
2
-
3
-
4
-
5
-
6
-
7
-
8
-
9
-
10
-
11
-
12
-
13
-
14
-
15
-
16
-
17
-
18
-
19
-
20
-
21
-
22
-
23
-
24
-
25
-
26
-
27
-
28
-
29
-
30
-
31
-
32
-
33
-
34
-
35
-
36
-
37
-
38
-
39
-
40
-
41
-
42
-
43
-
44
-
45
-
46
-
47
-
48
-
49
-
50
-
51
-
52
-
53
-
54
-
55
-
56
-
57
-
58
-
59
-
60
-
61
-
62
-
63
-
64
-
65
-
66
-
67
-
68
-
69
-
70
-
71
-
72
-
73
-
74
-
75
-
76
-
77
-
78
-
79
-
80
-
81
-
 82
82 -
 83
83 -
 84
84 -
 85
85 -
 86
86 -
 87
87 -
 88
88 -
 89
89 -
 90
90 -
 91
91 -
 92
92 -
93
-
94
-
95
-
96
-
97
-
98
-
99
-
100
-
101
-
102
-
103
-
104
-
105
-
106
-
107
-
108
-
109
-
110
-
111
-
112
-
113
-
114
-
115
-
116
-
117
-
118
-
119
-
120
-
121
-
122
-
123
-
124
-
125
-
126
-
127
-
128
-
129
-
130
-
131
-
132
-
133
-
134
-
135
-
136
-
137
-
138
 |
 |