Canon MP370 MultiPASS MP370/360 Software Guide - Page 35
Borderless printing, In the [Printer Properties] or [Printing Preferences] dialog box, click [OK].
 |
UPC - 013803037111
View all Canon MP370 manuals
Add to My Manuals
Save this manual to your list of manuals |
Page 35 highlights
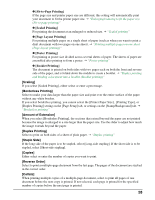
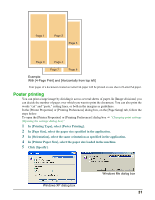
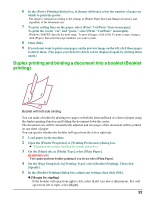
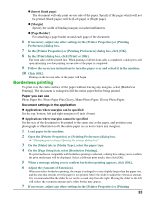
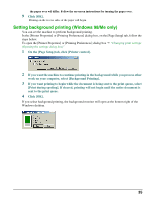
z [Insert blank page] The document will only print on one side of the paper. Specify if the pages which will not be printed (blank pages) will be [Left page] or [Right page]. z [Margin] Specify the width of binding margins in inches/millimeters. z [Page Border] For attaching a page border around each page of the document. 6 If necessary, adjust any other settings in the [Printer Properties] or [Printing Preferences] dialog box. 7 In the [Printer Properties] or [Printing Preferences] dialog box, click [OK]. 8 In the [Print] dialog box, click [Print] or [OK]. The front sides will be printed first. When printing of all the front sides is completed, a dialog box will open informing you that printing on one side of the paper is completed. 9 Follow the on-screen instructions to turn the paper over and reload it in the machine. 10 Click [OK]. Printing on the reverse sides of the paper will begin. Borderless printing To print over the entire surface of the paper without leaving any margins, select [Borderless Printing]. The document is enlarged to fill the entire paper before being printed. Paper you can use Photo Paper Pro, Photo Paper Plus Glossy, Matte Photo Paper, Glossy Photo Paper. Document settings in the application z Applications where margins can be specified Set the top, bottom, left and right margins to 0 inch (0 mm). z Applications where margins cannot be specified Set the size of the document to be printed to the same size as the paper, and position your photograph or illustration to fit the entire paper (so as not to leave any margins). 1 Load paper in the machine. 2 Open the [Printer Properties] or [Printing Preferences] dialog box. J "Changing print settings (Opening the settings dialog box)" 3 On the [Main] tab, in [Media Type], select the paper type. 4 On the [Page Setup] tab, select [Borderless Printing]. If a print media not compatible with borderless printing is selected, a dialog box asking you to confirm the print media type will be displayed. Select a different print media, then click [OK]. 5 When a message asking you to confirm borderless printing appears, click [OK]. 6 Adjust the [Amount of Extension]. When you select borderless printing, the image is enlarged to a size slightly larger than the paper size, and the area that extends over the paper is not printed. Move the slider to adjust the extension amount. It is recommended that the slider be set on the second stop from the right. Moving the slider to the left will reduce the extension amount and a white border may appear. 7 If necessary, adjust any other settings in the [Printer Properties] or [Printing 33
-
 1
1 -
2
-
3
-
4
-
5
-
6
-
7
-
8
-
9
-
10
-
11
-
12
-
13
-
14
-
15
-
16
-
17
-
18
-
19
-
20
-
21
-
22
-
23
-
24
-
25
-
26
-
27
-
28
-
29
-
 30
30 -
 31
31 -
 32
32 -
 33
33 -
 34
34 -
 35
35 -
 36
36 -
 37
37 -
 38
38 -
 39
39 -
 40
40 -
41
-
42
-
43
-
44
-
45
-
46
-
47
-
48
-
49
-
50
-
51
-
52
-
53
-
54
-
55
-
56
-
57
-
58
-
59
-
60
-
61
-
62
-
63
-
64
-
65
-
66
-
67
-
68
-
69
-
70
-
71
-
72
-
73
-
74
-
75
-
76
-
77
-
78
-
79
-
80
-
81
-
82
-
83
-
84
-
85
-
86
-
87
-
88
-
89
-
90
-
91
-
92
-
93
-
94
-
95
-
96
-
97
-
98
-
99
-
100
-
101
-
102
-
103
-
104
-
105
-
106
-
107
-
108
-
109
-
110
-
111
-
112
-
113
-
114
-
115
-
116
-
117
-
118
-
119
-
120
-
121
-
122
-
123
-
124
-
125
-
126
-
127
-
128
-
129
-
130
-
131
-
132
-
133
-
134
-
135
-
136
-
137
-
138
 |
 |