Canon imageCLASS MF7460 imageCLASS MF7400 Series Reference Guide - Page 125
Changing the Color Mode (imageCLASS MF7480 Only), Press, SEND., Place your originals.
 |
View all Canon imageCLASS MF7460 manuals
Add to My Manuals
Save this manual to your list of manuals |
Page 125 highlights
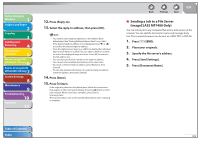
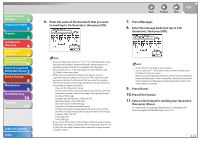
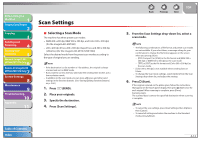
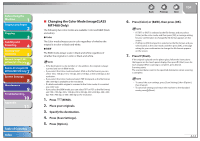
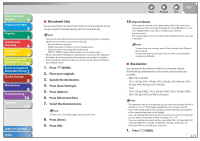
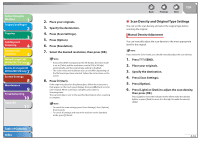
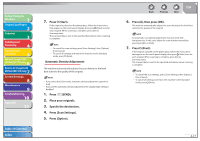
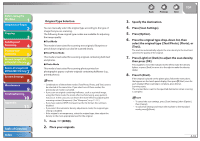
Before Using the Machine 1 Original and Paper 2 Copying 3 Sending and Receiving 4 Printing and Scanning 5 Network (imageCLASS 6 MF7480/MF7470 Only) Remote UI (imageCLASS 7 MF7480/MF7470 Only) System Settings 8 Maintenance 9 Troubleshooting 10 Appendix 11 Table of Contents Index ˙ Changing the Color Mode (imageCLASS MF7480 Only) The following two color modes are available: Color and B&W (black and white). ˔ Color The Color mode always scans in color regardless of whether the original is in color or black-and-white. ˔ B&W The B&W mode always scans in black-and-white regardless of whether the original is in color or black-and-white. - If the destination is a fax number or I-fax address, the original is always scanned and sent in B&W mode. - If you select the Color mode and select JPEG as the file format, you can select 100 x 100 dpi, 150 x 150 dpi, 200 x 100 dpi, or 300 x 300 dpi as the resolution. - If you select the Color mode and select PDF (Compact) as the file format, 300 x 300 dpi is available as the resolution. - If a black-and-white original is scanned in the Color mode, it is counted as a color scan. - If you select the B&W mode, you can select TIFF or PDF as the file format, and 150 x 150 dpi, 200 x 100 dpi, 200 x 200 dpi, 200 x 400 dpi, 300 x 300 dpi, 400 x 400 dpi, or 600 x 600 dpi as the resolution. 1. Press (SEND). 2. Place your originals. 3. Specify the destination. 4. Press [Scan Settings]. 5. Press [Option]. Back Previous Next TOP 6. Press [Color] or [B&W], then press [OK]. - If [TIFF] or [PDF] is selected as the file format, and you select [Color] as the color mode, and then press [OK], a message asking for your confirmation to change the file format appears on the screen. - If [JPEG] or [PDF(Compact)] is selected as the file format, and you select [Color] as the color mode, and then press [OK], a message asking for your confirmation to change the file format appears on the screen. 7. Press (Start). If the original is placed on the platen glass, follow the instructions that appear on the touch panel display, then press (Start) once for each original. When scanning is complete, press [Done]. Scanning starts. The scanned data is sent to the specified destination when scanning is complete. - To cancel the scan settings, press [Scan Settings], then [Option], then [Cancel]. - To cancel all settings and return the machine to the Standard mode, press (Reset). 4-14
-
 1
1 -
2
-
3
-
4
-
5
-
6
-
7
-
8
-
9
-
10
-
11
-
12
-
13
-
14
-
15
-
16
-
17
-
18
-
19
-
20
-
21
-
22
-
23
-
24
-
25
-
26
-
27
-
28
-
29
-
30
-
31
-
32
-
33
-
34
-
35
-
36
-
37
-
38
-
39
-
40
-
41
-
42
-
43
-
44
-
45
-
46
-
47
-
48
-
49
-
50
-
51
-
52
-
53
-
54
-
55
-
56
-
57
-
58
-
59
-
60
-
61
-
62
-
63
-
64
-
65
-
66
-
67
-
68
-
69
-
70
-
71
-
72
-
73
-
74
-
75
-
76
-
77
-
78
-
79
-
80
-
81
-
82
-
83
-
84
-
85
-
86
-
87
-
88
-
89
-
90
-
91
-
92
-
93
-
94
-
95
-
96
-
97
-
98
-
99
-
100
-
101
-
102
-
103
-
104
-
105
-
106
-
107
-
108
-
109
-
110
-
111
-
112
-
113
-
114
-
115
-
116
-
117
-
118
-
119
-
 120
120 -
 121
121 -
 122
122 -
 123
123 -
 124
124 -
 125
125 -
 126
126 -
 127
127 -
 128
128 -
 129
129 -
 130
130 -
131
-
132
-
133
-
134
-
135
-
136
-
137
-
138
-
139
-
140
-
141
-
142
-
143
-
144
-
145
-
146
-
147
-
148
-
149
-
150
-
151
-
152
-
153
-
154
-
155
-
156
-
157
-
158
-
159
-
160
-
161
-
162
-
163
-
164
-
165
-
166
-
167
-
168
-
169
-
170
-
171
-
172
-
173
-
174
-
175
-
176
-
177
-
178
-
179
-
180
-
181
-
182
-
183
-
184
-
185
-
186
-
187
-
188
-
189
-
190
-
191
-
192
-
193
-
194
-
195
-
196
-
197
-
198
-
199
-
200
-
201
-
202
-
203
-
204
-
205
-
206
-
207
-
208
-
209
-
210
-
211
-
212
-
213
-
214
-
215
-
216
-
217
-
218
-
219
-
220
-
221
-
222
-
223
-
224
-
225
-
226
-
227
-
228
-
229
-
230
-
231
-
232
-
233
-
234
-
235
-
236
-
237
-
238
-
239
-
240
-
241
-
242
-
243
-
244
-
245
-
246
-
247
-
248
-
249
-
250
-
251
-
252
-
253
-
254
-
255
-
256
-
257
-
258
-
259
-
260
-
261
-
262
-
263
-
264
-
265
-
266
-
267
-
268
-
269
-
270
-
271
-
272
-
273
-
274
-
275
-
276
-
277
-
278
-
279
-
280
-
281
-
282
-
283
-
284
-
285
-
286
-
287
-
288
-
289
-
290
-
291
-
292
-
293
-
294
-
295
-
296
-
297
-
298
-
299
-
300
-
301
-
302
-
303
-
304
-
305
-
306
-
307
-
308
-
309
-
310
-
311
-
312
-
313
-
314
-
315
-
316
-
317
-
318
-
319
-
320
-
321
-
322
-
323
-
324
-
325
-
326
-
327
-
328
-
329
-
330
-
331
-
332
-
333
-
334
-
335
-
336
-
337
-
338
-
339
-
340
-
341
-
342
-
343
-
344
-
345
-
346
-
347
-
348
-
349
-
350
-
351
-
352
-
353
-
354
-
355
-
356
-
357
-
358
-
359
-
360
-
361
-
362
-
363
-
364
-
365
-
366
-
367
-
368
-
369
-
370
-
371
-
372
-
373
-
374
-
375
-
376
-
377
-
378
-
379
-
380
-
381
-
382
-
383
-
384
-
385
-
386
-
387
-
388
-
389
-
390
-
391
-
392
-
393
-
394
-
395
-
396
-
397
-
398
-
399
-
400
-
401
-
402
-
403
-
404
-
405
-
406
-
407
-
408
-
409
-
410
-
411
-
412
-
413
-
414
-
415
-
416
-
417
-
418
-
419
-
420
-
421
-
422
-
423
-
424
-
425
-
426
-
427
-
428
-
429
-
430
-
431
-
432
-
433
-
434
-
435
-
436
-
437
-
438
-
439
-
440
-
441
-
442
-
443
-
444
-
445
-
446
-
447
-
448
-
449
-
450
-
451
-
452
-
453
-
454
-
455
-
456
-
457
-
458
-
459
-
460
-
461
-
462
-
463
-
464
-
465
-
466
-
467
-
468
-
469
-
470
-
471
-
472
-
473
-
474
-
475
-
476
-
477
-
478
-
479
-
480
-
481
-
482
-
483
-
484
 |
 |
