Canon imageCLASS MF7460 imageCLASS MF7400 Series Reference Guide - Page 175
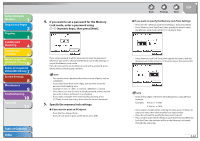
If you want to set a password for the Memory, Lock mode, enter a password using, numeric keys, then
 |
View all Canon imageCLASS MF7460 manuals
Add to My Manuals
Save this manual to your list of manuals |
Page 175 highlights
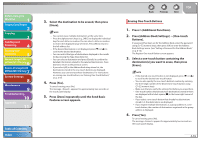
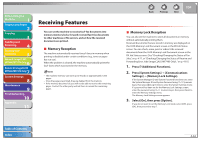
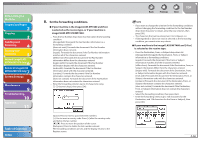
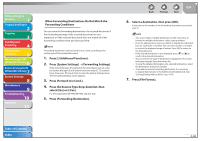
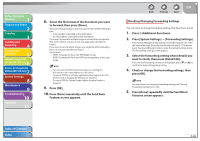
Before Using the Machine 1 Original and Paper 2 Copying 3 Sending and Receiving 4 Printing and Scanning 5 Network (imageCLASS 6 MF7480/MF7470 Only) Remote UI (imageCLASS 7 MF7480/MF7470 Only) System Settings 8 Maintenance 9 Troubleshooting 10 Appendix 11 Table of Contents Index 4. If you want to set a password for the Memory Lock mode, enter a password using - (numeric keys), then press [Next]. If you set a password, it will be necessary to enter the password whenever you want to change the Memory Lock mode settings, or cancel the Memory Lock mode. If you do not want to set the Memory Lock with a password, press [Next] without entering any numbers. - You cannot store a password that only consists of zeros, such as . - If you enter fewer than seven digits, the machine stores the password with leading zeros. Example: If or is entered, is stored. - Since there is no way to check a stored password, make sure that you write it down, and keep it in a safe place. - If you make a mistake when entering the password, press (Clear) to clear your entry, then enter the correct password. 5. Specify the memory lock settings. ˔ If you want to print an RX report: - Press [On] for . - If you do not want to print an RX report, press [Off ]. Back Previous Next TOP ˔ If you want to specify the Memory Lock Time Settings: - Press [On] for , then press [Next]. - Press [Memory Lock Start Time], then specify the time to enter the Memory Lock mode using - (numeric keys). - Press [Memory Lock End Time], then specify the time to exit the Memory Lock mode using - (numeric keys), then press [OK]. - Enter all four digits of the time (including zeros), using 24-hour notation. Examples: 9:05 a.m. → 0905 4:18 p.m. → 1618 - If you make a mistake when entering the time, press (Clear) to clear your entry, then enter another four digit number. - If you do not want to specify the time, press [Cancel]. - If you set the same time for Memory Lock Start Time and Memory Lock End Time, the machine will be in the Memory Lock mode through the entire day. 4-64
-
 1
1 -
2
-
3
-
4
-
5
-
6
-
7
-
8
-
9
-
10
-
11
-
12
-
13
-
14
-
15
-
16
-
17
-
18
-
19
-
20
-
21
-
22
-
23
-
24
-
25
-
26
-
27
-
28
-
29
-
30
-
31
-
32
-
33
-
34
-
35
-
36
-
37
-
38
-
39
-
40
-
41
-
42
-
43
-
44
-
45
-
46
-
47
-
48
-
49
-
50
-
51
-
52
-
53
-
54
-
55
-
56
-
57
-
58
-
59
-
60
-
61
-
62
-
63
-
64
-
65
-
66
-
67
-
68
-
69
-
70
-
71
-
72
-
73
-
74
-
75
-
76
-
77
-
78
-
79
-
80
-
81
-
82
-
83
-
84
-
85
-
86
-
87
-
88
-
89
-
90
-
91
-
92
-
93
-
94
-
95
-
96
-
97
-
98
-
99
-
100
-
101
-
102
-
103
-
104
-
105
-
106
-
107
-
108
-
109
-
110
-
111
-
112
-
113
-
114
-
115
-
116
-
117
-
118
-
119
-
120
-
121
-
122
-
123
-
124
-
125
-
126
-
127
-
128
-
129
-
130
-
131
-
132
-
133
-
134
-
135
-
136
-
137
-
138
-
139
-
140
-
141
-
142
-
143
-
144
-
145
-
146
-
147
-
148
-
149
-
150
-
151
-
152
-
153
-
154
-
155
-
156
-
157
-
158
-
159
-
160
-
161
-
162
-
163
-
164
-
165
-
166
-
167
-
168
-
169
-
 170
170 -
 171
171 -
 172
172 -
 173
173 -
 174
174 -
 175
175 -
 176
176 -
 177
177 -
 178
178 -
 179
179 -
 180
180 -
181
-
182
-
183
-
184
-
185
-
186
-
187
-
188
-
189
-
190
-
191
-
192
-
193
-
194
-
195
-
196
-
197
-
198
-
199
-
200
-
201
-
202
-
203
-
204
-
205
-
206
-
207
-
208
-
209
-
210
-
211
-
212
-
213
-
214
-
215
-
216
-
217
-
218
-
219
-
220
-
221
-
222
-
223
-
224
-
225
-
226
-
227
-
228
-
229
-
230
-
231
-
232
-
233
-
234
-
235
-
236
-
237
-
238
-
239
-
240
-
241
-
242
-
243
-
244
-
245
-
246
-
247
-
248
-
249
-
250
-
251
-
252
-
253
-
254
-
255
-
256
-
257
-
258
-
259
-
260
-
261
-
262
-
263
-
264
-
265
-
266
-
267
-
268
-
269
-
270
-
271
-
272
-
273
-
274
-
275
-
276
-
277
-
278
-
279
-
280
-
281
-
282
-
283
-
284
-
285
-
286
-
287
-
288
-
289
-
290
-
291
-
292
-
293
-
294
-
295
-
296
-
297
-
298
-
299
-
300
-
301
-
302
-
303
-
304
-
305
-
306
-
307
-
308
-
309
-
310
-
311
-
312
-
313
-
314
-
315
-
316
-
317
-
318
-
319
-
320
-
321
-
322
-
323
-
324
-
325
-
326
-
327
-
328
-
329
-
330
-
331
-
332
-
333
-
334
-
335
-
336
-
337
-
338
-
339
-
340
-
341
-
342
-
343
-
344
-
345
-
346
-
347
-
348
-
349
-
350
-
351
-
352
-
353
-
354
-
355
-
356
-
357
-
358
-
359
-
360
-
361
-
362
-
363
-
364
-
365
-
366
-
367
-
368
-
369
-
370
-
371
-
372
-
373
-
374
-
375
-
376
-
377
-
378
-
379
-
380
-
381
-
382
-
383
-
384
-
385
-
386
-
387
-
388
-
389
-
390
-
391
-
392
-
393
-
394
-
395
-
396
-
397
-
398
-
399
-
400
-
401
-
402
-
403
-
404
-
405
-
406
-
407
-
408
-
409
-
410
-
411
-
412
-
413
-
414
-
415
-
416
-
417
-
418
-
419
-
420
-
421
-
422
-
423
-
424
-
425
-
426
-
427
-
428
-
429
-
430
-
431
-
432
-
433
-
434
-
435
-
436
-
437
-
438
-
439
-
440
-
441
-
442
-
443
-
444
-
445
-
446
-
447
-
448
-
449
-
450
-
451
-
452
-
453
-
454
-
455
-
456
-
457
-
458
-
459
-
460
-
461
-
462
-
463
-
464
-
465
-
466
-
467
-
468
-
469
-
470
-
471
-
472
-
473
-
474
-
475
-
476
-
477
-
478
-
479
-
480
-
481
-
482
-
483
-
484
 |
 |
