Canon imageCLASS MF7460 imageCLASS MF7400 Series Reference Guide - Page 159
Set [Host Name], [File Path], [User], and, Registering File Server Addresses
 |
View all Canon imageCLASS MF7460 manuals
Add to My Manuals
Save this manual to your list of manuals |
Page 159 highlights
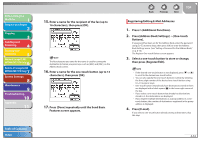
Before Using the Machine 1 Original and Paper 2 Copying 3 Sending and Receiving 4 Printing and Scanning 5 Network (imageCLASS 6 MF7480/MF7470 Only) Remote UI (imageCLASS 7 MF7480/MF7470 Only) System Settings 8 Maintenance 9 Troubleshooting 10 Appendix 11 Registering File Server Addresses If Language Switch in Common Settings is set to [On], the Host Name and File Path of the file server destination may not be displayed correctly, so you may not be able to refer to them. 1. Press (Additional Functions). 2. Press [Address Book Settings] → [Register Address] → [Register New Add]. If a password has been set for the Address Book, enter the password using - (numeric keys), then press [OK] to enter the Address Book Settings menu. (See "Setting a Password for the Address Book," on p. 8-16.) The Register New Address screen appears. 3. Press [File]. 4. Press the Protocol drop-down list, then select the desired protocol. [FTP]: Select this protocol if you are sending documents to a computer running Sun Solaris 2.6 or later, Mac OS X, Internet Information Services 5.0 under Windows 2000 Server, Internet Information Services 5.1 under Windows XP Professional, Internet Information Services 6.0 under Windows 2003 Server, Internet Information Services 7.0 under Windows Vista, or Red Hat Linux 7.2. [Windows (SMB)]: Select this protocol if you are sending documents to a computer running UNIX/Linux (Samba 2.2.8a or later) or Windows 98/Me/2000/XP/Server 2003/Vista. Back Previous Next TOP 5. Set [Host Name], [File Path], [User], and [Password]. For instructions on specifying each of the settings for FTP and Windows (SMB), see "Specifying a File Server (imageCLASS MF7480 Only)," on p. 4-24. 6. Press [Next]. 7. Enter a name for file server address (up to 16 characters), then press [OK]. The first character that you enter for the name is used for sorting the address list when you press keys, such as [ABC] and [DEF], on the Address Book screen. 8. Press [Done] repeatedly until the Send Basic Features screen appears. Table of Contents Index 4-48
-
 1
1 -
2
-
3
-
4
-
5
-
6
-
7
-
8
-
9
-
10
-
11
-
12
-
13
-
14
-
15
-
16
-
17
-
18
-
19
-
20
-
21
-
22
-
23
-
24
-
25
-
26
-
27
-
28
-
29
-
30
-
31
-
32
-
33
-
34
-
35
-
36
-
37
-
38
-
39
-
40
-
41
-
42
-
43
-
44
-
45
-
46
-
47
-
48
-
49
-
50
-
51
-
52
-
53
-
54
-
55
-
56
-
57
-
58
-
59
-
60
-
61
-
62
-
63
-
64
-
65
-
66
-
67
-
68
-
69
-
70
-
71
-
72
-
73
-
74
-
75
-
76
-
77
-
78
-
79
-
80
-
81
-
82
-
83
-
84
-
85
-
86
-
87
-
88
-
89
-
90
-
91
-
92
-
93
-
94
-
95
-
96
-
97
-
98
-
99
-
100
-
101
-
102
-
103
-
104
-
105
-
106
-
107
-
108
-
109
-
110
-
111
-
112
-
113
-
114
-
115
-
116
-
117
-
118
-
119
-
120
-
121
-
122
-
123
-
124
-
125
-
126
-
127
-
128
-
129
-
130
-
131
-
132
-
133
-
134
-
135
-
136
-
137
-
138
-
139
-
140
-
141
-
142
-
143
-
144
-
145
-
146
-
147
-
148
-
149
-
150
-
151
-
152
-
153
-
 154
154 -
 155
155 -
 156
156 -
 157
157 -
 158
158 -
 159
159 -
 160
160 -
 161
161 -
 162
162 -
 163
163 -
 164
164 -
165
-
166
-
167
-
168
-
169
-
170
-
171
-
172
-
173
-
174
-
175
-
176
-
177
-
178
-
179
-
180
-
181
-
182
-
183
-
184
-
185
-
186
-
187
-
188
-
189
-
190
-
191
-
192
-
193
-
194
-
195
-
196
-
197
-
198
-
199
-
200
-
201
-
202
-
203
-
204
-
205
-
206
-
207
-
208
-
209
-
210
-
211
-
212
-
213
-
214
-
215
-
216
-
217
-
218
-
219
-
220
-
221
-
222
-
223
-
224
-
225
-
226
-
227
-
228
-
229
-
230
-
231
-
232
-
233
-
234
-
235
-
236
-
237
-
238
-
239
-
240
-
241
-
242
-
243
-
244
-
245
-
246
-
247
-
248
-
249
-
250
-
251
-
252
-
253
-
254
-
255
-
256
-
257
-
258
-
259
-
260
-
261
-
262
-
263
-
264
-
265
-
266
-
267
-
268
-
269
-
270
-
271
-
272
-
273
-
274
-
275
-
276
-
277
-
278
-
279
-
280
-
281
-
282
-
283
-
284
-
285
-
286
-
287
-
288
-
289
-
290
-
291
-
292
-
293
-
294
-
295
-
296
-
297
-
298
-
299
-
300
-
301
-
302
-
303
-
304
-
305
-
306
-
307
-
308
-
309
-
310
-
311
-
312
-
313
-
314
-
315
-
316
-
317
-
318
-
319
-
320
-
321
-
322
-
323
-
324
-
325
-
326
-
327
-
328
-
329
-
330
-
331
-
332
-
333
-
334
-
335
-
336
-
337
-
338
-
339
-
340
-
341
-
342
-
343
-
344
-
345
-
346
-
347
-
348
-
349
-
350
-
351
-
352
-
353
-
354
-
355
-
356
-
357
-
358
-
359
-
360
-
361
-
362
-
363
-
364
-
365
-
366
-
367
-
368
-
369
-
370
-
371
-
372
-
373
-
374
-
375
-
376
-
377
-
378
-
379
-
380
-
381
-
382
-
383
-
384
-
385
-
386
-
387
-
388
-
389
-
390
-
391
-
392
-
393
-
394
-
395
-
396
-
397
-
398
-
399
-
400
-
401
-
402
-
403
-
404
-
405
-
406
-
407
-
408
-
409
-
410
-
411
-
412
-
413
-
414
-
415
-
416
-
417
-
418
-
419
-
420
-
421
-
422
-
423
-
424
-
425
-
426
-
427
-
428
-
429
-
430
-
431
-
432
-
433
-
434
-
435
-
436
-
437
-
438
-
439
-
440
-
441
-
442
-
443
-
444
-
445
-
446
-
447
-
448
-
449
-
450
-
451
-
452
-
453
-
454
-
455
-
456
-
457
-
458
-
459
-
460
-
461
-
462
-
463
-
464
-
465
-
466
-
467
-
468
-
469
-
470
-
471
-
472
-
473
-
474
-
475
-
476
-
477
-
478
-
479
-
480
-
481
-
482
-
483
-
484
 |
 |
