HP Q7815A HP LaserJet P3005 - User Guide - Page 117
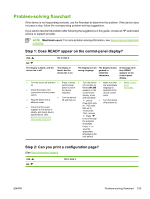
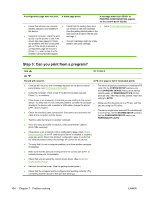
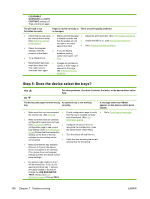
Step 4: Does the job print as expected?, Problem-solving flowchart
 |
View all HP Q7815A manuals
Add to My Manuals
Save this manual to your list of manuals |
Page 117 highlights
● If printing with the PS driver, on the PRINTING submenu (on the CONFIGURE DEVICE menu) at the device control panel, set PRINT PS ERRORS=ON, and then print the job again. If an error page prints, see the instructions in the next column. ● On the SYSTEM SETUP submenu (on the CONFIGURE DEVICE menu) at the device control panel, make sure that PERSONALITY=AUTO. ● You might be missing a device message that could help you solve the problem. On the SYSTEM SETUP submenu (on the CONFIGURE DEVICE menu) at the device control panel, temporarily turn off the CLEARABLE WARNINGS and AUTO-CONTINUE settings. Then, print the job again. Step 4: Does the job print as expected? YES Go to step 5. NO Print is garbled, or only a Printing stops in the middle Print speed is slower than A device control panel portion of the page prints. of the job. expected. setting is not taking effect. ● Check that you are using ● You might have ● Simplify the print job. ● Check settings in the the correct device driver. (See Select the correct printer driver.) ● pressed Stop. Check that the power ● Add more memory to the device. (See Install device driver or program. (The device driver and program ● The data file sent to the device might be corrupt. supplied to the device is steady, and that it meets device specifications. ● memory) Turn banner pages off. settings override device control-panel settings.) To test, try printing it on (See Electrical (See your network another device (if specifications.) administrator.) possible), or try a different file. ● Note that slower speeds should be expected if ● Check the interface you are printing narrow cable connections. Test paper, printing from the cable by trying it on tray 1, using the HIGH 2 another computer (if fuser mode, or have set possible). Small Paper Speed to ● Replace the interface SLOW. cable with a high-quality cable (see Part numbers). ● Simplify the print job, print at a lower resolution, or install more device memory. (See Install memory.) ● You might be missing a device message that could help you solve the problem. On the SYSTEM SETUP submenu (on the CONFIGURE DEVICE menu) at the device control panel, temporarily turn the ENWW Problem-solving flowchart 105
-
 1
1 -
2
-
3
-
4
-
5
-
6
-
7
-
8
-
9
-
10
-
11
-
12
-
13
-
14
-
15
-
16
-
17
-
18
-
19
-
20
-
21
-
22
-
23
-
24
-
25
-
26
-
27
-
28
-
29
-
30
-
31
-
32
-
33
-
34
-
35
-
36
-
37
-
38
-
39
-
40
-
41
-
42
-
43
-
44
-
45
-
46
-
47
-
48
-
49
-
50
-
51
-
52
-
53
-
54
-
55
-
56
-
57
-
58
-
59
-
60
-
61
-
62
-
63
-
64
-
65
-
66
-
67
-
68
-
69
-
70
-
71
-
72
-
73
-
74
-
75
-
76
-
77
-
78
-
79
-
80
-
81
-
82
-
83
-
84
-
85
-
86
-
87
-
88
-
89
-
90
-
91
-
92
-
93
-
94
-
95
-
96
-
97
-
98
-
99
-
100
-
101
-
102
-
103
-
104
-
105
-
106
-
107
-
108
-
109
-
110
-
111
-
 112
112 -
 113
113 -
 114
114 -
 115
115 -
 116
116 -
 117
117 -
 118
118 -
 119
119 -
 120
120 -
 121
121 -
 122
122 -
123
-
124
-
125
-
126
-
127
-
128
-
129
-
130
-
131
-
132
-
133
-
134
-
135
-
136
-
137
-
138
-
139
-
140
-
141
-
142
-
143
-
144
-
145
-
146
-
147
-
148
-
149
-
150
-
151
-
152
-
153
-
154
-
155
-
156
-
157
-
158
-
159
-
160
-
161
-
162
-
163
-
164
-
165
-
166
-
167
-
168
-
169
-
170
-
171
-
172
-
173
-
174
-
175
-
176
-
177
-
178
-
179
-
180
-
181
-
182
-
183
-
184
-
185
-
186
-
187
-
188
-
189
-
190
-
191
-
192
-
193
-
194
-
195
-
196
-
197
-
198
-
199
-
200
-
201
-
202
-
203
-
204
-
205
-
206
-
207
-
208
-
209
-
210
-
211
-
212
-
213
-
214
-
215
-
216
-
217
-
218
 |
 |