HP Q7815A HP LaserJet P3005 - User Guide - Page 49
Clearable warnings, Auto continue, Cartridge low, CON DEVICE, SYSTEM SETUP, CONTINUE
 |
View all HP Q7815A manuals
Add to My Manuals
Save this manual to your list of manuals |
Page 49 highlights
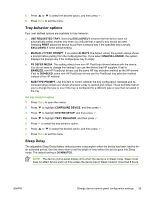
Clearable warnings Use this feature to determine the display time of control-panel clearable warnings by selecting ON or JOB. The default value is JOB. ● ON: Clearable warnings appear until you press . ● JOB: Clearable warnings appear until the end of the job for which they were generated. Set the clearable warnings 1. Press Menu to open the menus. 2. Press to highlight CONFIGURE DEVICE, and then press . 3. Press to highlight SYSTEM SETUP, and then press . 4. Press to highlight CLEARABLE WARNINGS, and then press . 5. Press or to select the appropriate setting, and then press . 6. Press Menu to exit the menu. Auto continue You can determine device behavior when the system generates an auto-continuable error. ON is the default setting. ● Select ON if you want an error message to appear for 10 seconds before the device automatically continues to print. ● Select OFF to pause printing any time an error message appears and until you press . Set auto continue 1. Press Menu to open the menus. 2. Press to highlight CONFIGURE DEVICE, and then press . 3. Press to highlight SYSTEM SETUP, and then press . 4. Press to highlight AUTO CONTINUE, and then press . 5. Press or to select the appropriate setting, and then press . 6. Press Menu to exit the menu. Cartridge low The device has two options for reporting that print-cartridge life is low: CONTINUE is the default value. ● Select CONTINUE to allow the device to continue printing while a warning appears and until the print cartridge is replaced. ● Select STOP if you want the device to pause printing until you replace the used print cartridge or press , which allows the device to print while the warning appears. ENWW Change device-control-panel configuration settings 37
-
 1
1 -
2
-
3
-
4
-
5
-
6
-
7
-
8
-
9
-
10
-
11
-
12
-
13
-
14
-
15
-
16
-
17
-
18
-
19
-
20
-
21
-
22
-
23
-
24
-
25
-
26
-
27
-
28
-
29
-
30
-
31
-
32
-
33
-
34
-
35
-
36
-
37
-
38
-
39
-
40
-
41
-
42
-
43
-
 44
44 -
 45
45 -
 46
46 -
 47
47 -
 48
48 -
 49
49 -
 50
50 -
 51
51 -
 52
52 -
 53
53 -
 54
54 -
55
-
56
-
57
-
58
-
59
-
60
-
61
-
62
-
63
-
64
-
65
-
66
-
67
-
68
-
69
-
70
-
71
-
72
-
73
-
74
-
75
-
76
-
77
-
78
-
79
-
80
-
81
-
82
-
83
-
84
-
85
-
86
-
87
-
88
-
89
-
90
-
91
-
92
-
93
-
94
-
95
-
96
-
97
-
98
-
99
-
100
-
101
-
102
-
103
-
104
-
105
-
106
-
107
-
108
-
109
-
110
-
111
-
112
-
113
-
114
-
115
-
116
-
117
-
118
-
119
-
120
-
121
-
122
-
123
-
124
-
125
-
126
-
127
-
128
-
129
-
130
-
131
-
132
-
133
-
134
-
135
-
136
-
137
-
138
-
139
-
140
-
141
-
142
-
143
-
144
-
145
-
146
-
147
-
148
-
149
-
150
-
151
-
152
-
153
-
154
-
155
-
156
-
157
-
158
-
159
-
160
-
161
-
162
-
163
-
164
-
165
-
166
-
167
-
168
-
169
-
170
-
171
-
172
-
173
-
174
-
175
-
176
-
177
-
178
-
179
-
180
-
181
-
182
-
183
-
184
-
185
-
186
-
187
-
188
-
189
-
190
-
191
-
192
-
193
-
194
-
195
-
196
-
197
-
198
-
199
-
200
-
201
-
202
-
203
-
204
-
205
-
206
-
207
-
208
-
209
-
210
-
211
-
212
-
213
-
214
-
215
-
216
-
217
-
218
 |
 |