HP Q7815A HP LaserJet P3005 - User Guide - Page 203
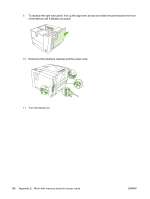
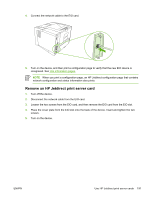
Remove an HP Jetdirect print server card, Loosen the two screws from the EIO card
 |
View all HP Q7815A manuals
Add to My Manuals
Save this manual to your list of manuals |
Page 203 highlights
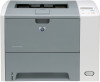
4. Connect the network cable to the EIO card. 5. Turn on the device, and then print a configuration page to verify that the new EIO device is recognized. See Use information pages. NOTE When you print a configuration page, an HP Jetdirect configuration page that contains network configuration and status information also prints. Remove an HP Jetdirect print server card 1. Turn off the device. 2. Disconnect the network cable from the EIO card. 3. Loosen the two screws from the EIO card, and then remove the EIO card from the EIO slot. 4. Place the cover plate from the EIO slot onto the back of the device. Insert and tighten the two screws. 5. Turn on the device. ENWW Use HP Jetdirect print server cards 191
-
 1
1 -
2
-
3
-
4
-
5
-
6
-
7
-
8
-
9
-
10
-
11
-
12
-
13
-
14
-
15
-
16
-
17
-
18
-
19
-
20
-
21
-
22
-
23
-
24
-
25
-
26
-
27
-
28
-
29
-
30
-
31
-
32
-
33
-
34
-
35
-
36
-
37
-
38
-
39
-
40
-
41
-
42
-
43
-
44
-
45
-
46
-
47
-
48
-
49
-
50
-
51
-
52
-
53
-
54
-
55
-
56
-
57
-
58
-
59
-
60
-
61
-
62
-
63
-
64
-
65
-
66
-
67
-
68
-
69
-
70
-
71
-
72
-
73
-
74
-
75
-
76
-
77
-
78
-
79
-
80
-
81
-
82
-
83
-
84
-
85
-
86
-
87
-
88
-
89
-
90
-
91
-
92
-
93
-
94
-
95
-
96
-
97
-
98
-
99
-
100
-
101
-
102
-
103
-
104
-
105
-
106
-
107
-
108
-
109
-
110
-
111
-
112
-
113
-
114
-
115
-
116
-
117
-
118
-
119
-
120
-
121
-
122
-
123
-
124
-
125
-
126
-
127
-
128
-
129
-
130
-
131
-
132
-
133
-
134
-
135
-
136
-
137
-
138
-
139
-
140
-
141
-
142
-
143
-
144
-
145
-
146
-
147
-
148
-
149
-
150
-
151
-
152
-
153
-
154
-
155
-
156
-
157
-
158
-
159
-
160
-
161
-
162
-
163
-
164
-
165
-
166
-
167
-
168
-
169
-
170
-
171
-
172
-
173
-
174
-
175
-
176
-
177
-
178
-
179
-
180
-
181
-
182
-
183
-
184
-
185
-
186
-
187
-
188
-
189
-
190
-
191
-
192
-
193
-
194
-
195
-
196
-
197
-
 198
198 -
 199
199 -
 200
200 -
 201
201 -
 202
202 -
 203
203 -
 204
204 -
 205
205 -
 206
206 -
 207
207 -
 208
208 -
209
-
210
-
211
-
212
-
213
-
214
-
215
-
216
-
217
-
218
 |
 |
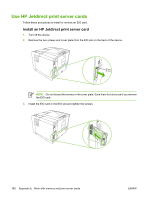
4.
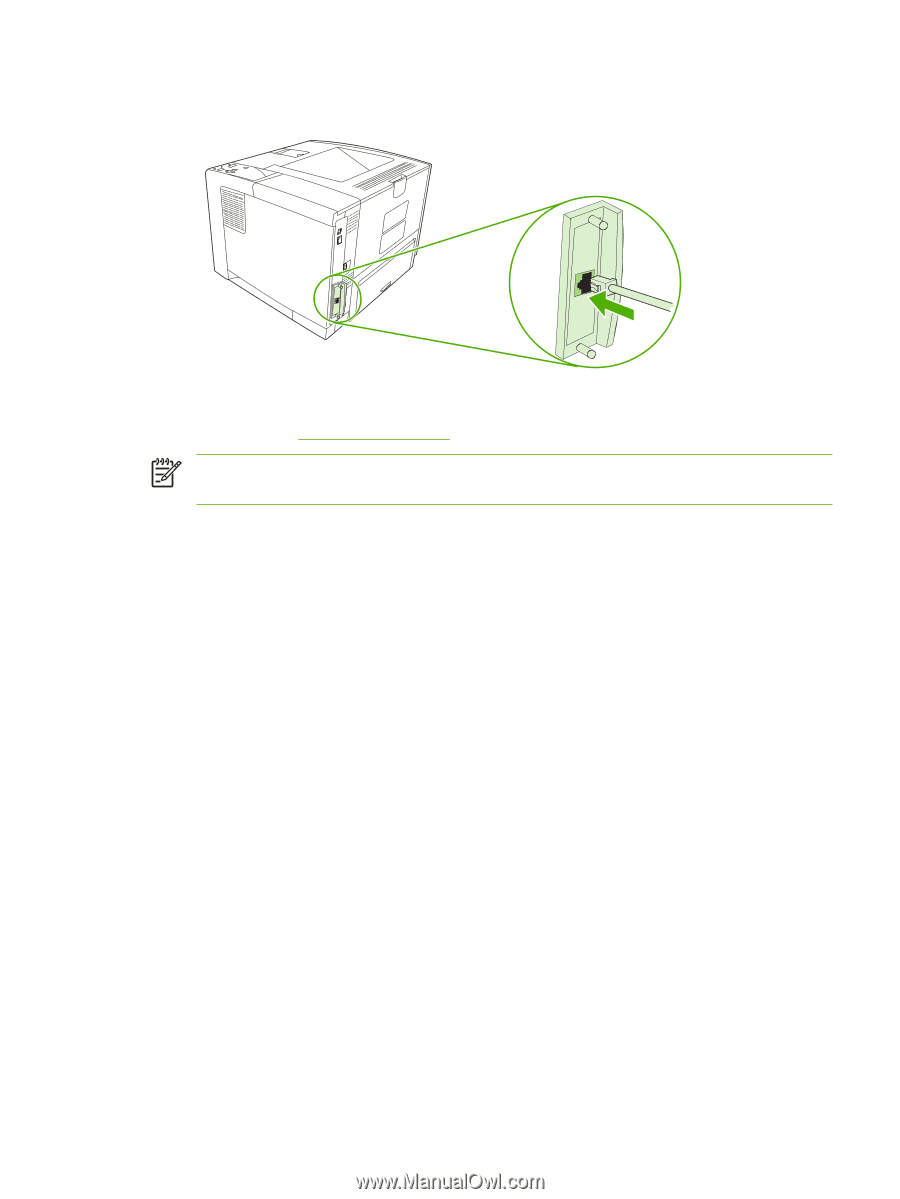
Connect the network cable to the EIO card.
5.
Turn on the device, and then print a configuration page to verify that the new EIO device is
recognized. See
Use information pages
.
NOTE
When you print a configuration page, an HP Jetdirect configuration page that contains
network configuration and status information also prints.
Remove an HP Jetdirect print server card
1.
Turn off the device.
2.
Disconnect the network cable from the EIO card.
3.
Loosen the two screws from the EIO card, and then remove the EIO card from the EIO slot.
4.
Place the cover plate from the EIO slot onto the back of the device. Insert and tighten the two
screws.
5.
Turn on the device.
ENWW
Use HP Jetdirect print server cards
191