HP Q7815A HP LaserJet P3005 - User Guide - Page 142
Clear jams from the print-cartridge area
 |
View all HP Q7815A manuals
Add to My Manuals
Save this manual to your list of manuals |
Page 142 highlights
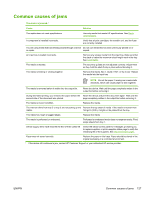
3. Before replacing the tray, make sure the paper is flat in the tray at all four corners and below the tabs on the guides. 4. Open and close the top cover to clear the jam message. If a jam message persists, there is still media in the device. Look for media in other locations. Clear jams from the print-cartridge area 1. Open the top cover and remove the print cartridge. CAUTION To prevent damage to the print cartridge, do not expose it to light for more than a few minutes. 130 Chapter 7 Problem solving ENWW
-
 1
1 -
2
-
3
-
4
-
5
-
6
-
7
-
8
-
9
-
10
-
11
-
12
-
13
-
14
-
15
-
16
-
17
-
18
-
19
-
20
-
21
-
22
-
23
-
24
-
25
-
26
-
27
-
28
-
29
-
30
-
31
-
32
-
33
-
34
-
35
-
36
-
37
-
38
-
39
-
40
-
41
-
42
-
43
-
44
-
45
-
46
-
47
-
48
-
49
-
50
-
51
-
52
-
53
-
54
-
55
-
56
-
57
-
58
-
59
-
60
-
61
-
62
-
63
-
64
-
65
-
66
-
67
-
68
-
69
-
70
-
71
-
72
-
73
-
74
-
75
-
76
-
77
-
78
-
79
-
80
-
81
-
82
-
83
-
84
-
85
-
86
-
87
-
88
-
89
-
90
-
91
-
92
-
93
-
94
-
95
-
96
-
97
-
98
-
99
-
100
-
101
-
102
-
103
-
104
-
105
-
106
-
107
-
108
-
109
-
110
-
111
-
112
-
113
-
114
-
115
-
116
-
117
-
118
-
119
-
120
-
121
-
122
-
123
-
124
-
125
-
126
-
127
-
128
-
129
-
130
-
131
-
132
-
133
-
134
-
135
-
136
-
 137
137 -
 138
138 -
 139
139 -
 140
140 -
 141
141 -
 142
142 -
 143
143 -
 144
144 -
 145
145 -
 146
146 -
 147
147 -
148
-
149
-
150
-
151
-
152
-
153
-
154
-
155
-
156
-
157
-
158
-
159
-
160
-
161
-
162
-
163
-
164
-
165
-
166
-
167
-
168
-
169
-
170
-
171
-
172
-
173
-
174
-
175
-
176
-
177
-
178
-
179
-
180
-
181
-
182
-
183
-
184
-
185
-
186
-
187
-
188
-
189
-
190
-
191
-
192
-
193
-
194
-
195
-
196
-
197
-
198
-
199
-
200
-
201
-
202
-
203
-
204
-
205
-
206
-
207
-
208
-
209
-
210
-
211
-
212
-
213
-
214
-
215
-
216
-
217
-
218
 |
 |
3.
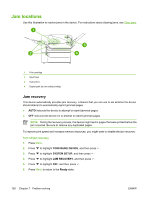
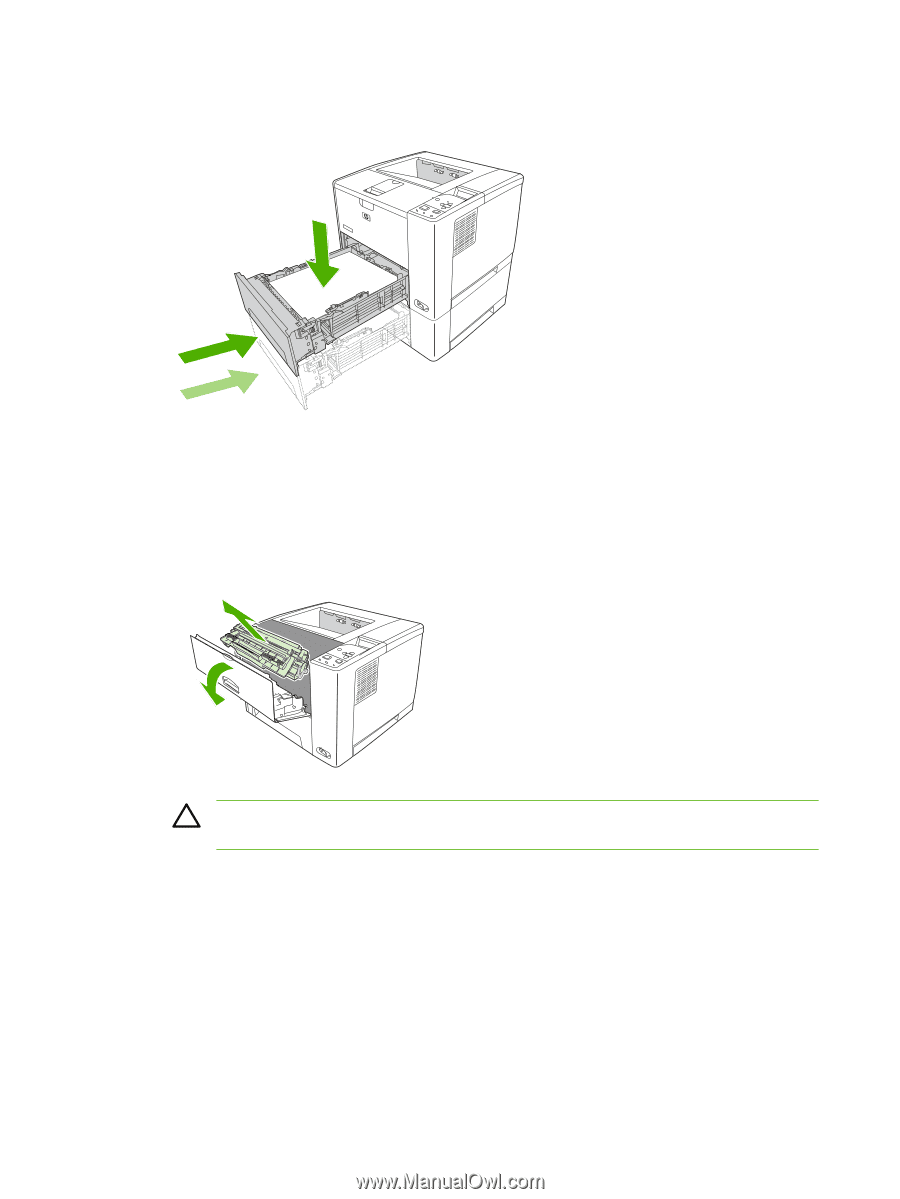
Before replacing the tray, make sure the paper is flat in the tray at all four corners and below the
tabs on the guides.
4.
Open and close the top cover to clear the jam message.
If a jam message persists, there is still media in the device. Look for media in other locations.
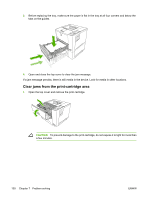
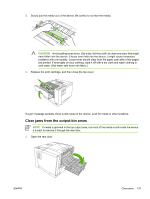
Clear jams from the print-cartridge area
1.
Open the top cover and remove the print cartridge.
CAUTION
To prevent damage to the print cartridge, do not expose it to light for more than
a few minutes.
130
Chapter 7
Problem solving
ENWW