HP Q7815A HP LaserJet P3005 - User Guide - Page 51
Ram Disk, Language, Jam Recovery, Con Device, System Setup, Xxx Mb
 |
View all HP Q7815A manuals
Add to My Manuals
Save this manual to your list of manuals |
Page 51 highlights
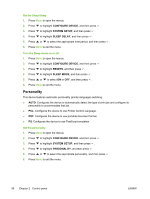
4. Press to highlight JAM RECOVERY, and then press . 5. Press or to select the appropriate setting, and then press . 6. Press Menu to exit the menu. RAM disk This option determines how the RAM disk feature is configured. This option is available only if the device has at least 8 MB of free memory. The default is AUTO. ● AUTO: The device determines the optimal RAM disk size based on the amount of available memory. ● OFF: The RAM disk is disabled, but a minimal RAM disk is still active (sufficient to scan one page). Set the RAM disk 1. Press Menu to open the menus. 2. Press to highlight CONFIGURE DEVICE, and then press . 3. Press to highlight SYSTEM SETUP, and then press . 4. Press to highlight RAM DISK, and then press . 5. Press or to select the appropriate setting, and then press . 6. Press Menu to exit the menu. Language If LANGUAGE appears in English on the control panel, use the following procedure. Otherwise, turn the device off and then on again. When XXX MB appears, press and hold . When all three control panel lights are lit, release and use the following procedure to set the language. Select the language during initial installation 1. Turn on the device. 2. When LANGUAGE appears on the control-panel display in the default language, press to highlight the preferred language, and then press . Change the language after the initial configuration After the initial installation, you can change the control-panel display language from the control panel. 1. Press Menu. 2. Use to highlight CONFIGURE DEVICE, and then press . 3. Use to highlight SYSTEM SETUP, and then press . 4. Use to highlight LANGUAGE, and then press . 5. Use or to highlight the appropriate language, and then press . 6. Press Menu to exit the menu. ENWW Change device-control-panel configuration settings 39
-
 1
1 -
2
-
3
-
4
-
5
-
6
-
7
-
8
-
9
-
10
-
11
-
12
-
13
-
14
-
15
-
16
-
17
-
18
-
19
-
20
-
21
-
22
-
23
-
24
-
25
-
26
-
27
-
28
-
29
-
30
-
31
-
32
-
33
-
34
-
35
-
36
-
37
-
38
-
39
-
40
-
41
-
42
-
43
-
44
-
45
-
 46
46 -
 47
47 -
 48
48 -
 49
49 -
 50
50 -
 51
51 -
 52
52 -
 53
53 -
 54
54 -
 55
55 -
 56
56 -
57
-
58
-
59
-
60
-
61
-
62
-
63
-
64
-
65
-
66
-
67
-
68
-
69
-
70
-
71
-
72
-
73
-
74
-
75
-
76
-
77
-
78
-
79
-
80
-
81
-
82
-
83
-
84
-
85
-
86
-
87
-
88
-
89
-
90
-
91
-
92
-
93
-
94
-
95
-
96
-
97
-
98
-
99
-
100
-
101
-
102
-
103
-
104
-
105
-
106
-
107
-
108
-
109
-
110
-
111
-
112
-
113
-
114
-
115
-
116
-
117
-
118
-
119
-
120
-
121
-
122
-
123
-
124
-
125
-
126
-
127
-
128
-
129
-
130
-
131
-
132
-
133
-
134
-
135
-
136
-
137
-
138
-
139
-
140
-
141
-
142
-
143
-
144
-
145
-
146
-
147
-
148
-
149
-
150
-
151
-
152
-
153
-
154
-
155
-
156
-
157
-
158
-
159
-
160
-
161
-
162
-
163
-
164
-
165
-
166
-
167
-
168
-
169
-
170
-
171
-
172
-
173
-
174
-
175
-
176
-
177
-
178
-
179
-
180
-
181
-
182
-
183
-
184
-
185
-
186
-
187
-
188
-
189
-
190
-
191
-
192
-
193
-
194
-
195
-
196
-
197
-
198
-
199
-
200
-
201
-
202
-
203
-
204
-
205
-
206
-
207
-
208
-
209
-
210
-
211
-
212
-
213
-
214
-
215
-
216
-
217
-
218
 |
 |