Lenovo ThinkPad Edge E420s (English) User Guide - Page 100
Replacing memory
 |
View all Lenovo ThinkPad Edge E420s manuals
Add to My Manuals
Save this manual to your list of manuals |
Page 100 highlights
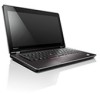
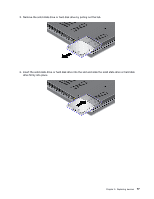
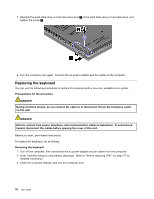
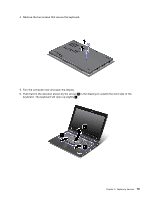
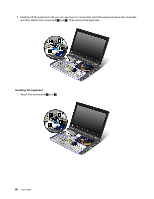
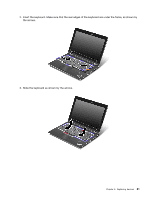
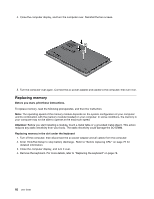
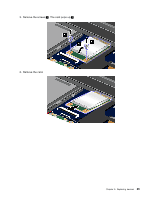
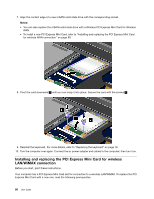
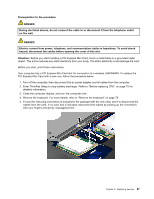
4. Close the computer display, and turn the computer over. Reinstall the two screws. 5. Turn the computer over again. Connect the ac power adapter and cables to the computer; then turn it on. Replacing memory Before you start, print these instructions. To replace memory, read the following prerequisites, and then the instruction. Note: The operating speed of the memory module depends on the system configuration of your computer and its combination with the memory module installed on your computer. In some conditions, the memory in your computer may not be able to operate at the maximum speed. Attention: Before you start installing a module, touch a metal table or a grounded metal object. This action reduces any static electricity from your body. The static electricity could damage the SO-DIMM. Replacing memory in the slot under the keyboard 1. Turn off the computer; then disconnect the ac power adapter and all cables from the computer. 2. Enter ThinkPad Setup to stop battery discharge. Refer to "Before replacing CRU" on page 75 for detailed information. 3. Close the computer display, and turn it over. 4. Remove the keyboard. For more details, refer to "Replacing the keyboard" on page 78. 82 User Guide
-
 1
1 -
2
-
3
-
4
-
5
-
6
-
7
-
8
-
9
-
10
-
11
-
12
-
13
-
14
-
15
-
16
-
17
-
18
-
19
-
20
-
21
-
22
-
23
-
24
-
25
-
26
-
27
-
28
-
29
-
30
-
31
-
32
-
33
-
34
-
35
-
36
-
37
-
38
-
39
-
40
-
41
-
42
-
43
-
44
-
45
-
46
-
47
-
48
-
49
-
50
-
51
-
52
-
53
-
54
-
55
-
56
-
57
-
58
-
59
-
60
-
61
-
62
-
63
-
64
-
65
-
66
-
67
-
68
-
69
-
70
-
71
-
72
-
73
-
74
-
75
-
76
-
77
-
78
-
79
-
80
-
81
-
82
-
83
-
84
-
85
-
86
-
87
-
88
-
89
-
90
-
91
-
92
-
93
-
94
-
 95
95 -
 96
96 -
 97
97 -
 98
98 -
 99
99 -
 100
100 -
 101
101 -
 102
102 -
 103
103 -
 104
104 -
 105
105 -
106
-
107
-
108
-
109
-
110
-
111
-
112
-
113
-
114
-
115
-
116
-
117
-
118
-
119
-
120
-
121
-
122
-
123
-
124
-
125
-
126
-
127
-
128
-
129
-
130
-
131
-
132
-
133
-
134
-
135
-
136
-
137
-
138
-
139
-
140
-
141
-
142
-
143
-
144
-
145
-
146
-
147
-
148
-
149
-
150
-
151
-
152
-
153
-
154
-
155
-
156
-
157
-
158
-
159
-
160
-
161
-
162
-
163
-
164
-
165
-
166
-
167
-
168
-
169
-
170
-
171
-
172
-
173
-
174
-
175
-
176
-
177
-
178
-
179
-
180
-
181
-
182
-
183
-
184
-
185
-
186
 |
 |
