Lexmark X925 Lexmark Document Distributor - Page 132
The solution stops responding, The solution cannot connect to the network, Settings, Security
 |
View all Lexmark X925 manuals
Add to My Manuals
Save this manual to your list of manuals |
Page 132 highlights
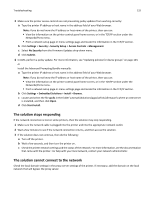
Troubleshooting 132 3 Make sure the printer access controls are not preventing policy updates from working correctly: a Type the printer IP address or host name in the address field of your Web browser. Note: If you do not know the IP address or host name of the printer, then you can: • View the information on the printer control panel home screen, or in the TCP/IP section under the Networks/Ports menu. • Print a network setup page or menu settings page and locate the information in the TCP/IP section. b Click Settings > Security > Security Setup > Access Controls > Management. c Select No Security from the Firmware Updates drop‑down menu. d Click Submit. 4 In LMC, perform a policy update. For more information, see "Updating policies for device groups" on page 104. or Install the Advanced Prompting Bundle manually: a Type the printer IP address or host name in the address field of your Web browser. Note: If you do not know the IP address or host name of the printer, then you can: • View the information on the printer control panel home screen, or in the TCP/IP section under the Networks/Ports menu. • Print a network setup page or menu settings page and locate the information in the TCP/IP section. b Click Settings > Embedded Solutions > Install > Browse. c Locate and select the file ap.fls in the folder \Lexmark\Solutions\apps\wf-ldss\firmware\ where an LDD server is installed, and then click Open. d Click Start Install. The solution stops responding If the network connection is lost on some printers, then the solution may stop responding. 1 Make sure the network cable is plugged into the printer and into the appropriate network outlet. 2 Wait a few minutes to see if the network connection returns, and then access the solution. 3 If the solution does not continue, then do the following: a Turn off the printer. b Wait a few seconds, and then turn the printer on. c Check the printer network settings and the status of the network. For more information, see the documentation that came with the printer. For help with your local network, contact your network administrator. The solution cannot connect to the network Check the local domain settings in the proxy server settings of the printer. If necessary, add the domain on the local network that will bypass the proxy server.
-
 1
1 -
2
-
3
-
4
-
5
-
6
-
7
-
8
-
9
-
10
-
11
-
12
-
13
-
14
-
15
-
16
-
17
-
18
-
19
-
20
-
21
-
22
-
23
-
24
-
25
-
26
-
27
-
28
-
29
-
30
-
31
-
32
-
33
-
34
-
35
-
36
-
37
-
38
-
39
-
40
-
41
-
42
-
43
-
44
-
45
-
46
-
47
-
48
-
49
-
50
-
51
-
52
-
53
-
54
-
55
-
56
-
57
-
58
-
59
-
60
-
61
-
62
-
63
-
64
-
65
-
66
-
67
-
68
-
69
-
70
-
71
-
72
-
73
-
74
-
75
-
76
-
77
-
78
-
79
-
80
-
81
-
82
-
83
-
84
-
85
-
86
-
87
-
88
-
89
-
90
-
91
-
92
-
93
-
94
-
95
-
96
-
97
-
98
-
99
-
100
-
101
-
102
-
103
-
104
-
105
-
106
-
107
-
108
-
109
-
110
-
111
-
112
-
113
-
114
-
115
-
116
-
117
-
118
-
119
-
120
-
121
-
122
-
123
-
124
-
125
-
126
-
 127
127 -
 128
128 -
 129
129 -
 130
130 -
 131
131 -
 132
132 -
 133
133 -
 134
134 -
 135
135 -
 136
136 -
 137
137 -
138
-
139
-
140
-
141
-
142
-
143
-
144
-
145
-
146
 |
 |