Actiontec MI424WR User Guide
Actiontec MI424WR Manual
 |
View all Actiontec MI424WR manuals
Add to My Manuals
Save this manual to your list of manuals |
Actiontec MI424WR manual content summary:
- Actiontec MI424WR | User Guide - Page 1
Wireless Broadband Router Model #: MI424WR Firmware Version: 4.0.16.1.44.28 User Manual Ver 2.0 Solutions for the Digital Life™ - Actiontec MI424WR | User Guide - Page 2
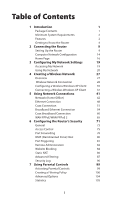
54 Coax Broadband Connection 60 WAN PPPoE/WAN PPPoE 2 65 6 Configuring the Router's Security 71 General 73 Access Control 75 Port Forwarding 78 DMZ (Demilitarized Zone) Host 80 Port Triggering 81 Remote Administration 82 Website Blocking 84 Static NAT 86 Advanced Filtering 87 - Actiontec MI424WR | User Guide - Page 3
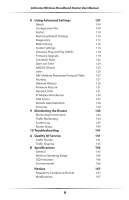
Actiontec Wireless Broadband Router User Manual 8 Using Advanced Settings 107 About 109 Configuration File 109 Restart 110 Restoring Default Settings 110 Diagnostics 111 MAC Cloning 112 System Settings 113 Universal Plug and Play (UPnP) 118 Firmware Upgrade 119 Scheduler Rules - Actiontec MI424WR | User Guide - Page 4
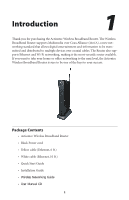
Wireless Broadband Router is sure to be one of the keys to your success. Package Contents s Actiontec Wireless Broadband Router s Black Power cord s Yellow cable (Ethernet, 6 ft.) s White cable (Ethernet, 10 ft.) s Quick Start Guide s Installation Guide s Wireless Networking Guide s User Manual - Actiontec MI424WR | User Guide - Page 5
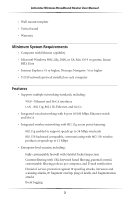
Actiontec Wireless Broadband Router User Manual s Wall-mount template s Vertical stand s MoCA s Integrated wired networking with 4-port 10/100 Mbps Ethernet switch and MoCA s Integrated wireless networking with 802.11g access point featuring: 802.11g enabled to support speeds up to 54 Mbps wirelessly - Actiontec MI424WR | User Guide - Page 6
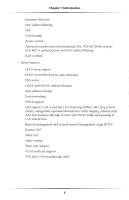
wireless protection featuring WPA, WEP 64/128 bit encryption, 802.1x authentication, and MAC address filtering ICSA certified s Other Features DHCP server option DHCP server/PPPoE server auto-detection DNS server LAN IP and WAN IP address selection MAC address cloning Port forwarding PPPoE support - Actiontec MI424WR | User Guide - Page 7
MI424WR Actiontec Wireless Broadband Router User Manual Getting to Know the Router This section contains a quick description of the Router's lights (LEDs), ports, etc. The Router features several indicator lights on its front panel, and a series of ports and switches on its rear panel. Front Panel - Actiontec MI424WR | User Guide - Page 8
Network Terminator), but authentication has not taken place (i.e., no IP address is present). Ethernet LAN Lights (1, 2, 3, 4) The Ethernet LAN lights illuminate when the Router is connected to a local network via one or more of its Ethernet ports. If flashing, data traffic is passing across the - Actiontec MI424WR | User Guide - Page 9
as well as a Reset button and Power switch. Coax Reset 10 10 100 10 100 10 100 100 Reset 4 3 2 1 On/Off 5VDC 3A Coax Port The Coax port connects the Router to the ISP or other devices using a coaxial cable. Reset Button To restore the Router's factory default settings, press and hold - Actiontec MI424WR | User Guide - Page 10
can be used when connecting to the ports. Power Switch The Power switch powers the Router on and off. Power Port The Power port connects the Router to an electrical wall outlet via the Power cord. MCaution: Do not unplug the Power cord from the Router during the reset process. Doing so may result in - Actiontec MI424WR | User Guide - Page 11
Actiontec Wireless Broadband Router User Manual This page left intentionally blank. 8 - Actiontec MI424WR | User Guide - Page 12
to seamlessly integrate the Router with the computer or local network. Moreover, zero-configuration is attained when taking advantage of Universal Plug-and-Play support in Windows XP. The Windows default network settings dictate that in most cases, the setup procedure described in the "Computer - Actiontec MI424WR | User Guide - Page 13
Actiontec Wireless Broadband Router User Manual 6. Make sure the computer is powered on, then plug the other end of the yellow Ethernet cable into an Ethernet port on the computer. 7. Make sure at least one of the Ethernet LAN lights on the front of the Router glows steadily green. This may take a - Actiontec MI424WR | User Guide - Page 14
Connecting the Router 2. The "Login" screen appears. Enter the default user name (admin) and pass- word (password) in the appropriate text boxes, then click OK. 3. The "Login Setup" screen appears. Select a new user name and password and enter them in the appropriate text boxes (the password must be - Actiontec MI424WR | User Guide - Page 15
Actiontec Wireless Broadband Router User Manual 6. Click Advanced at the top of the Home screen. The "Advanced" screen appears. 7. Click Date and Time. The "Date and Time" time zone from the "Time Zone" drop-down list, then click OK at the bottom of the screen. The Router is now configured. 12 - Actiontec MI424WR | User Guide - Page 16
to use 64/40-bit WEP encryption. 4. Make sure the changes were implemented by surfing the Internet from the computer. 5. Repeat these steps for every other computer to be connected to the Router wirelessly. Coaxial 1. Make sure all set top boxes are turned off. 2. Disconnect any adapter currently - Actiontec MI424WR | User Guide - Page 17
statically defined IP address and DNS address, or instructed to automatically obtain an IP address using the Network DHCP server. The Router is set up, by default, with an active DHCP server, and Actiontec recommends leaving this setting as is. Configuring a Computer to Use Dynamic IP Addressing To - Actiontec MI424WR | User Guide - Page 18
Properties. 3. In the "IP Address" tab, click the "Obtain an IP address automatically" radio button. 4. In the "DNS" tab, verify no DNS server is defined in the "DNS Service Search Order" text box and no suffix is defined in the "Domain Suffix Search Order" text box. Linux 1. Login into the system - Actiontec MI424WR | User Guide - Page 19
contains links to all of the configuration options of the Router: Wireless Setup (explained in chapter 4 of this manual), Network Connections (chapter 5), Security (chapter 6), Parental Control (chapter 7), Quality of Service (appendix A), Advanced (chapter 8), and System Monitoring (chapter 9). 16 - Actiontec MI424WR | User Guide - Page 20
connection type, name, IP address, and MAC (Media Access Control) address of all devices connected to the Router's network. The icon settings are described in more detail in chapter 3, "Configuring My Network Settings." Entertainment/General Information This section contains links to various Verizon - Actiontec MI424WR | User Guide - Page 21
Actiontec Wireless Broadband Router User Manual This page left intentionally blank. 18 - Actiontec MI424WR | User Guide - Page 22
Network Settings 3 Once the Wireless Broadband Router is physically connected and the MegaControl Panel's Home screen is displayed in a web browser, a list of the devices connected to the Router's network appears in the "My Network" section of the screen. From here, some basic network settings can - Actiontec MI424WR | User Guide - Page 23
Actiontec Wireless Broadband Router User Manual Using My Network Various settings can be accessed for a the website will also be blocked). If the website address has multiple IP addresses, the Router will resolve all additional addresses and automatically add them to the restrictions table. - Actiontec MI424WR | User Guide - Page 24
the "Advanced Settings" chapter of this manual). ☞ Note: Make sure the Router's date and time settings for your time zone are set correctly. 4. not, "Hostname Resolution Failed" appears. Click Refresh to update the status if necessary. If the Router fails to locate the website, do the following: - Actiontec MI424WR | User Guide - Page 25
Actiontec Wireless Broadband Router User Manual 2. Select the Internet protocol to be blocked from the see the "Advanced Settings" chapter of this manual). ☞ Note: Make sure the Router's date and time settings for your time zone are set correctly. 4. Click OK to save the changes. The Access Control - Actiontec MI424WR | User Guide - Page 26
To set this up on a networked device, locate the device in the My Network column, then click Enable Applications. The "Port Forwarding" screen appears. 1. Click Add. The "Add Port Forwarding Rule" screen appears. 2. Enter the local IP address or the host name of the computer providing the service in - Actiontec MI424WR | User Guide - Page 27
Actiontec Wireless Broadband Router User Manual that appears, enter the port number. If no port is identified, select "Same as Incoming Port." 5. If this port will be active all the time, select "Always" from the "When should this rule occur?" drop-down list. If the rule will only be active - Actiontec MI424WR | User Guide - Page 28
Chapter 3 Configuring My Network Settings 1. Click Test Connectivity. The "Diagnostics" screen appears. 2. Click Go. The Router runs a ping test, and the results are displayed in the Diagnostics screen. Rename This Device To rename a networked device, locate the device in the My - Actiontec MI424WR | User Guide - Page 29
Actiontec Wireless Broadband Router User Manual Enter the new name of the device in the "New Name" text box and, if needed, select a new icon for the device from the "New - Actiontec MI424WR | User Guide - Page 30
wireless security activated, by default. The level of security is 64/40-bit WEP, with a unique WEP key already entered. ☞ Note: The default WEP key is displayed on a sticker located on the bottom of the Router. The Router integrates multiple layers of security. These include the IEEE 802.1x port - Actiontec MI424WR | User Guide - Page 31
Actiontec Wireless Broadband Router User Manual Wireless Network Connection As soon as the Router is turned on, wireless networking is available. This section explains the wireless networking screens in the Router's MegaControl Panel. Wireless Setup Clicking on the "Wireless Setup" icon at the top - Actiontec MI424WR | User Guide - Page 32
enable SSID broadcast. If activated, the SSID of the Router's wireless network is broadcast wirelessly. To deactivate, click in the check box to make the check mark disappear. 802.11 Mode Select the wireless key for the Router's wireless network security configuration. The default setting is 64/40- - Actiontec MI424WR | User Guide - Page 33
of the Wireless Setup screen to generate the "Configure Wireless Access Point" screen. The top half of the screen is shown in the figure, below: General This section displays general communication parameters of the Router's wireless connection. Actiontec recommends not changing the default values in - Actiontec MI424WR | User Guide - Page 34
already entered, but it can be changed here. The default SSID can also be found on a sticker on the bottom of the Router. SSID Broadcast Select this check box to enable SSID broadcast. If activated, the SSID of the Router's wireless network is broadcast wirelessly. To deactivate, click in the check - Actiontec MI424WR | User Guide - Page 35
Actiontec Wireless Broadband Router User Manual Advanced Wireless Options The bottom of the Configure Wireless Access Point screen comprises "Advanced Wireless Options." Only experienced network technicians should make any changes to these settings. Transmission Rate Select the wireless transmission - Actiontec MI424WR | User Guide - Page 36
packet. Wireless Security Set the type of wireless security for the Router's wireless network in this section of the screen. Make sure the "Enabled" or AES). 4. Click in the "Group Key Update Interval" check box to activate the group key update interval, and set the interval time in the text box to - Actiontec MI424WR | User Guide - Page 37
Actiontec Wireless Broadband Router User Manual 802.1X WEP If 802.1X WEP (Wired Equivalent Privacy) was chosen, no other settings need to be changed. 802.1x WEP is a robust security protocol that uses port control with dynamically changing encryption keys automatically updated over the network. 802. - Actiontec MI424WR | User Guide - Page 38
OK to save changes. Internet Connection Firewall Click in the "Enabled" check box to activate the Router's firewall on the wireless connection. Actiontec recommends leaving this option deactivated. Additional IP Addresses Clicking New IP Address generates the "Additional IP Address Settings" screen - Actiontec MI424WR | User Guide - Page 39
Actiontec Wireless Broadband Router User Manual 2. Double-click the wireless connection icon. The "Wireless Network Connection" screen appears, displaying all available wireless networks in the vicinity. If the Router is connected and active, the Router's wireless connection is displayed. Note that - Actiontec MI424WR | User Guide - Page 40
section assumes the Router is set up with WPA security. 1. Click Network Connections in the Control Panel. The "Network Connections" window appears. 2. Double-click the wireless connection icon. The "Wireless Network Connection" screen appears, displaying the Router's wireless connection. Note that - Actiontec MI424WR | User Guide - Page 41
Actiontec Wireless Broadband Router User Manual 3. Click the connection once to mark it, then click Connect at the bottom of the screen. The following login window appears, asking for a "Network Key," which is the pre-shared key used when configuring the Router's WPA security (see the "WPA" section - Actiontec MI424WR | User Guide - Page 42
Network Connection Properties" window appears. Select Wireless Networks. 3. Click the connection to highlight it, then click Properties. The connection's "Properties Window" appears. 4. From the "Network Authentication" drop-down list, select WPA-PSK. 5. - Actiontec MI424WR | User Guide - Page 43
Actiontec Wireless Broadband Router User Manual 6. Enter the pre-shared key in both the "Network key" and the "Confirm net- work key" text boxes. 7. Click OK, then OK again. 8. When attempting to connect to the wireless network, the login window appears, pre-populated with the pre-shared key. Press - Actiontec MI424WR | User Guide - Page 44
Using Network Connections 5 The Wireless Broadband Router supports various local area network (LAN) and wide area network (WAN, on Internet) connections via Ethernet or coaxial cables. Network connections is used to configure the various parameters of the Router's network and Internet connections, - Actiontec MI424WR | User Guide - Page 45
Actiontec Wireless Broadband Router User Manual To select a connection, click on its name. The rest of this chapter describes the different network connections available on the Router underlying devices will not be able to get the DHCP address from the network interface to which they were connected. - Actiontec MI424WR | User Guide - Page 46
Network Click Settings in the "Network (Home/Office) Properties" screen to generate the "Configure Network (Home/Office)" screen. General The top part of the Configure Network (Home/Office) screen displays general communication parameters. Actiontec recommends not changing the default values in - Actiontec MI424WR | User Guide - Page 47
Actiontec Wireless Broadband Router User Manual Internet Protocol This section has three options: No IP Address, Obtain an IP Address Automatically, and Use the Following IP Address. No IP Address Select this option if the connection will have no IP address. This is useful if the connection operates - Actiontec MI424WR | User Guide - Page 48
devices. DHCP Server To set up the network bridge to function as a DHCP server: 1. Select DHCP Server. 2. Enter the IP address at which the Router starts issuing addresses in the "Start IP Address" text boxes. Since the Router's default IP address is 192.168.1.1, the Start IP Address must be 192.168 - Actiontec MI424WR | User Guide - Page 49
Actiontec Wireless Broadband Router User Manual 4. Enter the subnet mask address in the "Subnet Mask" text boxes. The subnet mask determines which portion of a destination LAN IP address is the network portion, and which portion is the host portion. 5. If Windows Internet Naming Service (WINS) is - Actiontec MI424WR | User Guide - Page 50
Settings" screen. Enter the vendor class identifier (provided by the manufacturer of the product), IP range, and priority level in the appropriate text boxes. Routing The Router can be configured to use static or dynamic routing. Dynamic Advanced To set up the Router's network bridge for advanced - Actiontec MI424WR | User Guide - Page 51
Click in the "Enabled" check box to activate the Router's firewall on the LAN Bridge connection. Actiontec does NOT recommend activating this feature. Additional IP Addresses Clicking New IP Address generates the "Additional IP Address Settings" screen, where additional IP addresses can be created - Actiontec MI424WR | User Guide - Page 52
the Ethernet Connection Click Settings at the bottom-right of the Ethernet Properties screen to generate the "Configure Ethernet" screen. General The top part of the Configure Ethernet screen displays general communication parameters. Actiontec recommends not changing the default values in this - Actiontec MI424WR | User Guide - Page 53
Broadband Router User Manual Internet Connection Firewall Click in the "Enabled" check box to activate the Router's firewall on the Ethernet connection. Actiontec does NOT recommend activating this feature. Additional IP Addresses Clicking New IP Address generates the "Additional IP Address Settings - Actiontec MI424WR | User Guide - Page 54
Using Network Connections Coax Connection A Coax connection connects devices (such as set-top boxes) to the Router using a coaxial cable. Click Coax in the Network Connections screen ( "Name" text box). ☞ Note: If disabling the connection, the Router must be rebooted for the change to take effect. 51 - Actiontec MI424WR | User Guide - Page 55
Wireless Broadband Router User Manual Configure Coax Click Settings at the bottom-right of the Coax Properties screen generates the "Configure Coax" screen. General The top part of the Configure Coax screen displays general communication parameters. Actiontec recommends not changing the default - Actiontec MI424WR | User Guide - Page 56
in the "Enabled" check box to activate the Router's firewall on the Coax Link Ethernet connection. Actiontec does NOT recommend activating this feature. Additional IP Addresses Clicking New IP Address generates the "Additional IP Address Settings" screen, where additional IP addresses can be created - Actiontec MI424WR | User Guide - Page 57
Actiontec Wireless Broadband Router User Manual Broadband Ethernet Connection A Broadband Ethernet connection connects the Router to the Internet using an Ethernet cable. Click "Rule Name" text box). ☞ Note: If disabling the connection, the Router must be rebooted for the change to take effect. 54 - Actiontec MI424WR | User Guide - Page 58
Click Settings at the bottom-right of the Broadband Connection (Ethernet) Properties window to generate the "Configure Broadband Connection (Ethernet)" screen. General The top part of the screen displays general communication parameters. Actiontec recommends not changing the default values - Actiontec MI424WR | User Guide - Page 59
set manually. Internet Protocol This section includes three options: No IP Address, Obtain an IP Address Automatically, and Use the Following IP Address. No IP Address Select this option if the connection has no IP address. This is useful if the connection is operating under a bridge. Obtain an IP - Actiontec MI424WR | User Guide - Page 60
devices. DHCP Server To set up the Router to function as a DHCP server: 1. Select DHCP Server. 2. Enter the IP address at which the Router starts issuing addresses in the "Start IP Address" text boxes. Since the Router's default IP address is 192.168.1.1, the Start IP Address must be 192.168.1.2 or - Actiontec MI424WR | User Guide - Page 61
Actiontec Wireless Broadband Router User Manual IP Address Distribution According to DHCP Option 60 DHCP Option 60 is used to preset a general name for a product or product family, as well as set a specific IP range and priority level. In this way, one device and its traffic can be given higher - Actiontec MI424WR | User Guide - Page 62
Connection Firewall Click in the "Enabled" check box to activate the Router's firewall on the connection. Additional IP Addresses Clicking New IP Address generates the "Additional IP Address Settings" screen, where additional IP addresses can be created to access the Router via the connection. 59 - Actiontec MI424WR | User Guide - Page 63
Actiontec Wireless Broadband Router User Manual Coax Broadband Connection A Coax Broadband connection connects the Router to the Internet using a coaxial cable. Click Broadband Name" text box). ☞ Note: If disabling the connection, the Router must be rebooted for the change to take effect. 60 - Actiontec MI424WR | User Guide - Page 64
Broadband Connection Click Settings at the bottom of the Broadband Connection (Coax) Properties screen to generate the "Configure Broadband Connection (Coax)" screen. General The top part of the screen displays general communication parameters. Actiontec recommends not changing the default values in - Actiontec MI424WR | User Guide - Page 65
Actiontec Wireless Broadband Router User Manual Physical Address Displays the physical address of the network card used for the network. MTU MTU (Maximum Transmission Unit) specifies the largest packet size permitted for Internet transmission. "Automatic" sets the MTU at 1500. Other choices include - Actiontec MI424WR | User Guide - Page 66
Server To set up the WAN Coax Link Ethernet connection to function as a DHCP server: 1. Select DHCP Server. 2. Enter the IP address at which the Router starts issuing addresses in the "Start IP Address" text boxes. Since the Router's default IP address is 192.168.1.1, the Start IP Address must be - Actiontec MI424WR | User Guide - Page 67
Actiontec Wireless Broadband Router User Manual 5. If a Windows Internet Naming Service (WINS) is being used, enter the WINS server address in the "WINS Server" text boxes. 6. Enter the amount of time a network device will be allowed to connect to the Router with its currently issued dynamic IP - Actiontec MI424WR | User Guide - Page 68
Firewall Click in the "Enabled" check box to activate the Router's firewall on the connection. Actiontec does NOT recommend activating this feature. Additional IP Addresses Click New IP Address to generate the "Additional IP Address Settings" screen, where additional IP addresses can be created to - Actiontec MI424WR | User Guide - Page 69
Router User Manual Configuring the WAN PPPoE Connection Click Settings in the WAN PPPoE Properties screen to generate the "Configure WAN PPPoE" screen. General The top part of the Configure WAN PPPoE screen displays general communication parameters. Actiontec recommends not changing the default - Actiontec MI424WR | User Guide - Page 70
sets the MTU at 1492. Other choices include "Automatic," which sets the MTU according to the connection to the ISP, and "Manual," which allows the MTU to be set manually packets between the user and the ISP. Service Name Specify the networking peer's service name, if provided by the ISP, in - Actiontec MI424WR | User Guide - Page 71
PPP Authentication settings should not be changed unless instructed to do so by Verizon. Login User Name Enter the user name (provided by the ISP) in this text box. Login Password Enter the password (provided by the ISP) in this text box. Support Unencrypted Password (PAP) Password Authentication - Actiontec MI424WR | User Guide - Page 72
"Internet Protocol" drop-down list: Obtain an IP Address Automatically This option is selected by default. Change only if required by the ISP. The server that assigns the Router with an IP address also assigns a subnet mask. Override the dynamically assigned subnet mask by selecting the "Override - Actiontec MI424WR | User Guide - Page 73
Select one of the following Routing modes: • Route - Select this option to cause the Router to act as a router between two networks. • NAT - Select this option to activate Network Address Translation (NAT), which translates IP addresses to a valid, public address on the Internet. NAT adds security - Actiontec MI424WR | User Guide - Page 74
Configuring the Router's Security 6 The Wireless Broadband Router's security suite includes comprehensive and robust security services: Stateful Packet Inspection, a firewall, user authentication protocols, and password protection mechanisms. These features allow users to connect their computers - Actiontec MI424WR | User Guide - Page 75
Actiontec Wireless Broadband Router User Manual This chapter covers these Security features: • General - select the security level for the firewall. • Access Control - restrict access from the local network to the Internet. • Port Forwarding - enable access from the Internet to specified services - Actiontec MI424WR | User Guide - Page 76
incoming and outgoing data are inspected and then either accepted (allowed to pass through the Router) or rejected (barred from passing through the Router) according to a flexible and configurable set of rules. These rules are designed to prevent unwanted intrusions from the outside, while allowing - Actiontec MI424WR | User Guide - Page 77
with their own default ports. When applying this behavior, these applications will not be blocked outbound, even at the Maximum Security level. To configure the Router's security settings: 1. From the General screen, select a security level by clicking the appropriate radio button. Using the - Actiontec MI424WR | User Guide - Page 78
some UDP-based services make legitimate use of IP fragments. IP fragments must be allowed to pass into the local network to use these services. 3. Click OK to save changes. Access Control control also incorporates a list of preset services in the form of applications and common port settings. 75 - Actiontec MI424WR | User Guide - Page 79
Actiontec Wireless Broadband Router User Manual Allow or Restrict Services To view and allow/restrict these services: 1. Select Access Control from the left side of any Security screen. The "Access Control" screen appears. ☞ Note: The "Allowed" section is only visible when the firewall is set to " - Actiontec MI424WR | User Guide - Page 80
rule (for more details about schedule rules, see the "Advanced Settings" chapter of this manual). 6. Click OK to save the changes. The Access Control screen will display a summary of the new access control rule. ☞ Note: To block a service not included in the list, select Specify Protocol from the - Actiontec MI424WR | User Guide - Page 81
Actiontec Wireless Broadband Router User Manual Port Forwarding In its default state, the Router blocks all external users from connecting to or communicating with the network, making it safe from hackers who may try to intrude on the network - Actiontec MI424WR | User Guide - Page 82
a schedule rule (for more details about schedule rules, see the "Advanced Settings" chapter of this manual). 8. Click OK to save the changes. ☞ Note: Some applications, such as FTP, TFTP, PPTP, and H323, require the support of special specific Application Level Gateway (ALG) modules in order to work - Actiontec MI424WR | User Guide - Page 83
Wireless Broadband Router User Manual DMZ (Demilitarized Zone) Host The DMZ host feature allows one device on the network to operate outside the firewall. Designate a DMZ host: • To use an Internet service, such as an online game or video-conferencing program, not present in the Port Forwarding - Actiontec MI424WR | User Guide - Page 84
Chapter 6 Configuring the Router's Security Port Triggering Port triggering can be used for dynamic port forwarding configuration. By setting port triggering rules, inbound traffic is allowed to arrive at a specific network host using ports different than those used for the outbound traffic. The - Actiontec MI424WR | User Guide - Page 85
Actiontec Wireless Broadband Router User Manual 3. Click Add. An "Edit Service" screen appears. 3. Specify the port triggering entries by clicking New Trigger Ports and New Opened Ports and entering the protocol and protocol number in the succeeding screens. For example, to set up port triggering - Actiontec MI424WR | User Guide - Page 86
MegaControl Panel remote administration access may be used to modify or disable firewall settings. Local IP addresses and other settings can also be changed, making it difficult or impossible to access the Router from the local network. Therefore, remote adminstration access to Telnet or MegaControl - Actiontec MI424WR | User Guide - Page 87
Actiontec Wireless Broadband Router User Manual Website Blocking The Router can be configured to block specific websites, preventing access to them from computers on the local network. Restrictions can also be applied to a comprehensive, automatically updated table of sites to which access is not - Actiontec MI424WR | User Guide - Page 88
Schedule and click Add. Then, add a schedule rule (for more details about schedule rules, see the "Advanced Settings" chapter of this manual). ☞ Note: Make sure the Router's date and time are set correctly for the local time zone. 5. Click OK to add the website to the table. The previous screen - Actiontec MI424WR | User Guide - Page 89
Actiontec Wireless Broadband Router User Manual Static NAT ☞ Note: A block of static IP addresses must be purchased from the ISP to configure this feature. This option allows multiple static NAT IP addresses to be designated to devices on the network. Static NAT IP addresses allow devices behind a - Actiontec MI424WR | User Guide - Page 90
Router's Security 6. Select the protocol that needs to be accessible from the public IP address by clicking in the check box next to "Enable Port Forwarding for Static NAT," then selecting a protocol from the drop-down menu. Click OK, and OK again. Repeat these steps to add more static IP addresses - Actiontec MI424WR | User Guide - Page 91
Actiontec Wireless Broadband Router User Manual Two sets of rules can be configured: input rules and output rules. Each set of rules firewall check box "Internet Connection Firewall" in the connection settings screen is unchecked • IP/hostname filtering rules and access control rules from the tabs - Actiontec MI424WR | User Guide - Page 92
This is where the action the rule will take is defined. Select one of the following radio buttons: • Drop - Deny access to packets that match the source and destination IP addresses and protocol ports defined in "Matching." • Reject - Deny access to packets that match the source and destination - Actiontec MI424WR | User Guide - Page 93
Actiontec Wireless Broadband Router User Manual • Accept - Allow access to packets that match the source and destination IP addresses and protocol ports defined for more details about schedule rules, see the "Advanced Settings" chapter of this manual) Security Log The security log displays a list of - Actiontec MI424WR | User Guide - Page 94
logged in to WBM • CLI Login - a user logged in to the command line interface via Telnet Event-Type Displays a textual description of the event. Details The "Details" column displays more information about the packet or the event, such as protocol, IP addresses, ports, etc. The following are the - Actiontec MI424WR | User Guide - Page 95
Actiontec Wireless Broadband Router User Manual • ICMP replay - an ICMP (Internet IP belong- ing the local network has been blocked. • DMZ network packet - a packet from a demilitarized zone network has been blocked. • Trusted device - a packet from a trusted device has been accepted. • Default - Actiontec MI424WR | User Guide - Page 96
accepted. • Outbound Auth1X - an outbound Auth1X packet has been accepted. • IP Version 6 - an IPv6 packet has been accepted. • Router initiated traffic - all traffic the Router initiates is recorded. • Maximum security enabled service - a packet has been accepted because it belongs to a permitted - Actiontec MI424WR | User Guide - Page 97
Actiontec Wireless Broadband Router User Manual • Fragmented packet, packet too big - because the connection pool is full. • NAT Error: No free NAT IP - no free NAT IP, so NAT has failed. • NAT Error: Conflict Mapping already exists Client attempted to open Server ports - a packet has been blocked. 94 - Actiontec MI424WR | User Guide - Page 98
Chapter 6 Configuring the Router's Security • FTP port request to 3rd party is forbidden (Possible bounce attack) - a packet has been blocked. • Firewall Rules were changed - the firewall rule set has been modified. • User authentication - a message arrived during login time, including both - Actiontec MI424WR | User Guide - Page 99
Actiontec Wireless Broadband Router User Manual 3. Select the type of blocked events to be listed in the log: • All Blocked Connection Attempts - activating this States" check box to track connection handling by the firewall and Application Level Gateways (ALGs). 6. Click OK to save changes. 96 - Actiontec MI424WR | User Guide - Page 100
Chapter 6 Configuring the Router's Security 97 - Actiontec MI424WR | User Guide - Page 101
Actiontec Wireless Broadband Router User Manual This page left intentionally blank. 98 - Actiontec MI424WR | User Guide - Page 102
does on the Internet?" The Wireless Broadband Router's Parental Controls allows users to Router's MegaControl Panel: 1. Click Parental Control from the top of the Home screen. 2. If no subscription has been activated, or the subscription has expired, the "General" screen appears. 3. If the "Enable - Actiontec MI424WR | User Guide - Page 103
Actiontec Wireless Broadband Router User Manual 5. The Surf Control subscription site will then be displayed in a new browser window. Follow the instructions on the website and subscribe or enroll for a free trial. A verification E-mail will be sent. Click on the link in the verification E-mail. - Actiontec MI424WR | User Guide - Page 104
Chapter 7 Parental Controls 2. Click Filtering Policy from the list on the left side of the screen. The "Filtering Policy" screen appears. 3. Click Add a Policy to generate another "Filtering Policy" screen. 101 - Actiontec MI424WR | User Guide - Page 105
Actiontec Wireless Broadband Router User Manual 4. Enter a name for the new policy in the "Name" text box. 5. Applying the Filtering Policy Once different filtering policies have been created, either define a default policy that will be applied to all networked computers, or apply different policies - Actiontec MI424WR | User Guide - Page 106
the policy name from the "Default Policy" drop-down list, located Computer. The "LAN Computer Policy" screen appears. 2. Enter the name or IP address of the networked computer to which a policy will be applied. 3. Select the enable or disable the policy for a particular computer. 7. Click OK. 103 - Actiontec MI424WR | User Guide - Page 107
Actiontec Wireless Broadband Router User Manual Advanced Options The "Advanced Options" screen contains features providing additional Web filtering security. Provider Consulting Failure To decide whether to allow or block a specific website, the filter service provider is consulted about the website - Actiontec MI424WR | User Guide - Page 108
Chapter 7 Parental Controls Statistics The Router's MegaControl Panel monitors content filtering statistics. Statistics include a record of: • . The "Statistics" screen appears. ☞ Note: When Parental Control is enabled, HTTP services cannot be blocked by the Security Access Control feature. 105 - Actiontec MI424WR | User Guide - Page 109
Actiontec Wireless Broadband Router User Manual This page left intentionally blank. 106 - Actiontec MI424WR | User Guide - Page 110
- view information about the Router Configuration File - manage configuration files Restart - restart the Router Restore Defaults - reset the Router to its default settings Diagnostics - perform diagnostic tests on the Router MAC Cloning - clone MAC addresses System Settings - modify the system - Actiontec MI424WR | User Guide - Page 111
Actiontec Wireless Broadband Router User Manual Universal Plug and Play - configure Universal Plug and Play settings Firmware Upgrade - download and install new versions of the Router's firmware Scheduler Rules - schedule firewall activation Date and Time - set the local date and time Radius - - Actiontec MI424WR | User Guide - Page 112
Chapter 8 Using Advanced Settings About To view technical information regarding the Router, click About in the Advanced screen. The "About" screen appears, displaying various technical aspects concerning the Router. Configuration File Use the Router's Configuration File feature to view, save, and - Actiontec MI424WR | User Guide - Page 113
This may take up to one minute. To reenter the MegaControl Panel after restarting the Router, click the web browser's "Refresh" button. Restoring Default Settings If the Router's factory default settings need to be restored (to build a new network from the beginning, for example), use the following - Actiontec MI424WR | User Guide - Page 114
Chapter 8 Using Advanced Settings Diagnostics The Diagnostics screen can assist in testing network connectivity. This feature pings (ICMP echo) an IP address and displays the results, such as the number of packets transmitted and received, round trip time, and success status. To diagnose network - Actiontec MI424WR | User Guide - Page 115
Actiontec Wireless Broadband Router User Manual MAC Cloning A MAC (Media Access Control) address is a unique hexadecimal code that identifies a device on a network. All networkable devices have a MAC address. When replacing another network device with the Router, the installation process can be - Actiontec MI424WR | User Guide - Page 116
. System Use the "System" section of this screen to configure the following two option Wireless Broadband Router's Hostname Specify the Router's host name by entering it into the this text box. The host name is also the Router's URL address, so it can be entered here rather than 192.168.1.1. 113 - Actiontec MI424WR | User Guide - Page 117
Actiontec Wireless Broadband Router User Manual Local Domain Specify the network's local domain by entering it into this text box. Actiontec MegaControl Panel Use this section to configure the following: Automatic Refresh of System Monitoring Web Pages Click in this check box to activate the - Actiontec MI424WR | User Guide - Page 118
Chapter 8 Using Advanced Settings System Logging Use this section to configure the following system log options. Enable Logging Click in this check box to activate system logging. Low Capacity Notification Enabled Click in this check box to activate low capacity notification (works in tandem with " - Actiontec MI424WR | User Guide - Page 119
Actiontec Wireless Broadband Router User Manual Allowed Capacity Before Email Notification Enter the percentage of security log buffer capacity reached to trigger an E-mail notification. Security Log Buffer Size Enter the - Actiontec MI424WR | User Guide - Page 120
Advanced Settings Auto WAN Detection When activated, Auto WAN Detection causes the Router to automatically search for a WAN connection. Enable Logging Clicking in this check box activates automatic WAN detection. PPP Timeout Enter the amount of time (in seconds) before the Router stops attempting - Actiontec MI424WR | User Guide - Page 121
Actiontec Wireless Broadband Router User Manual Universal Plug and Play (UPnP) To access the UPnP settings perform the following: 1. Click Universal Plug and Play in the Advanced screen. The "Universal Plug and Play" settings screen appears. 2. Click in the "Allow Other Network Users to Control - Actiontec MI424WR | User Guide - Page 122
8 Using Advanced Settings Firmware Upgrade The Router offers a built-in mechanism for upgrading its firmware without losing custom configurations and settings. There are two methods for upgrading the firmware: • Upgrading from a local computer - use a software image file pre-downloaded to the - Actiontec MI424WR | User Guide - Page 123
Actiontec Wireless Broadband Router User Manual 2. In the "Upgrade From a Computer in the Network" section, click Upgrade Now. The "Upgrade From a Computer in the Network" screen appears. 3. Enter the path of the software image file, or press the "Browse" button to browse for the file, and click OK. - Actiontec MI424WR | User Guide - Page 124
an E-mail to the E-mail address listed in the System Settings. Automatic Check Disabled If "Automatically Check Disabled" is selected, the Router will not automatically check for firmware upgrades. Manual Checking and Upgrading To manually upgrade the Router's firmware: 1. Click Check Now in the - Actiontec MI424WR | User Guide - Page 125
Actiontec Wireless Broadband Router User Manual Scheduler Rules Scheduler rules are used for limiting the activation of firewall rules to specific time periods, either for days of the week, or for hours of each day. To define a rule: 1. Make sure the Router's date and time are set correctly. To do - Actiontec MI424WR | User Guide - Page 126
Chapter 8 Using Advanced Settings 6. Click Add Rule Schedule. The "Edit Rule Schedule" screen appears. 7. Select or active or . Enter a start and end time in the appropriate text boxes. 9. Click OK. ☞ Note: Make sure the Router's date and time settings are properly configured for the time zone. 123 - Actiontec MI424WR | User Guide - Page 127
Actiontec Wireless Broadband Router User Manual Date and Time To configure date, time, and daylight savings time settings perform the following: 1. Click Date and Time in the Advanced screen. The "Date and Time" screen appears. 2. Select the local time zone from the drop-down list. The Router can - Actiontec MI424WR | User Guide - Page 128
the bottom of the "Automatic Time Update" section and entering the IP address or domain name of the time server in the "Time Server Settings" screen. RADIUS (Client) RADIUS (Remote Authentication Dial-In User Service) is used in conjunction with 802.1x WEP wireless security. RADIUS is a certificate - Actiontec MI424WR | User Guide - Page 129
Actiontec Wireless Broadband Router User Manual 2. Click New User, which generates the "User Settings" screen. When adding a user, specify the following parameters: • Full Name - The user's full name. • User Name - The name a remote user will use to access the - Actiontec MI424WR | User Guide - Page 130
of the user parameters will prompt the connection associated with the user to terminate. For changes to take effect, activate the connection manually after modifying user parameters. ARP (Address Resolution Protocol) Table Clicking ARP Table in the Advanced screen generates the "ARP Table" screen - Actiontec MI424WR | User Guide - Page 131
Actiontec Wireless Broadband Router User Manual Routing rules can be added, edited, or deleted from the Routing screen. To add a router, click New Route. The "Route Settings" screen appears. When adding a routing rule, the following parameters must be specified: • Rule Name- Select the type of - Actiontec MI424WR | User Guide - Page 132
"Minimum Security" no further action is required. However, if the Router is set to "Typical Security" or "Maximum Security," the group's IP address must be added to the Router's "Multicast Groups" screen. This will allow incoming messages addressed to the group to pass through the firewall and on to - Actiontec MI424WR | User Guide - Page 133
Actiontec Wireless Broadband Router User Manual To define a network object: 1. Click Network Objects in the Advanced the "Network Object Type" list box. Options include IP address, IP Subnet, IP Range, MAC Address, and Host Name. 6. Repeat to create other network objects, if needed. When finished - Actiontec MI424WR | User Guide - Page 134
displays the "Active Firmware" and the "Backup Firmware." To restore the firmware to the backup firmware, click Restore Backup Firmware. A confirmation screen appears. Click OK to finish restoring the Router's firmware. Dynamic DNS Dynamic DNS (Domain Name Server) a dynamic IP address to be aliased - Actiontec MI424WR | User Guide - Page 135
Actiontec Wireless Broadband Router User Manual Opening a Dynamic DNS Account To use Dynamic DNS, a free Dynamic DNS account must be opened at http:// www.dyndns.org/account/create.html. When applying for an account, a user name and password must be specified. Have them available when customizing - Actiontec MI424WR | User Guide - Page 136
Exchanger Enter the mail exchange server address. This will redirect all E-mails arriving at the Dynamic DNS address to the mail server. Backup MX Select this check box to designate the mail exchange server to be a backup server. IP Address Distribution The Router's DHCP server makes it possible to - Actiontec MI424WR | User Guide - Page 137
connected to the Router. • Defines the range of IP addresses that can be allocated in the network. • Defines the length of time for which dynamic IP addresses are allocated. • Provides the above configurations for each network device and can be con- figured and enabled/disabled separately for - Actiontec MI424WR | User Guide - Page 138
in the "Action" column. The "DHCP Settings" screen for the device appears. 2. Select the "IP Address Distribution" from the drop-down list. Options include DHCP Server, DHCP Relay, or Disable. 3. Complete the following fields: • Start IP Address Range, End IP Address Range - determines the number of - Actiontec MI424WR | User Guide - Page 139
Actiontec Wireless Broadband Router User Manual • Lease Time - each device will be assigned an IP address by the DHCP server for a limited time ("Lease Time") when it connects to the network. When the lease expires, the server will determine if the - Actiontec MI424WR | User Guide - Page 140
Connections list must be updated with the new network card's MAC address. To remove a host from the table, click the appropriate "Delete" icon in the Action column. DNS Server The Domain Name System (DNS) translates domain names into IP addresses and vice versa. The Router's DNS server is an auto - Actiontec MI424WR | User Guide - Page 141
Actiontec Wireless Broadband Router User Manual The Router's DNS also provides the following services: • Shares a common database of domain names and IP addresses with the DHCP server. • Supports multiple subnets within the local network simultaneously. • Automatically appends a domain name to - Actiontec MI424WR | User Guide - Page 142
IP address in the "IP Address" text boxes. 4. Click OK to save the changes. To edit the host name or IP address of an entry: 1. Click the appropriate "Edit" icon in the Action column. The "DNS Entry" screen appears. 2. If the host was manually added to the DNS Table, its host name and/or IP address - Actiontec MI424WR | User Guide - Page 143
Actiontec Wireless Broadband Router User Manual Protocols Protocols features a list of preset and user-defined applications and common port settings. Protocols can be used in various security features, such as Access Control and Port Forwarding. New protocols can be added to support new applications - Actiontec MI424WR | User Guide - Page 144
Chapter 8 Using Advanced Settings 3. Name the service in the "Service Name" text box and, if needed, enter a description of the service in the "Service Description" text box, then click Add Service Ports. The "Edit Service Server Ports" screen appears. 4. Select a protocol from the "Protocol" drop- - Actiontec MI424WR | User Guide - Page 145
Actiontec Wireless Broadband Router User Manual This page left intentionally blank. 142 - Actiontec MI424WR | User Guide - Page 146
Monitoring the Router 9 The Wireless Broadband Router's System Monitoring screens display important system information, including: • Key network device parameters • Network traffic statistics • System log • Amount of time since the Router was last started Monitoring Connections 1. Click System - Actiontec MI424WR | User Guide - Page 147
Actiontec Wireless Broadband Router User Manual Traffic Monitoring The Router constantly monitors traffic within the local network and between the local network and the Internet. You can view up-to-the-second statistical information about - Actiontec MI424WR | User Guide - Page 148
Chapter 9 Monitoring the Router System Log The System Log displays a list of the most recent activities of the Router. Click System Log to generate the "System Log" screen. Router Status To display the amount of time since the Router was last started, click Router Status. The "Router Status" screen - Actiontec MI424WR | User Guide - Page 149
Actiontec Wireless Broadband Router User Manual This page left intentionally blank. 146 - Actiontec MI424WR | User Guide - Page 150
of a ballpoint pen and depress the "Reset" button on the back of the Router for at least five seconds. The second is to access the Router's MegaControl Panel and navigate to the "Advanced Settings" screen. Click on "Restore Defaults" and read the instructions on-screen. Note that after performing - Actiontec MI424WR | User Guide - Page 151
Actiontec Wireless Broadband Router User Manual LAN Connection Failure • Ensure the Router is properly installed, the LAN connections are correct, and the power is on. • Confirm the computer and Router are on the same network segment. If unsure, let the computer get the IP address automatically by - Actiontec MI424WR | User Guide - Page 152
Chapter 10 Troubleshooting Are the Router's Ethernet ports auto-sensing? Yes. Either a straight-through or crossover Ethernet cable can be used. Can I use an 802.11b wireless card to connect to the Router? Yes, the Router can interface with 802.11b cards or 802.11g cards. The 802.11g standard is - Actiontec MI424WR | User Guide - Page 153
the computer connected to the Router is set up to dynamically receive an IP address. I have an FTP or Web server on my network. How can I make it available to users on the Internet? For a Web server, enable port forwarding for port 8088 to the IP address of the server and set up the Web server to - Actiontec MI424WR | User Guide - Page 154
) are set per packet, on an application basis. QoS can be configured using flexible rules, according to the following parameters: • Source/destination IP address, MAC address, or host name • Device • Source/destination ports • Limit the rule for specific days and hours The Router supports two - Actiontec MI424WR | User Guide - Page 155
Actiontec Wireless Broadband Router User Manual The matching of packets by rules is connection-based, known as Stateful Packet Inspection (SPI), using the Router will apply to both control and data ports (even if the data ports are unknown). Applications that support such inheritance have an ALG in - Actiontec MI424WR | User Guide - Page 156
Appendix A Quality of Service Setting Priority Rules To set priority rules: 1. Click Quality of Service on the top of the Home screen. traffic, respectively. Each section lists all the devices on which rules can be set. Rules can be set on all devices at once by clicking Add in the "All Devices" row - Actiontec MI424WR | User Guide - Page 157
Actiontec Wireless Broadband Router User Manual Set the following parameters: Source Address - The source address of the packets sent to or received from the network object. To add an address: 1. Select Specify Address matched by this rule. Schedule - By default, the rule will always be active. However, - Actiontec MI424WR | User Guide - Page 158
use a 100 Mbps Ethernet LAN with a 100 Mbps WAN interface router. This is where most bottlenecks occur A traffic shaper is essentially a of its own. This enables the definition of QoS rules on the default WAN, for example, and their maintenance even if the PPP or bridge device over the WAN is - Actiontec MI424WR | User Guide - Page 159
Actiontec Wireless Broadband Router User Manual 2. Click Add. The "Add Device Traffic Shaping" screen appears. 3. Select the device for which the traffic will be shaped. The drop-down list includes all the Router the Router's bandwidth reception rate. TCP Serialization - Enable TCP Serialization - Actiontec MI424WR | User Guide - Page 160
Appendix A Quality of Service Shaping Classes The bandwidth of a device can be divided to reserve is defined for a specific traffic type, two shaping classes are created. The second class is the "Default Class", which is responsible for all the packets that do not match the defined shaping class, or - Actiontec MI424WR | User Guide - Page 161
Wireless Broadband Router User Manual Configure the following parameters: Name Enter the name of the class in this text box. Class Priority The class can be granted one of eight priority levels, zero being the highest and seven the lowest (opposite the rules priority levels). This level sets default - Actiontec MI424WR | User Guide - Page 162
Service to the VoIP class. These packets will be limited to the class settings (bandwidth, schedule, etc.). In addition, the traffic protocol and priority The "Add Traffic Priority Rule" screen appears. Source Address - The source address of the packets sent to or received from the network object ( - Actiontec MI424WR | User Guide - Page 163
Actiontec Wireless Broadband Router User Manual ). This sets the priority ? - By default, the rule address, any destination address, and any protocol to this class," all packets traveling through Router download (Rx) traffic bottlenecks, the ability to control the flow is much more limited. The Router - Actiontec MI424WR | User Guide - Page 164
of low-priority TCP connections (such as the file download). Differentiated Services Code Point Settings In order to understand what DSCP is, one must in IP packet headers referred to as the Differentiated Services Codepoint (DSCP). Hosts or routers passing traffic to a Diffserv-enabled network - Actiontec MI424WR | User Guide - Page 165
Actiontec Wireless Broadband Router User Manual 1. Click Quality of Service at the top of the Home screen, then click DSCP Settings. The "DSCP Settings" screen appears. 2. To edit an existing /high priority). The default DSCP value for packets with an unassigned value is zero. 4. Click OK to save the - Actiontec MI424WR | User Guide - Page 166
eight levels of priority. By default, the highest priority is seven, Service at the top of the Home screen, then click 802.1p Settings. The "802.1p Settings" screen appears. 2. The eight 802.1p values are pre-populated with the three priority levels: Low, Medium, and High. These levels can be changed - Actiontec MI424WR | User Guide - Page 167
Actiontec Wireless Broadband Router User Manual Class Statistics The Router provides accurate, real-time information on the parameters monitored per each shaping class. To view class statistics, click Quality of Service at the top of the Home screen, then click Class Statistics. The following screen - Actiontec MI424WR | User Guide - Page 168
Specifications B General Model Number MI424WR (4-Port Wireless Broadband Router) Standards IEEE 802.3x IEEE 802.3u IEEE 802.11b, g (Wireless) IP IP version 4 MoCA Two channels (WAN, LAN) WAN MoCA frequency: 975 MHz - 1025 MHz (single channel) LAN MoCA frequency: 1125 MHz - 1425 MHz (6 channel) - Actiontec MI424WR | User Guide - Page 169
Actiontec Wireless Broadband Router User Manual Wireless Operating Range Indoors Up to 91 M (300 ft.) Outdoors Up to 533 M (1750 ft.) Topology Star (Ethernet) LED Indicators Power, Ethernet WAN, Ethernet LAN (4), Coax WAN, Coax LAN, Internet, Wireless are subject to change without notice. 166 - Actiontec MI424WR | User Guide - Page 170
energy and, if not installed and used in accordance with the instructions, may cause harmful interference to radio communications. However, there is user to be notified that any changes or modifications made to this device that are not expressly approved by Actiontec Electronics, Inc., may void the - Actiontec MI424WR | User Guide - Page 171
Actiontec Wireless Broadband Router User Manual 2. This device must accept any interference received, antenna or transmitter. For questions regarding your product or the FCC declaration, contact: Actiontec Electronics, Inc. 760 North Mary Ave. Sunnyvale, CA 94086 United States Tel: (408)
-
 1
1 -
 2
2 -
 3
3 -
 4
4 -
 5
5 -
 6
6 -
 7
7 -
8
-
9
-
10
-
11
-
12
-
13
-
14
-
15
-
16
-
17
-
18
-
19
-
20
-
21
-
22
-
23
-
24
-
25
-
26
-
27
-
28
-
29
-
30
-
31
-
32
-
33
-
34
-
35
-
36
-
37
-
38
-
39
-
40
-
41
-
42
-
43
-
44
-
45
-
46
-
47
-
48
-
49
-
50
-
51
-
52
-
53
-
54
-
55
-
56
-
57
-
58
-
59
-
60
-
61
-
62
-
63
-
64
-
65
-
66
-
67
-
68
-
69
-
70
-
71
-
72
-
73
-
74
-
75
-
76
-
77
-
78
-
79
-
80
-
81
-
82
-
83
-
84
-
85
-
86
-
87
-
88
-
89
-
90
-
91
-
92
-
93
-
94
-
95
-
96
-
97
-
98
-
99
-
100
-
101
-
102
-
103
-
104
-
105
-
106
-
107
-
108
-
109
-
110
-
111
-
112
-
113
-
114
-
115
-
116
-
117
-
118
-
119
-
120
-
121
-
122
-
123
-
124
-
125
-
126
-
127
-
128
-
129
-
130
-
131
-
132
-
133
-
134
-
135
-
136
-
137
-
138
-
139
-
140
-
141
-
142
-
143
-
144
-
145
-
146
-
147
-
148
-
149
-
150
-
151
-
152
-
153
-
154
-
155
-
156
-
157
-
158
-
159
-
160
-
161
-
162
-
163
-
164
-
165
-
166
-
167
-
168
-
169
-
170
-
171
 |
 |

Wireless
Broadband
Router
Model #: MI424WR
Firmware Version: 4.0.16.1.44.2
8
User Manual
Ver 2.0
Solutions for the Digital Life
™