Actiontec MI424WR User Guide - Page 60
Address Distribution of the Con Broadband Connection, IP Address Distribution
 |
View all Actiontec MI424WR manuals
Add to My Manuals
Save this manual to your list of manuals |
Page 60 highlights
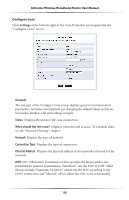
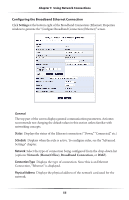
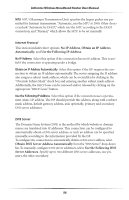
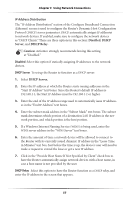
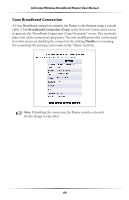
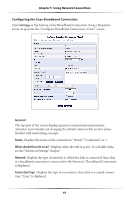
Chapter 5 Using Network Connections IP Address Distribution The "IP Address Distribution" section of the Configure Broadband Connection (Ethernet) screen is used to configure the Router's Dynamic Host Configuration Protocol (DHCP) server parameters. DHCP automatically assigns IP addresses to network devices. If enabled, make sure to configure the network devices as "DHCP Clients." There are three options in this section: Disabled, DHCP Server, and DHCP Relay. MCaution: Actiontec strongly recommends leaving this setting at "Disabled." Disabled Select this option if statically assigning IP addresses to the network devices. DHCP Server To set up the Router to function as a DHCP server: 1. Select DHCP Server. 2. Enter the IP address at which the Router starts issuing addresses in the "Start IP Address" text boxes. Since the Router's default IP address is 192.168.1.1, the Start IP Address must be 192.168.1.2 or higher. 3. Enter the end of the IP address range used to automatically issue IP addresses in the "End IP Address" text boxes. 4. Enter the subnet mask address in the "Subnet Mask" text boxes. The subnet mask determines which portion of a destination LAN IP address is the network portion, and which portion is the host portion. 5. If a Windows Internet Naming Service (WINS) is being used, enter the WINS server address in the "WINS Server" text boxes. 6. Enter the amount of time a network device will be allowed to connect to the Router with its currently issued dynamic IP address in the "Lease Time in Minutes" text box. Just before the time is up, the device's user will need to make a request to extend the lease or get a new IP address. 7. Click in the "Provide Host Name If Not Specified by Client" check box to have the Router automatically assign network devices with a host name, in case a host name is not provided by the user. DHCP Relay Select this option to have the Router function as a DHCP relay, and enter the IP address in the screen that appears. 57
-
 1
1 -
2
-
3
-
4
-
5
-
6
-
7
-
8
-
9
-
10
-
11
-
12
-
13
-
14
-
15
-
16
-
17
-
18
-
19
-
20
-
21
-
22
-
23
-
24
-
25
-
26
-
27
-
28
-
29
-
30
-
31
-
32
-
33
-
34
-
35
-
36
-
37
-
38
-
39
-
40
-
41
-
42
-
43
-
44
-
45
-
46
-
47
-
48
-
49
-
50
-
51
-
52
-
53
-
54
-
 55
55 -
 56
56 -
 57
57 -
 58
58 -
 59
59 -
 60
60 -
 61
61 -
 62
62 -
 63
63 -
 64
64 -
 65
65 -
66
-
67
-
68
-
69
-
70
-
71
-
72
-
73
-
74
-
75
-
76
-
77
-
78
-
79
-
80
-
81
-
82
-
83
-
84
-
85
-
86
-
87
-
88
-
89
-
90
-
91
-
92
-
93
-
94
-
95
-
96
-
97
-
98
-
99
-
100
-
101
-
102
-
103
-
104
-
105
-
106
-
107
-
108
-
109
-
110
-
111
-
112
-
113
-
114
-
115
-
116
-
117
-
118
-
119
-
120
-
121
-
122
-
123
-
124
-
125
-
126
-
127
-
128
-
129
-
130
-
131
-
132
-
133
-
134
-
135
-
136
-
137
-
138
-
139
-
140
-
141
-
142
-
143
-
144
-
145
-
146
-
147
-
148
-
149
-
150
-
151
-
152
-
153
-
154
-
155
-
156
-
157
-
158
-
159
-
160
-
161
-
162
-
163
-
164
-
165
-
166
-
167
-
168
-
169
-
170
-
171
 |
 |
