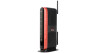
Actiontec MI424WR User Guide - Page 17
Computer Network Configuration, Configuring a Computer to Use Dynamic IP Addressing - dns settings
 |
View all Actiontec MI424WR manuals
Add to My Manuals
Save this manual to your list of manuals |
Page 17 highlights
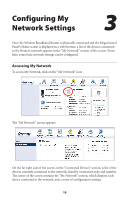
Actiontec Wireless Broadband Router User Manual 3. Connect one end of the coaxial cable to the coaxial wall jack, and the other end to the red Coax port on the back of the Router. 4. Power up the set top box. 5. Make sure the Coax LAN light on the front of the Router glows steadily green. This may take a few minutes. When it does, the set top box is connected to the Router. Computer Network Configuration Each network interface on the computer should either be configured with a statically defined IP address and DNS address, or instructed to automatically obtain an IP address using the Network DHCP server. The Router is set up, by default, with an active DHCP server, and Actiontec recommends leaving this setting as is. Configuring a Computer to Use Dynamic IP Addressing To configure a computer to use dynamic IP addressing: Windows XP 1. Select Network Connections in the Control Panel. 2. Right-click Ethernet Local Area Connection, then click Properties. 3. In the "General" tab, select Internet Protocol (TCP/IP), then click Properties. 4. The "Internet Protocol (TCP/IP) Properties" window appears. 5. Click the "Obtain an IP address automatically" radio button. 6. Click the "Obtain DNS server address automatically" radio button. 7. Click OK to save the settings. 14
-
 1
1 -
2
-
3
-
4
-
5
-
6
-
7
-
8
-
9
-
10
-
11
-
 12
12 -
 13
13 -
 14
14 -
 15
15 -
 16
16 -
 17
17 -
 18
18 -
 19
19 -
 20
20 -
 21
21 -
 22
22 -
23
-
24
-
25
-
26
-
27
-
28
-
29
-
30
-
31
-
32
-
33
-
34
-
35
-
36
-
37
-
38
-
39
-
40
-
41
-
42
-
43
-
44
-
45
-
46
-
47
-
48
-
49
-
50
-
51
-
52
-
53
-
54
-
55
-
56
-
57
-
58
-
59
-
60
-
61
-
62
-
63
-
64
-
65
-
66
-
67
-
68
-
69
-
70
-
71
-
72
-
73
-
74
-
75
-
76
-
77
-
78
-
79
-
80
-
81
-
82
-
83
-
84
-
85
-
86
-
87
-
88
-
89
-
90
-
91
-
92
-
93
-
94
-
95
-
96
-
97
-
98
-
99
-
100
-
101
-
102
-
103
-
104
-
105
-
106
-
107
-
108
-
109
-
110
-
111
-
112
-
113
-
114
-
115
-
116
-
117
-
118
-
119
-
120
-
121
-
122
-
123
-
124
-
125
-
126
-
127
-
128
-
129
-
130
-
131
-
132
-
133
-
134
-
135
-
136
-
137
-
138
-
139
-
140
-
141
-
142
-
143
-
144
-
145
-
146
-
147
-
148
-
149
-
150
-
151
-
152
-
153
-
154
-
155
-
156
-
157
-
158
-
159
-
160
-
161
-
162
-
163
-
164
-
165
-
166
-
167
-
168
-
169
-
170
-
171
 |
 |
