Actiontec MI424WR User Guide - Page 41
Connect, Change Advanced, Settings
 |
View all Actiontec MI424WR manuals
Add to My Manuals
Save this manual to your list of manuals |
Page 41 highlights
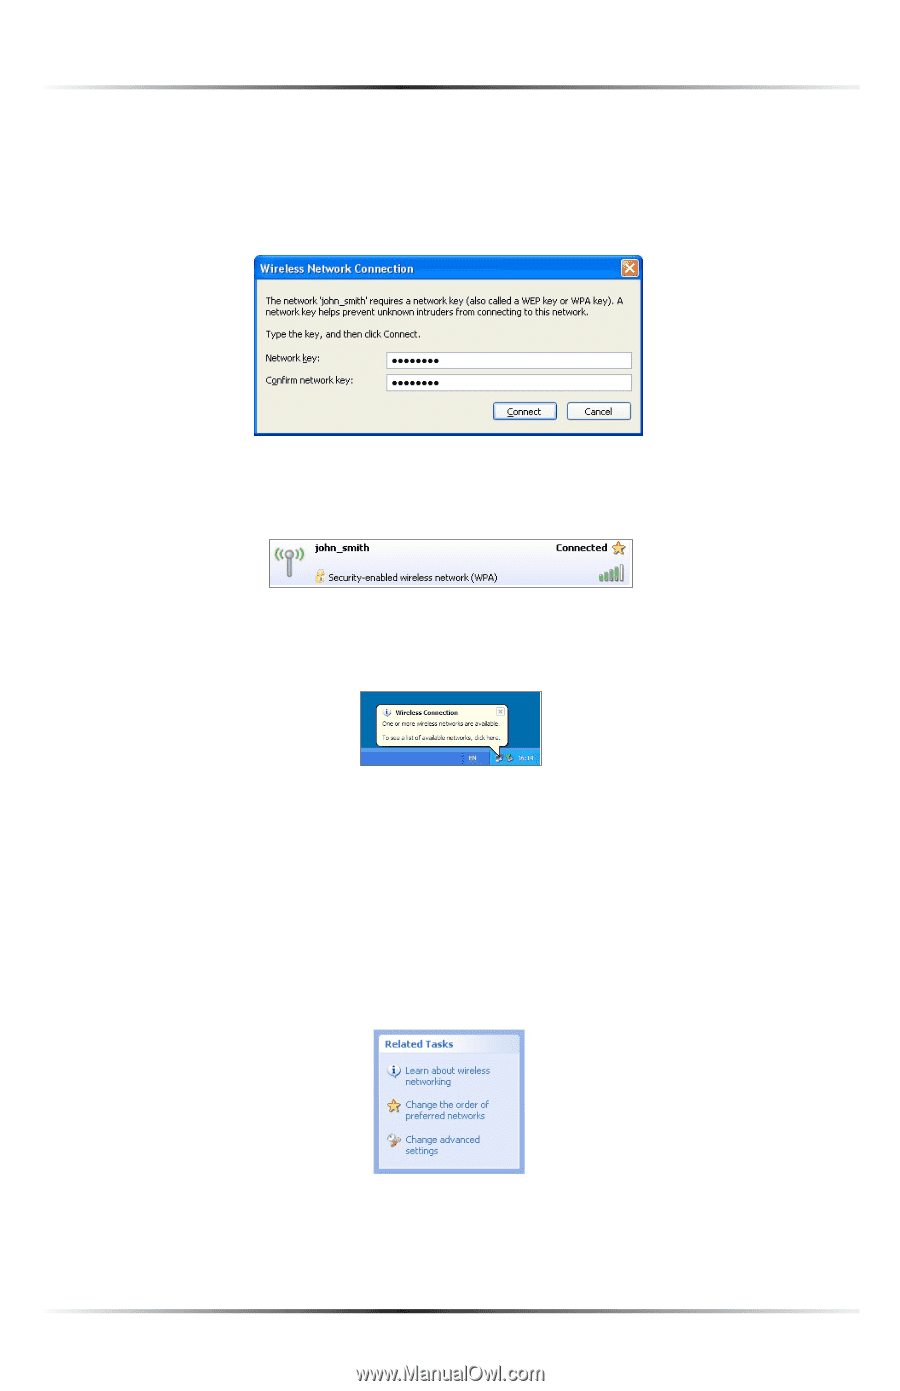
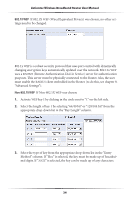
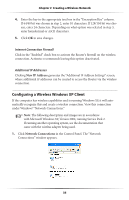
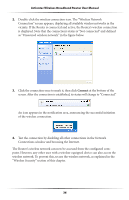
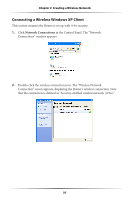
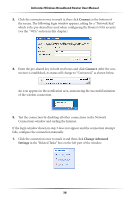
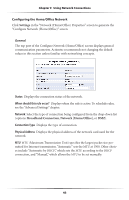
Actiontec Wireless Broadband Router User Manual 3. Click the connection once to mark it, then click Connect at the bottom of the screen. The following login window appears, asking for a "Network Key," which is the pre-shared key used when configuring the Router's WPA security (see the "WPA" section in this chapter). 4. Enter the pre-shared key in both text boxes and click Connect. After the connection is established, its status will change to "Connected," as shown below. An icon appears in the notification area, announcing the successful initiation of the wireless connection. 5. Test the connection by disabling all other connections in the Network Connections window and surfing the Internet. If the login window shown in step 3 does not appear and the connection attempt fails, configure the connection manually: 1. Click the connection once to mark it and then click Change Advanced Settings in the "Related Tasks" box on the left part of the window. 38
-
 1
1 -
2
-
3
-
4
-
5
-
6
-
7
-
8
-
9
-
10
-
11
-
12
-
13
-
14
-
15
-
16
-
17
-
18
-
19
-
20
-
21
-
22
-
23
-
24
-
25
-
26
-
27
-
28
-
29
-
30
-
31
-
32
-
33
-
34
-
35
-
 36
36 -
 37
37 -
 38
38 -
 39
39 -
 40
40 -
 41
41 -
 42
42 -
 43
43 -
 44
44 -
 45
45 -
 46
46 -
47
-
48
-
49
-
50
-
51
-
52
-
53
-
54
-
55
-
56
-
57
-
58
-
59
-
60
-
61
-
62
-
63
-
64
-
65
-
66
-
67
-
68
-
69
-
70
-
71
-
72
-
73
-
74
-
75
-
76
-
77
-
78
-
79
-
80
-
81
-
82
-
83
-
84
-
85
-
86
-
87
-
88
-
89
-
90
-
91
-
92
-
93
-
94
-
95
-
96
-
97
-
98
-
99
-
100
-
101
-
102
-
103
-
104
-
105
-
106
-
107
-
108
-
109
-
110
-
111
-
112
-
113
-
114
-
115
-
116
-
117
-
118
-
119
-
120
-
121
-
122
-
123
-
124
-
125
-
126
-
127
-
128
-
129
-
130
-
131
-
132
-
133
-
134
-
135
-
136
-
137
-
138
-
139
-
140
-
141
-
142
-
143
-
144
-
145
-
146
-
147
-
148
-
149
-
150
-
151
-
152
-
153
-
154
-
155
-
156
-
157
-
158
-
159
-
160
-
161
-
162
-
163
-
164
-
165
-
166
-
167
-
168
-
169
-
170
-
171
 |
 |