Actiontec MI424WR User Guide - Page 126
The Edit Rule Schedule screen appears., Add Rule Schedule, New Hours Range Entry
 |
View all Actiontec MI424WR manuals
Add to My Manuals
Save this manual to your list of manuals |
Page 126 highlights
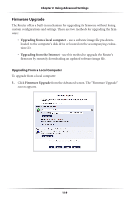
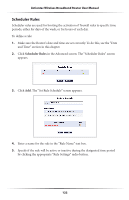
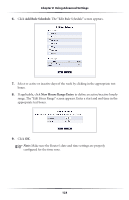
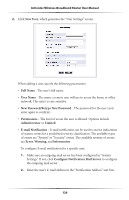
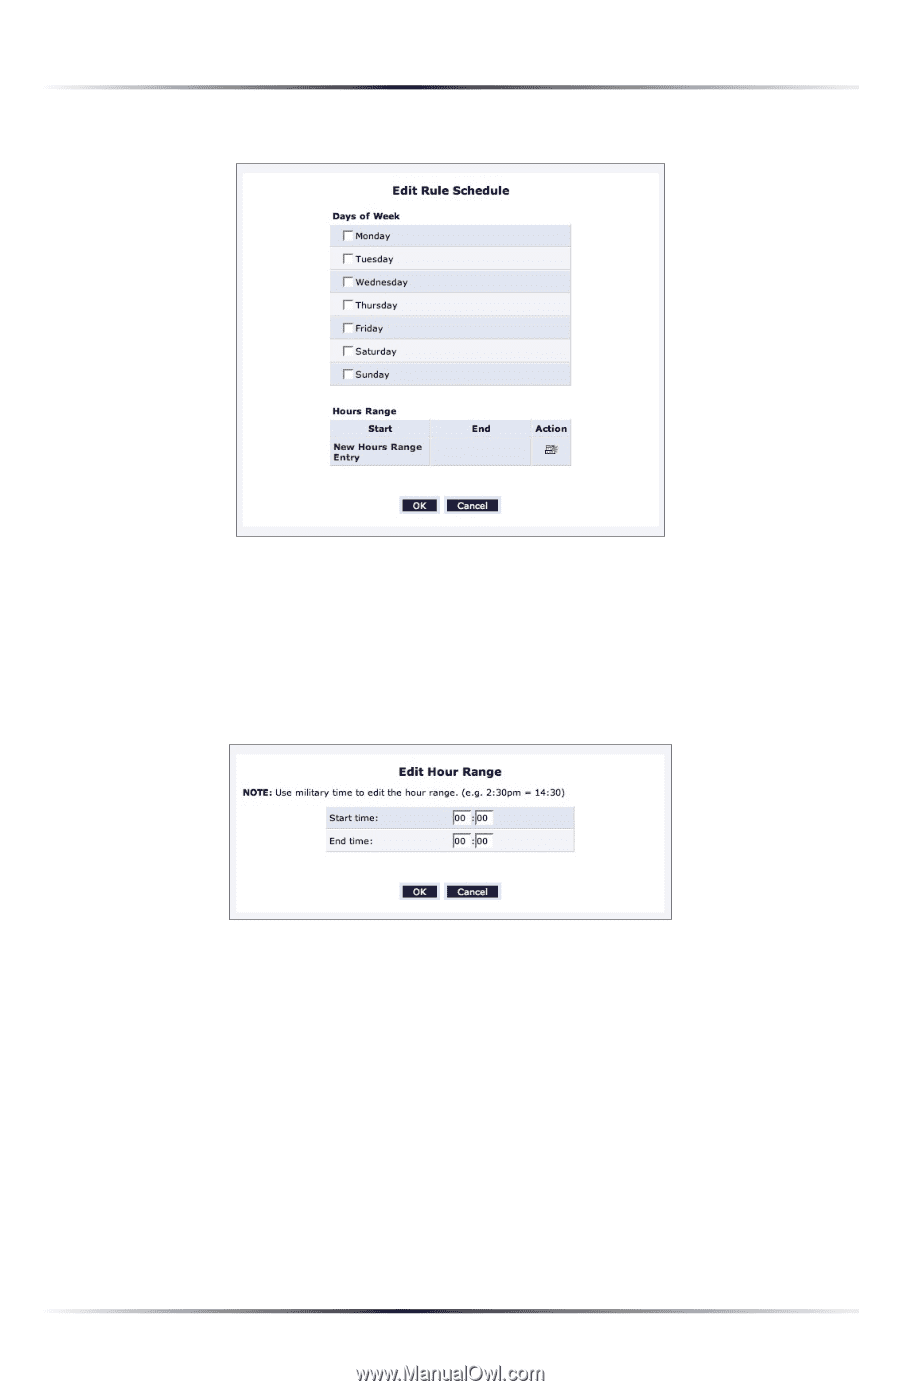
Chapter 8 Using Advanced Settings 6. Click Add Rule Schedule. The "Edit Rule Schedule" screen appears. 7. Select or active or inactive days of the week by clicking in the appropriate text boxes. 8. If applicable, click New Hours Range Entry to define an active/inactive hourly range. The "Edit Hour Range" screen appears. Enter a start and end time in the appropriate text boxes. 9. Click OK. ☞ Note: Make sure the Router's date and time settings are properly configured for the time zone. 123
-
 1
1 -
2
-
3
-
4
-
5
-
6
-
7
-
8
-
9
-
10
-
11
-
12
-
13
-
14
-
15
-
16
-
17
-
18
-
19
-
20
-
21
-
22
-
23
-
24
-
25
-
26
-
27
-
28
-
29
-
30
-
31
-
32
-
33
-
34
-
35
-
36
-
37
-
38
-
39
-
40
-
41
-
42
-
43
-
44
-
45
-
46
-
47
-
48
-
49
-
50
-
51
-
52
-
53
-
54
-
55
-
56
-
57
-
58
-
59
-
60
-
61
-
62
-
63
-
64
-
65
-
66
-
67
-
68
-
69
-
70
-
71
-
72
-
73
-
74
-
75
-
76
-
77
-
78
-
79
-
80
-
81
-
82
-
83
-
84
-
85
-
86
-
87
-
88
-
89
-
90
-
91
-
92
-
93
-
94
-
95
-
96
-
97
-
98
-
99
-
100
-
101
-
102
-
103
-
104
-
105
-
106
-
107
-
108
-
109
-
110
-
111
-
112
-
113
-
114
-
115
-
116
-
117
-
118
-
119
-
120
-
 121
121 -
 122
122 -
 123
123 -
 124
124 -
 125
125 -
 126
126 -
 127
127 -
 128
128 -
 129
129 -
 130
130 -
 131
131 -
132
-
133
-
134
-
135
-
136
-
137
-
138
-
139
-
140
-
141
-
142
-
143
-
144
-
145
-
146
-
147
-
148
-
149
-
150
-
151
-
152
-
153
-
154
-
155
-
156
-
157
-
158
-
159
-
160
-
161
-
162
-
163
-
164
-
165
-
166
-
167
-
168
-
169
-
170
-
171
 |
 |
123
Chapter 8
Using Advanced Settings
6.
Click
Add Rule Schedule
. The “Edit Rule Schedule” screen appears.
7.
Select or active or inactive days of the week by clicking in the appropriate text
boxes.
8.
If applicable, click
New Hours Range Entry
to define an active/inactive hourly
range. The “Edit Hour Range” screen appears. Enter a start and end time in the
appropriate text boxes.
9.
Click
OK
.
☞
Note:
Make sure the Router’s date and time settings are properly
configured for the time zone.