Asus PCI-DA2100 User Manual - Page 174
Installing SlackWare Linux
 |
View all Asus PCI-DA2100 manuals
Add to My Manuals
Save this manual to your list of manuals |
Page 174 highlights
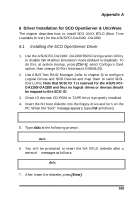
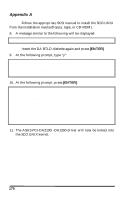
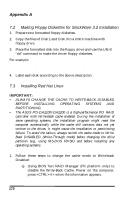
Appendix A 6. Choose "SCSI CD-ROM", the installation program will found ASUS PCI-DA2100/-DA2200 RAID controller, follow the onscreen instructions to continue. 7. Insert "ASUS PCI-DA2100/-DA2200 Red Hat 5.1 Supplement Disk" disk 4 into floppy drive when prompted. 8. When on-screen appears "Please insert the Disk 3 (Driver disk)", insert "ASUS PCI-DA2100/-DA2200 Text RAID Manager, RAIDSNMP for Linux" into the floppy drive. 9. Follow the on-screen instructions to complete the installation of Red Hat 5.1. 7.4 Installing SlackWare Linux IMPORTANT: • ALWAYS CHANGE THE CACHE TO WRITE-BACK DISABLED BEFORE INSTALLING OPERATING SYSTEMS AND PARTITIONING. • The ASUS PCI-DA2100/-DA2200 is a high-performance PCI RAID controller with Write-Back cache enabled. During the installation of some operating systems, the installation program might reset the computer automatically while the cache still contains data not yet written to the drives. It might cause the installation or partitioning failure. To avoid the failure, always switch the cache mode to WriteBack DISABLED (Write-Through mode) before changing the drive partition (e.g., using MS-DOS FDISK) and before installing any operating systems. 1. Follow these steps to change the cache mode to Write-back Disabled: a) Using BIOS Text RAID Manager (PC platform only) to disable the Write-Back Cache. Power on the computer, press when the information appears. b) Choose "Configure RAID" from the menu and press to enter a proper display mode (either ANSI, VT-100 or ANSI Color). 174 ASUS PCI-DA2100/PCI-DA2200 User's Manual
-
 1
1 -
2
-
3
-
4
-
5
-
6
-
7
-
8
-
9
-
10
-
11
-
12
-
13
-
14
-
15
-
16
-
17
-
18
-
19
-
20
-
21
-
22
-
23
-
24
-
25
-
26
-
27
-
28
-
29
-
30
-
31
-
32
-
33
-
34
-
35
-
36
-
37
-
38
-
39
-
40
-
41
-
42
-
43
-
44
-
45
-
46
-
47
-
48
-
49
-
50
-
51
-
52
-
53
-
54
-
55
-
56
-
57
-
58
-
59
-
60
-
61
-
62
-
63
-
64
-
65
-
66
-
67
-
68
-
69
-
70
-
71
-
72
-
73
-
74
-
75
-
76
-
77
-
78
-
79
-
80
-
81
-
82
-
83
-
84
-
85
-
86
-
87
-
88
-
89
-
90
-
91
-
92
-
93
-
94
-
95
-
96
-
97
-
98
-
99
-
100
-
101
-
102
-
103
-
104
-
105
-
106
-
107
-
108
-
109
-
110
-
111
-
112
-
113
-
114
-
115
-
116
-
117
-
118
-
119
-
120
-
121
-
122
-
123
-
124
-
125
-
126
-
127
-
128
-
129
-
130
-
131
-
132
-
133
-
134
-
135
-
136
-
137
-
138
-
139
-
140
-
141
-
142
-
143
-
144
-
145
-
146
-
147
-
148
-
149
-
150
-
151
-
152
-
153
-
154
-
155
-
156
-
157
-
158
-
159
-
160
-
161
-
162
-
163
-
164
-
165
-
166
-
167
-
168
-
 169
169 -
 170
170 -
 171
171 -
 172
172 -
 173
173 -
 174
174 -
 175
175 -
 176
176 -
 177
177 -
 178
178 -
 179
179 -
180
-
181
-
182
-
183
-
184
-
185
-
186
-
187
-
188
-
189
-
190
-
191
-
192
-
193
-
194
-
195
-
196
-
197
-
198
-
199
-
200
-
201
-
202
-
203
-
204
-
205
-
206
-
207
-
208
-
209
-
210
-
211
-
212
-
213
-
214
-
215
-
216
-
217
-
218
-
219
-
220
-
221
-
222
-
223
-
224
-
225
-
226
-
227
-
228
-
229
-
230
-
231
-
232
-
233
-
234
-
235
-
236
-
237
-
238
-
239
-
240
-
241
-
242
-
243
-
244
-
245
-
246
-
247
-
248
-
249
-
250
-
251
-
252
-
253
-
254
-
255
-
256
-
257
-
258
-
259
-
260
-
261
-
262
-
263
-
264
-
265
-
266
-
267
-
268
-
269
-
270
-
271
-
272
-
273
-
274
-
275
-
276
-
277
-
278
-
279
-
280
-
281
-
282
-
283
-
284
-
285
-
286
-
287
-
288
-
289
-
290
-
291
-
292
-
293
-
294
-
295
-
296
-
297
-
298
-
299
-
300
-
301
-
302
-
303
-
304
-
305
-
306
-
307
-
308
-
309
-
310
-
311
-
312
-
313
-
314
-
315
-
316
-
317
-
318
-
319
-
320
-
321
-
322
-
323
-
324
-
325
-
326
-
327
-
328
-
329
-
330
-
331
-
332
-
333
-
334
-
335
-
336
-
337
-
338
-
339
-
340
-
341
-
342
-
343
-
344
-
345
-
346
-
347
-
348
-
349
-
350
-
351
-
352
-
353
-
354
-
355
-
356
-
357
-
358
-
359
-
360
-
361
-
362
-
363
-
364
-
365
-
366
-
367
-
368
-
369
-
370
-
371
-
372
-
373
-
374
-
375
-
376
-
377
-
378
-
379
-
380
-
381
-
382
-
383
-
384
-
385
-
386
-
387
-
388
-
389
-
390
-
391
-
392
-
393
-
394
-
395
-
396
-
397
-
398
-
399
-
400
-
401
-
402
-
403
-
404
-
405
-
406
-
407
-
408
-
409
-
410
 |
 |