Cisco SR224T Administration Guide - Page 228
Configuring RADIUS, Apply, Security, RADIUS, IP Version, Retries, Timeout for Reply, Dead Time
 |
View all Cisco SR224T manuals
Add to My Manuals
Save this manual to your list of manuals |
Page 228 highlights
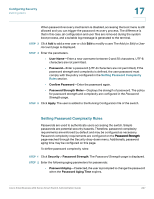
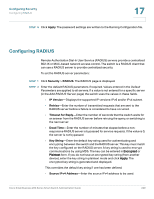
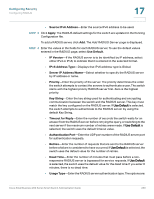
Configuring Security Configuring RADIUS 17 STEP 5 Click Apply. The password settings are written to the Running Configuration file. Configuring RADIUS Remote Authorization Dial-In User Service (RADIUS) servers provide a centralized 802.1X or MAC-based network access control. The switch is a RADIUS client that can use a RADIUS server to provide centralized security. To set the RADIUS server parameters: STEP 1 Click Security > RADIUS. The RADIUS page is displayed. STEP 2 Enter the default RADIUS parameters if required. Values entered in the Default Parameters are applied to all servers. If a value is not entered for a specific server (in the Add RADIUS Server page) the switch uses the values in these fields. • IP Version-Displays the supported IP versions: IPv6 and/or IPv4 subnet. • Retries-Enter the number of transmitted requests that are sent to the RADIUS server before a failure is considered to have occurred. • Timeout for Reply-Enter the number of seconds that the switch waits for an answer from the RADIUS server before retrying the query, or switching to the next server. • Dead Time-Enter the number of minutes that elapse before a nonresponsive RADIUS server is bypassed for service requests. If the value is 0, the server is not bypassed. • Key String-Enter the default key string used for authenticating and encrypting between the switch and the RADIUS server. This key must match the key configured on the RADIUS server. A key string is used to encrypt communications by using MD5. The key can be entered in Encrypted or Plaintext form. If you do not have an encrypted key string (from another device), enter the key string in plaintext mode and click Apply. The encrypted key string is generated and displayed. This overrides the default key string if one has been defined. • Source IPv4 Address-Enter the source IPv4 address to be used. Cisco Small Business 200 Series Smart Switch Administration Guide 229
-
 1
1 -
2
-
3
-
4
-
5
-
6
-
7
-
8
-
9
-
10
-
11
-
12
-
13
-
14
-
15
-
16
-
17
-
18
-
19
-
20
-
21
-
22
-
23
-
24
-
25
-
26
-
27
-
28
-
29
-
30
-
31
-
32
-
33
-
34
-
35
-
36
-
37
-
38
-
39
-
40
-
41
-
42
-
43
-
44
-
45
-
46
-
47
-
48
-
49
-
50
-
51
-
52
-
53
-
54
-
55
-
56
-
57
-
58
-
59
-
60
-
61
-
62
-
63
-
64
-
65
-
66
-
67
-
68
-
69
-
70
-
71
-
72
-
73
-
74
-
75
-
76
-
77
-
78
-
79
-
80
-
81
-
82
-
83
-
84
-
85
-
86
-
87
-
88
-
89
-
90
-
91
-
92
-
93
-
94
-
95
-
96
-
97
-
98
-
99
-
100
-
101
-
102
-
103
-
104
-
105
-
106
-
107
-
108
-
109
-
110
-
111
-
112
-
113
-
114
-
115
-
116
-
117
-
118
-
119
-
120
-
121
-
122
-
123
-
124
-
125
-
126
-
127
-
128
-
129
-
130
-
131
-
132
-
133
-
134
-
135
-
136
-
137
-
138
-
139
-
140
-
141
-
142
-
143
-
144
-
145
-
146
-
147
-
148
-
149
-
150
-
151
-
152
-
153
-
154
-
155
-
156
-
157
-
158
-
159
-
160
-
161
-
162
-
163
-
164
-
165
-
166
-
167
-
168
-
169
-
170
-
171
-
172
-
173
-
174
-
175
-
176
-
177
-
178
-
179
-
180
-
181
-
182
-
183
-
184
-
185
-
186
-
187
-
188
-
189
-
190
-
191
-
192
-
193
-
194
-
195
-
196
-
197
-
198
-
199
-
200
-
201
-
202
-
203
-
204
-
205
-
206
-
207
-
208
-
209
-
210
-
211
-
212
-
213
-
214
-
215
-
216
-
217
-
218
-
219
-
220
-
221
-
222
-
 223
223 -
 224
224 -
 225
225 -
 226
226 -
 227
227 -
 228
228 -
 229
229 -
 230
230 -
 231
231 -
 232
232 -
 233
233 -
234
-
235
-
236
-
237
-
238
-
239
-
240
-
241
-
242
-
243
-
244
-
245
-
246
-
247
-
248
-
249
-
250
-
251
-
252
-
253
-
254
-
255
-
256
-
257
-
258
-
259
-
260
-
261
-
262
-
263
-
264
-
265
-
266
-
267
-
268
-
269
-
270
-
271
-
272
-
273
-
274
-
275
-
276
-
277
-
278
-
279
-
280
-
281
-
282
-
283
 |
 |
