Cisco SR224T Administration Guide - Page 42
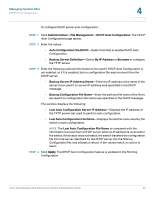
Last Auto Configuration Server IP Address, Backup Server IP Address/Name
 |
View all Cisco SR224T manuals
Add to My Manuals
Save this manual to your list of manuals |
Page 42 highlights
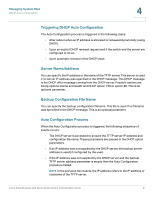
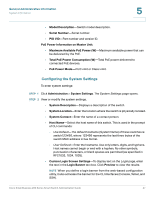
Managing System Files DHCP Auto Configuration 4 To configure DHCP server auto configuration: STEP 1 Click Administration > File Management > DHCP Auto Configuration. The DHCP Auto Configuration page opens. STEP 2 Enter the values. • Auto Configuration Via DHCP-Select this field to enable DHCP Auto Configuration. • Backup Server Definition-Select By IP Address or By name to configure the TFTP server. STEP 3 Enter the following optional information to be used if DHCP Auto Configuration is not enabled, or if it is enabled, but no configuration file was received from the DHCP server. • Backup Server IP Address/Name-Enter the IP address or the name of the server to be used if no server IP address was specified in the DHCP message. • Backup Configuration File Name-Enter the path and file name of the file to be used if no configuration file name was specified in the DHCP message. The window displays the following: • Last Auto Configuration Server IP Address-Displays the IP address of the TFTP server last used to perform auto configuration. • Last Auto Configuration File Name-Displays the last file name used by the switch in auto configuration. NOTE The Last Auto Configuration File Name is compared with the information received from a DHCP server when an IP address is received for the switch. If this value does not match, the switch transfers the configuration file from the server identified by the DHCP server into the Startup Configuration file, and initiates a reboot. If the values match, no action is taken. STEP 4 Click Apply. The DHCP Auto Configuration feature is updated in the Running Configuration. Cisco Small Business 200 Series Smart Switch Administration Guide 43
-
 1
1 -
2
-
3
-
4
-
5
-
6
-
7
-
8
-
9
-
10
-
11
-
12
-
13
-
14
-
15
-
16
-
17
-
18
-
19
-
20
-
21
-
22
-
23
-
24
-
25
-
26
-
27
-
28
-
29
-
30
-
31
-
32
-
33
-
34
-
35
-
36
-
 37
37 -
 38
38 -
 39
39 -
 40
40 -
 41
41 -
 42
42 -
 43
43 -
 44
44 -
 45
45 -
 46
46 -
 47
47 -
48
-
49
-
50
-
51
-
52
-
53
-
54
-
55
-
56
-
57
-
58
-
59
-
60
-
61
-
62
-
63
-
64
-
65
-
66
-
67
-
68
-
69
-
70
-
71
-
72
-
73
-
74
-
75
-
76
-
77
-
78
-
79
-
80
-
81
-
82
-
83
-
84
-
85
-
86
-
87
-
88
-
89
-
90
-
91
-
92
-
93
-
94
-
95
-
96
-
97
-
98
-
99
-
100
-
101
-
102
-
103
-
104
-
105
-
106
-
107
-
108
-
109
-
110
-
111
-
112
-
113
-
114
-
115
-
116
-
117
-
118
-
119
-
120
-
121
-
122
-
123
-
124
-
125
-
126
-
127
-
128
-
129
-
130
-
131
-
132
-
133
-
134
-
135
-
136
-
137
-
138
-
139
-
140
-
141
-
142
-
143
-
144
-
145
-
146
-
147
-
148
-
149
-
150
-
151
-
152
-
153
-
154
-
155
-
156
-
157
-
158
-
159
-
160
-
161
-
162
-
163
-
164
-
165
-
166
-
167
-
168
-
169
-
170
-
171
-
172
-
173
-
174
-
175
-
176
-
177
-
178
-
179
-
180
-
181
-
182
-
183
-
184
-
185
-
186
-
187
-
188
-
189
-
190
-
191
-
192
-
193
-
194
-
195
-
196
-
197
-
198
-
199
-
200
-
201
-
202
-
203
-
204
-
205
-
206
-
207
-
208
-
209
-
210
-
211
-
212
-
213
-
214
-
215
-
216
-
217
-
218
-
219
-
220
-
221
-
222
-
223
-
224
-
225
-
226
-
227
-
228
-
229
-
230
-
231
-
232
-
233
-
234
-
235
-
236
-
237
-
238
-
239
-
240
-
241
-
242
-
243
-
244
-
245
-
246
-
247
-
248
-
249
-
250
-
251
-
252
-
253
-
254
-
255
-
256
-
257
-
258
-
259
-
260
-
261
-
262
-
263
-
264
-
265
-
266
-
267
-
268
-
269
-
270
-
271
-
272
-
273
-
274
-
275
-
276
-
277
-
278
-
279
-
280
-
281
-
282
-
283
 |
 |
