Cisco SR224T Administration Guide - Page 237
Defining Storm Control, Service Name, Local IP Address, Local Port, Application Instance, Apply
 |
View all Cisco SR224T manuals
Add to My Manuals
Save this manual to your list of manuals |
Page 237 highlights
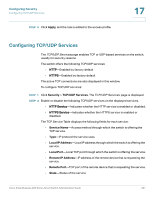
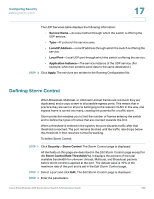
Configuring Security Defining Storm Control 17 The UDP Services table displays the following information: • Service Name-Access method through which the switch is offering the UDP service. • Type-IP protocol the service uses. • Local IP Address-Local IP address through which the switch is offering the service. • Local Port-Local UDP port through which the switch is offering the service. • Application Instance-The service instance of the UDP service. (For example, when two senders send data to the same destination.) STEP 3 Click Apply. The services are written to the Running Configuration file. Defining Storm Control When Broadcast, Multicast, or Unknown Unicast frames are received, they are duplicated, and a copy is sent to all possible egress ports. This means that in practice they are sent to all ports belonging to the relevant VLAN. In this way, one ingress frame is turned into many, creating the potential for a traffic storm. Storm protection enables you to limit the number of frames entering the switch and to define the types of frames that are counted towards this limit. When a threshold is entered in the system, the port discards traffic after that threshold is reached. The port remains blocked until the traffic rate drops below this threshold. It then resumes normal forwarding. To define Storm Control: STEP 1 Click Security > Storm Control. The Storm Control page is displayed. All the fields on this page are described in the Edit Storm Control page except for the Storm Control Rate Threshold (%). It displays the percent of the total available bandwidth for unknown Unicast, Multicast, and Broadcast packets before storm control is applied at the port. The default value is 10% of the maximum rate of the port and is set in the Edit Storm Control page. STEP 2 Select a port and click Edit. The Edit Storm Control page is displayed. STEP 3 Enter the parameters. Cisco Small Business 200 Series Smart Switch Administration Guide 238
-
 1
1 -
2
-
3
-
4
-
5
-
6
-
7
-
8
-
9
-
10
-
11
-
12
-
13
-
14
-
15
-
16
-
17
-
18
-
19
-
20
-
21
-
22
-
23
-
24
-
25
-
26
-
27
-
28
-
29
-
30
-
31
-
32
-
33
-
34
-
35
-
36
-
37
-
38
-
39
-
40
-
41
-
42
-
43
-
44
-
45
-
46
-
47
-
48
-
49
-
50
-
51
-
52
-
53
-
54
-
55
-
56
-
57
-
58
-
59
-
60
-
61
-
62
-
63
-
64
-
65
-
66
-
67
-
68
-
69
-
70
-
71
-
72
-
73
-
74
-
75
-
76
-
77
-
78
-
79
-
80
-
81
-
82
-
83
-
84
-
85
-
86
-
87
-
88
-
89
-
90
-
91
-
92
-
93
-
94
-
95
-
96
-
97
-
98
-
99
-
100
-
101
-
102
-
103
-
104
-
105
-
106
-
107
-
108
-
109
-
110
-
111
-
112
-
113
-
114
-
115
-
116
-
117
-
118
-
119
-
120
-
121
-
122
-
123
-
124
-
125
-
126
-
127
-
128
-
129
-
130
-
131
-
132
-
133
-
134
-
135
-
136
-
137
-
138
-
139
-
140
-
141
-
142
-
143
-
144
-
145
-
146
-
147
-
148
-
149
-
150
-
151
-
152
-
153
-
154
-
155
-
156
-
157
-
158
-
159
-
160
-
161
-
162
-
163
-
164
-
165
-
166
-
167
-
168
-
169
-
170
-
171
-
172
-
173
-
174
-
175
-
176
-
177
-
178
-
179
-
180
-
181
-
182
-
183
-
184
-
185
-
186
-
187
-
188
-
189
-
190
-
191
-
192
-
193
-
194
-
195
-
196
-
197
-
198
-
199
-
200
-
201
-
202
-
203
-
204
-
205
-
206
-
207
-
208
-
209
-
210
-
211
-
212
-
213
-
214
-
215
-
216
-
217
-
218
-
219
-
220
-
221
-
222
-
223
-
224
-
225
-
226
-
227
-
228
-
229
-
230
-
231
-
 232
232 -
 233
233 -
 234
234 -
 235
235 -
 236
236 -
 237
237 -
 238
238 -
 239
239 -
 240
240 -
 241
241 -
 242
242 -
243
-
244
-
245
-
246
-
247
-
248
-
249
-
250
-
251
-
252
-
253
-
254
-
255
-
256
-
257
-
258
-
259
-
260
-
261
-
262
-
263
-
264
-
265
-
266
-
267
-
268
-
269
-
270
-
271
-
272
-
273
-
274
-
275
-
276
-
277
-
278
-
279
-
280
-
281
-
282
-
283
 |
 |
