Epson FX-880 User Manual - Page 169
Loading Roll Paper, Set the paper release lever to the single-sheet position. Also set
 |
View all Epson FX-880 manuals
Add to My Manuals
Save this manual to your list of manuals |
Page 169 highlights
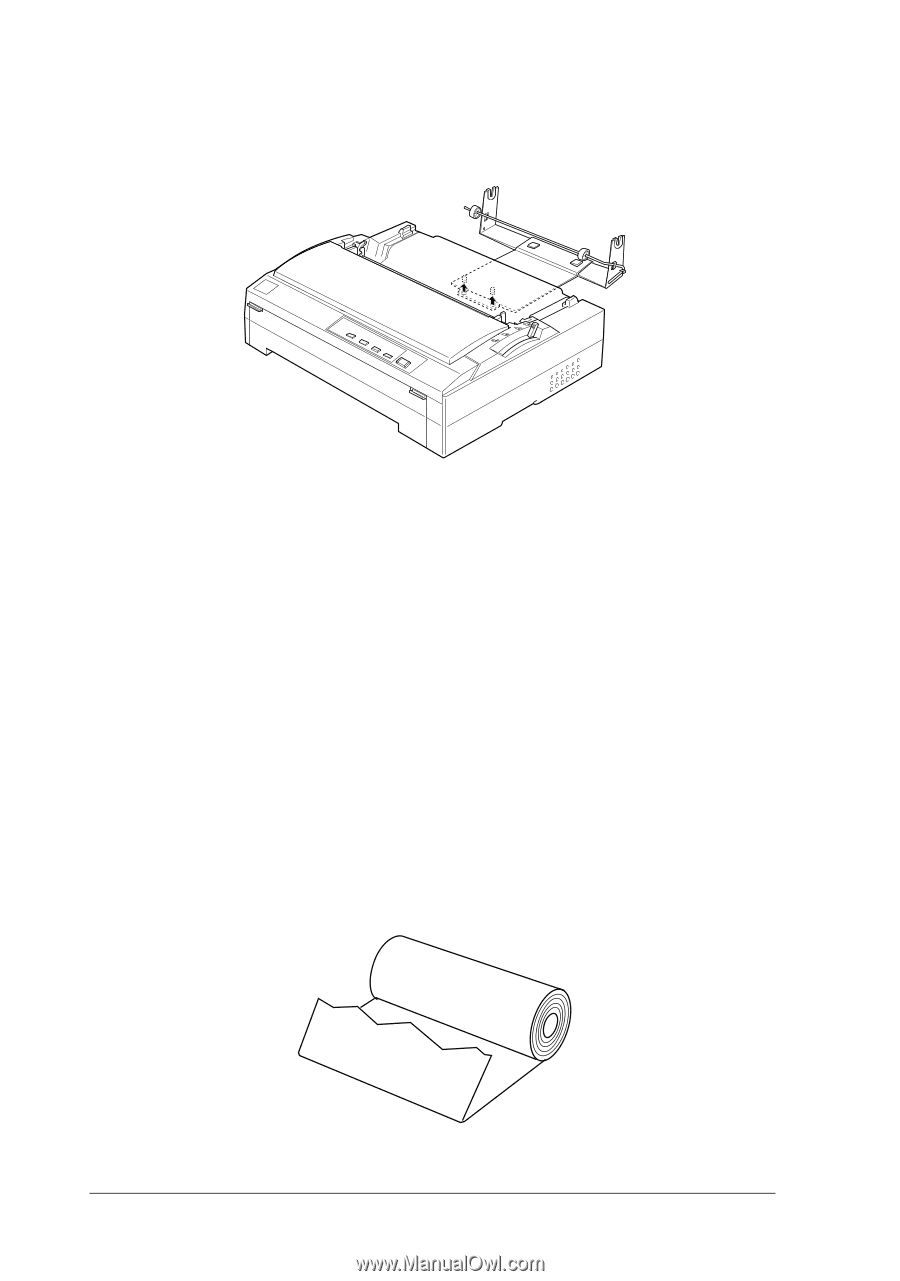
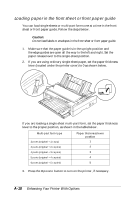
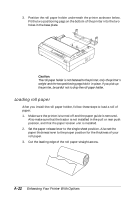
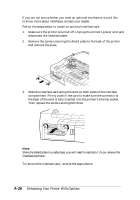
3. Position the roll paper holder underneath the printer as shown below. Fit the two positioning pegs on the bottom of the printer into the two holes in the base plate. c Caution: The roll paper holder is not fastened to the printer; only the printer's weight and the two positioning pegs hold it in place. If you pick up the printer, be careful not to drop the roll paper holder. Loading roll paper After you install the roll paper holder, follow these steps to load a roll of paper: 1. Make sure the printer is turned off and the paper guide is removed. Also make sure that the tractor is not installed in the pull or rear push position, and that the paper tension unit is installed. 2. Set the paper release lever to the single-sheet position. Also set the paper thickness lever to the proper position for the thickness of your roll paper. 3. Cut the leading edge of the roll paper straight across. A-22 Enhancing Your Printer With Options
-
 1
1 -
2
-
3
-
4
-
5
-
6
-
7
-
8
-
9
-
10
-
11
-
12
-
13
-
14
-
15
-
16
-
17
-
18
-
19
-
20
-
21
-
22
-
23
-
24
-
25
-
26
-
27
-
28
-
29
-
30
-
31
-
32
-
33
-
34
-
35
-
36
-
37
-
38
-
39
-
40
-
41
-
42
-
43
-
44
-
45
-
46
-
47
-
48
-
49
-
50
-
51
-
52
-
53
-
54
-
55
-
56
-
57
-
58
-
59
-
60
-
61
-
62
-
63
-
64
-
65
-
66
-
67
-
68
-
69
-
70
-
71
-
72
-
73
-
74
-
75
-
76
-
77
-
78
-
79
-
80
-
81
-
82
-
83
-
84
-
85
-
86
-
87
-
88
-
89
-
90
-
91
-
92
-
93
-
94
-
95
-
96
-
97
-
98
-
99
-
100
-
101
-
102
-
103
-
104
-
105
-
106
-
107
-
108
-
109
-
110
-
111
-
112
-
113
-
114
-
115
-
116
-
117
-
118
-
119
-
120
-
121
-
122
-
123
-
124
-
125
-
126
-
127
-
128
-
129
-
130
-
131
-
132
-
133
-
134
-
135
-
136
-
137
-
138
-
139
-
140
-
141
-
142
-
143
-
144
-
145
-
146
-
147
-
148
-
149
-
150
-
151
-
152
-
153
-
154
-
155
-
156
-
157
-
158
-
159
-
160
-
161
-
162
-
163
-
 164
164 -
 165
165 -
 166
166 -
 167
167 -
 168
168 -
 169
169 -
 170
170 -
 171
171 -
 172
172 -
 173
173 -
 174
174 -
175
-
176
-
177
-
178
-
179
-
180
-
181
-
182
-
183
-
184
-
185
-
186
-
187
-
188
-
189
-
190
-
191
-
192
-
193
-
194
-
195
-
196
-
197
-
198
-
199
-
200
-
201
-
202
-
203
-
204
-
205
-
206
-
207
-
208
-
209
-
210
-
211
-
212
-
213
-
214
-
215
-
216
-
217
-
218
-
219
-
220
-
221
 |
 |