Epson FX-880 User Manual - Page 47
Device Options menu, Print Quality
 |
View all Epson FX-880 manuals
Add to My Manuals
Save this manual to your list of manuals |
Page 47 highlights
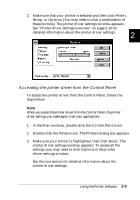
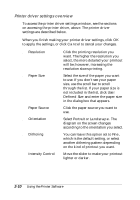
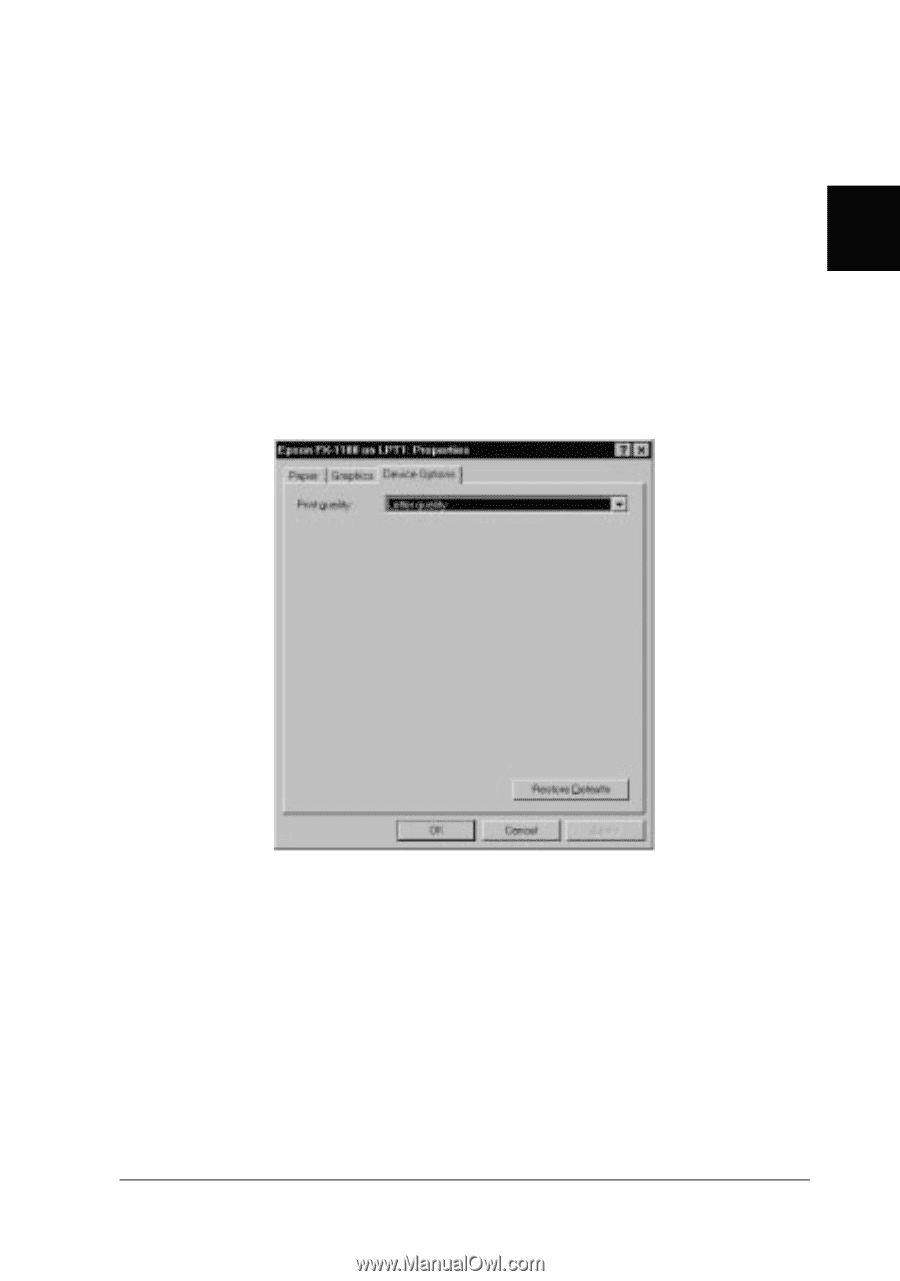
q Dithering q Intensity You can leave this option set to Fine, which is the default setting, or select another dithering pattern depending on the kind of printout you want. The display to the left of the dithering options shows the effect of your 2 setting. Move the slider to make your printout lighter or darker. Device Options menu q Print Quality Select the print quality from the Print Quality list. Higher quality means the printer produces more detailed printouts at a slower printing speed. Once you've checked your printer driver settings and changed them if necessary, you are ready to print with continuous paper as described in Chapter 3, or with single sheets as described in Chapter 4. Using the Printer Software 2-7
-
 1
1 -
2
-
3
-
4
-
5
-
6
-
7
-
8
-
9
-
10
-
11
-
12
-
13
-
14
-
15
-
16
-
17
-
18
-
19
-
20
-
21
-
22
-
23
-
24
-
25
-
26
-
27
-
28
-
29
-
30
-
31
-
32
-
33
-
34
-
35
-
36
-
37
-
38
-
39
-
40
-
41
-
 42
42 -
 43
43 -
 44
44 -
 45
45 -
 46
46 -
 47
47 -
 48
48 -
 49
49 -
 50
50 -
 51
51 -
 52
52 -
53
-
54
-
55
-
56
-
57
-
58
-
59
-
60
-
61
-
62
-
63
-
64
-
65
-
66
-
67
-
68
-
69
-
70
-
71
-
72
-
73
-
74
-
75
-
76
-
77
-
78
-
79
-
80
-
81
-
82
-
83
-
84
-
85
-
86
-
87
-
88
-
89
-
90
-
91
-
92
-
93
-
94
-
95
-
96
-
97
-
98
-
99
-
100
-
101
-
102
-
103
-
104
-
105
-
106
-
107
-
108
-
109
-
110
-
111
-
112
-
113
-
114
-
115
-
116
-
117
-
118
-
119
-
120
-
121
-
122
-
123
-
124
-
125
-
126
-
127
-
128
-
129
-
130
-
131
-
132
-
133
-
134
-
135
-
136
-
137
-
138
-
139
-
140
-
141
-
142
-
143
-
144
-
145
-
146
-
147
-
148
-
149
-
150
-
151
-
152
-
153
-
154
-
155
-
156
-
157
-
158
-
159
-
160
-
161
-
162
-
163
-
164
-
165
-
166
-
167
-
168
-
169
-
170
-
171
-
172
-
173
-
174
-
175
-
176
-
177
-
178
-
179
-
180
-
181
-
182
-
183
-
184
-
185
-
186
-
187
-
188
-
189
-
190
-
191
-
192
-
193
-
194
-
195
-
196
-
197
-
198
-
199
-
200
-
201
-
202
-
203
-
204
-
205
-
206
-
207
-
208
-
209
-
210
-
211
-
212
-
213
-
214
-
215
-
216
-
217
-
218
-
219
-
220
-
221
 |
 |
q
Dithering
You can leave this option set to
Fine
,
which is the default setting, or select
another dithering pattern depending
on the kind of printout you want. The
display to the left of the dithering
options shows the effect of your
setting.
q
Intensity
Move the slider to make your printout
lighter or darker.
Device Options menu
q
Print Quality
Select the print quality from the Print
Quality list. Higher quality means the
printer produces more detailed
printouts at a slower printing speed.
Once you’ve checked your printer driver settings and changed
them if necessary, you are ready to print with continuous paper
as described in Chapter 3, or with single sheets as described in
Chapter 4.
2
Using the Printer Software
2-7