Epson FX-880 User Manual - Page 64
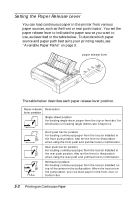
Setting the Paper Thickness Lever, the thickness of your paper. - specifications
 |
View all Epson FX-880 manuals
Add to My Manuals
Save this manual to your list of manuals |
Page 64 highlights
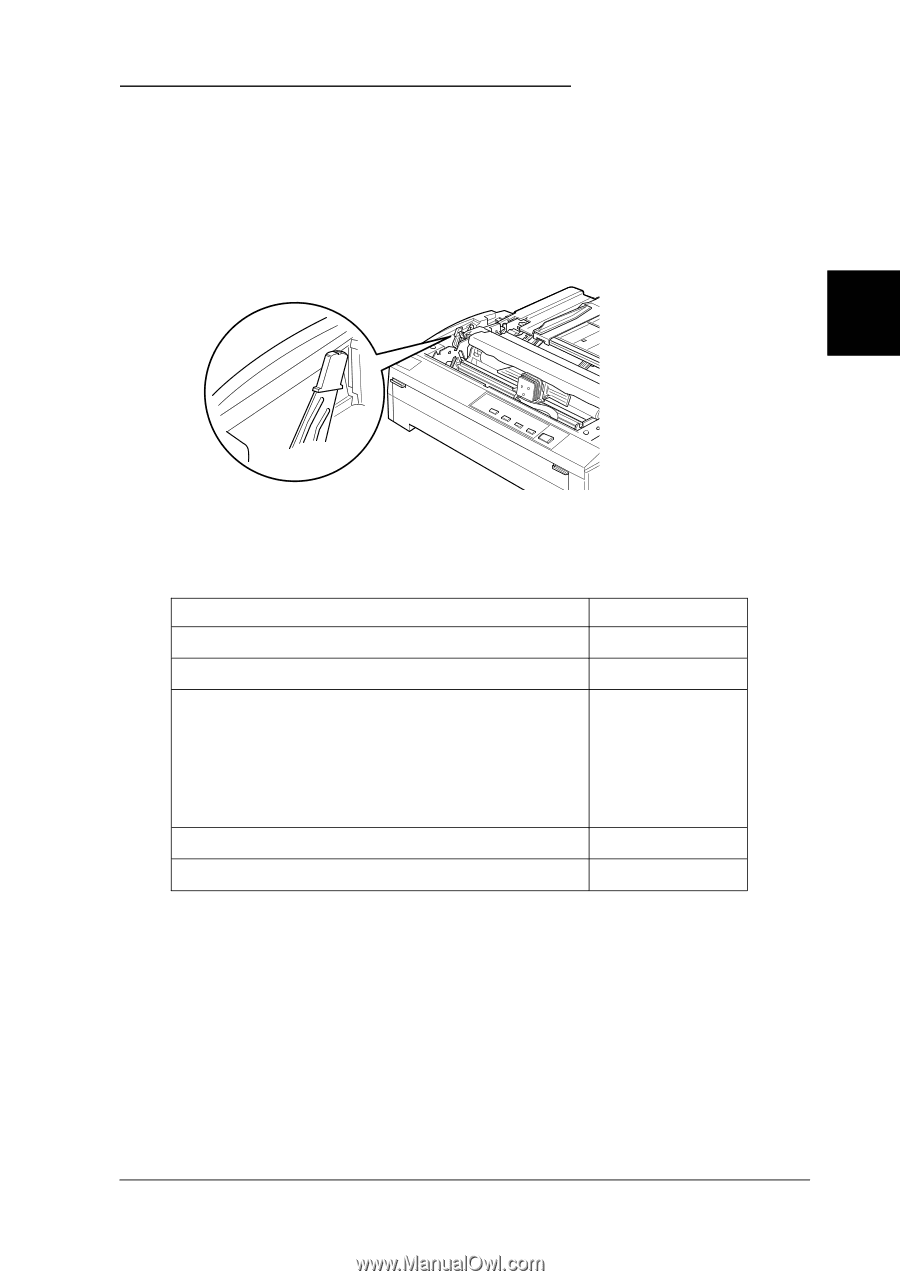
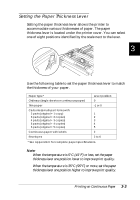
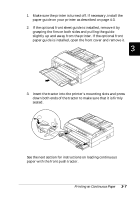
Setting the Paper Thickness Lever Setting the paper thickness lever allows the printer to accommodate various thicknesses of paper. The paper thickness lever is located under the printer cover. You can select one of eight positions identified by the scale next to the lever. 3 0 -1 1 2 3 4 5 6 Use the following table to set the paper thickness lever to match the thickness of your paper. Paper type* Ordinary (single sheets or continuous paper) Thin paper Carbonless multi-part forms with: 2 parts (original + 1 copy) 3 parts (original + 2 copies) 4 parts (original + 3 copies) 5 parts (original + 4 copies) 6 parts (original + 5 copies) Continuous paper with labels Envelopes Lever position 0 -1 or 0 1 2 3 4 5 2 2 to 6 * See Appendix C for complete paper specifications. Note: o When the temperature is 5°C (41°F) or less, set the paper thickness lever one position lower to improve print quality. o When the temperature is 35°C (95°F) or more, set the paper thickness lever one position higher to improve print quality. Printing on Continuous Paper 3-3
-
 1
1 -
2
-
3
-
4
-
5
-
6
-
7
-
8
-
9
-
10
-
11
-
12
-
13
-
14
-
15
-
16
-
17
-
18
-
19
-
20
-
21
-
22
-
23
-
24
-
25
-
26
-
27
-
28
-
29
-
30
-
31
-
32
-
33
-
34
-
35
-
36
-
37
-
38
-
39
-
40
-
41
-
42
-
43
-
44
-
45
-
46
-
47
-
48
-
49
-
50
-
51
-
52
-
53
-
54
-
55
-
56
-
57
-
58
-
 59
59 -
 60
60 -
 61
61 -
 62
62 -
 63
63 -
 64
64 -
 65
65 -
 66
66 -
 67
67 -
 68
68 -
 69
69 -
70
-
71
-
72
-
73
-
74
-
75
-
76
-
77
-
78
-
79
-
80
-
81
-
82
-
83
-
84
-
85
-
86
-
87
-
88
-
89
-
90
-
91
-
92
-
93
-
94
-
95
-
96
-
97
-
98
-
99
-
100
-
101
-
102
-
103
-
104
-
105
-
106
-
107
-
108
-
109
-
110
-
111
-
112
-
113
-
114
-
115
-
116
-
117
-
118
-
119
-
120
-
121
-
122
-
123
-
124
-
125
-
126
-
127
-
128
-
129
-
130
-
131
-
132
-
133
-
134
-
135
-
136
-
137
-
138
-
139
-
140
-
141
-
142
-
143
-
144
-
145
-
146
-
147
-
148
-
149
-
150
-
151
-
152
-
153
-
154
-
155
-
156
-
157
-
158
-
159
-
160
-
161
-
162
-
163
-
164
-
165
-
166
-
167
-
168
-
169
-
170
-
171
-
172
-
173
-
174
-
175
-
176
-
177
-
178
-
179
-
180
-
181
-
182
-
183
-
184
-
185
-
186
-
187
-
188
-
189
-
190
-
191
-
192
-
193
-
194
-
195
-
196
-
197
-
198
-
199
-
200
-
201
-
202
-
203
-
204
-
205
-
206
-
207
-
208
-
209
-
210
-
211
-
212
-
213
-
214
-
215
-
216
-
217
-
218
-
219
-
220
-
221
 |
 |