Epson FX-880 User Manual - Page 75
Installing the Tractor in the Rear Push Position, Make sure the printer is turned off.
 |
View all Epson FX-880 manuals
Add to My Manuals
Save this manual to your list of manuals |
Page 75 highlights
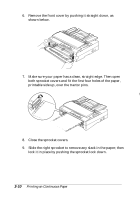
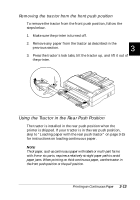
Installing the tractor in the rear push position Before installing the tractor in the rear push position, remove it from its current position. If the tractor is in the front push position, remove it by pressing the tractor's lock tabs while lifting it out. If the tractor is in the pull position, remove it as described on page 3-28. 1. Make sure the printer is turned off. 2. Lift the paper guide up and off the printer. 3. Lower the tractor into the printer's mounting slots and press down both ends of the tractor to make sure that it is firmly seated. 3-14 Printing on Continuous Paper
-
 1
1 -
2
-
3
-
4
-
5
-
6
-
7
-
8
-
9
-
10
-
11
-
12
-
13
-
14
-
15
-
16
-
17
-
18
-
19
-
20
-
21
-
22
-
23
-
24
-
25
-
26
-
27
-
28
-
29
-
30
-
31
-
32
-
33
-
34
-
35
-
36
-
37
-
38
-
39
-
40
-
41
-
42
-
43
-
44
-
45
-
46
-
47
-
48
-
49
-
50
-
51
-
52
-
53
-
54
-
55
-
56
-
57
-
58
-
59
-
60
-
61
-
62
-
63
-
64
-
65
-
66
-
67
-
68
-
69
-
 70
70 -
 71
71 -
 72
72 -
 73
73 -
 74
74 -
 75
75 -
 76
76 -
 77
77 -
 78
78 -
 79
79 -
 80
80 -
81
-
82
-
83
-
84
-
85
-
86
-
87
-
88
-
89
-
90
-
91
-
92
-
93
-
94
-
95
-
96
-
97
-
98
-
99
-
100
-
101
-
102
-
103
-
104
-
105
-
106
-
107
-
108
-
109
-
110
-
111
-
112
-
113
-
114
-
115
-
116
-
117
-
118
-
119
-
120
-
121
-
122
-
123
-
124
-
125
-
126
-
127
-
128
-
129
-
130
-
131
-
132
-
133
-
134
-
135
-
136
-
137
-
138
-
139
-
140
-
141
-
142
-
143
-
144
-
145
-
146
-
147
-
148
-
149
-
150
-
151
-
152
-
153
-
154
-
155
-
156
-
157
-
158
-
159
-
160
-
161
-
162
-
163
-
164
-
165
-
166
-
167
-
168
-
169
-
170
-
171
-
172
-
173
-
174
-
175
-
176
-
177
-
178
-
179
-
180
-
181
-
182
-
183
-
184
-
185
-
186
-
187
-
188
-
189
-
190
-
191
-
192
-
193
-
194
-
195
-
196
-
197
-
198
-
199
-
200
-
201
-
202
-
203
-
204
-
205
-
206
-
207
-
208
-
209
-
210
-
211
-
212
-
213
-
214
-
215
-
216
-
217
-
218
-
219
-
220
-
221
 |
 |
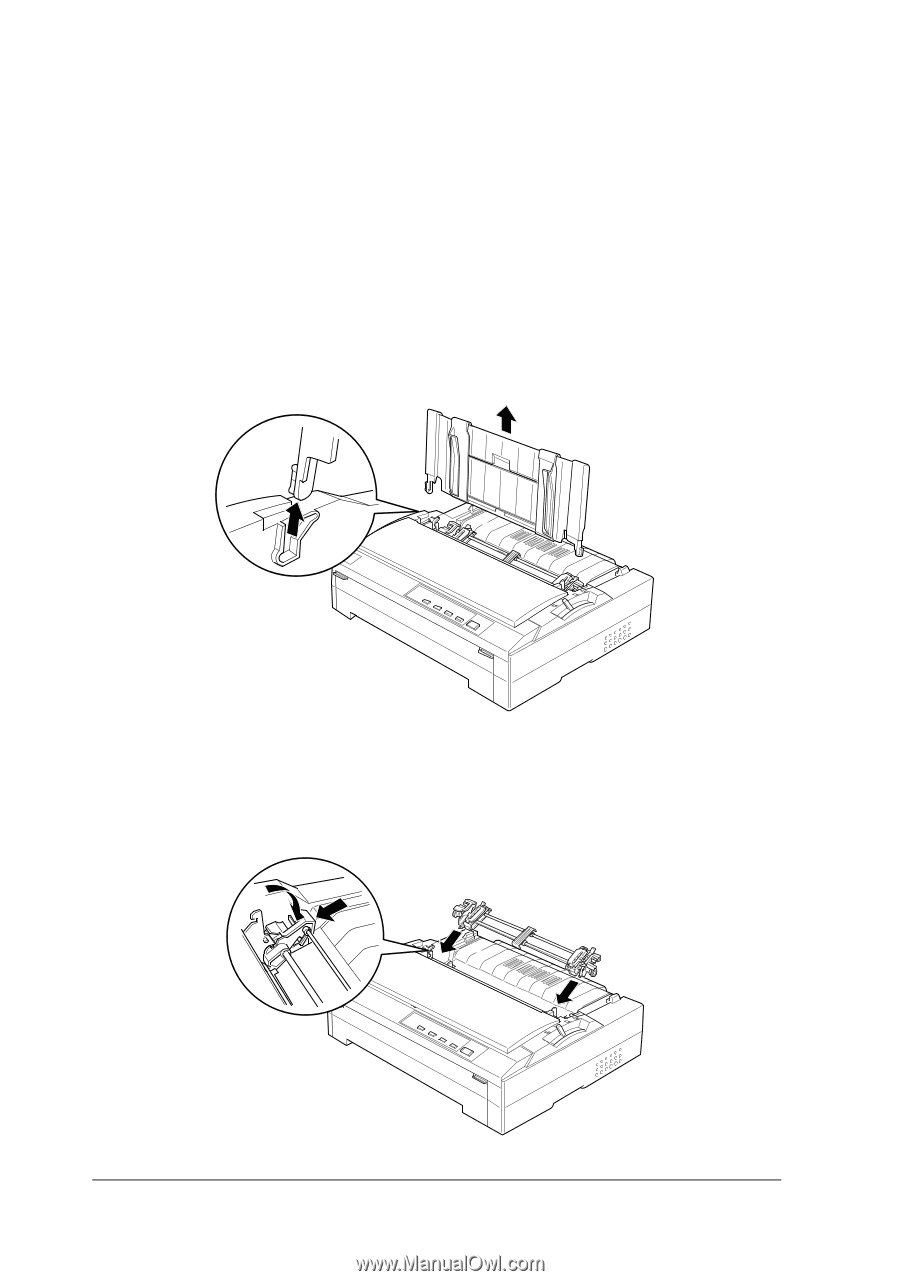
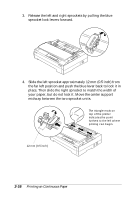
Installing the tractor in the rear push position
Before installing the tractor in the rear push position, remove it
from its current position. If the tractor is in the front push
position, remove it by pressing the tractor’s lock tabs while
lifting it out. If the tractor is in the pull position, remove it as
described on page 3-28.
1.
Make sure the printer is turned off.
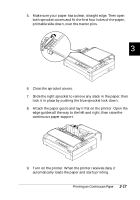
2.
Lift the paper guide up and off the printer.
3.
Lower the tractor into the printer’s mounting slots and press
down both ends of the tractor to make sure that it is firmly
seated.
3-14
Printing on Continuous Paper