Epson Stylus Pro 4800 Portrait Edition Printer Guide - Page 108
Maintaining and Transporting the Printer, When the bi-directional black alignment is finished
 |
View all Epson Stylus Pro 4800 Portrait Edition manuals
Add to My Manuals
Save this manual to your list of manuals |
Page 108 highlights
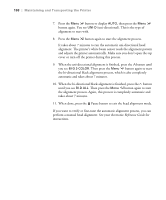
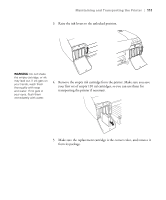
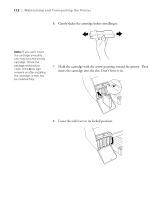
108 | Maintaining and Transporting the Printer 7. Press the Menu button to display AUTO, then press the Menu button again. You see UNI-D (uni-directional). This is the type of alignment to start with. 8. Press the Menu button again to start the alignment process. It takes about 7 minutes to run the automatic uni-directional head alignment. The printer's white beam sensor reads the alignment pattern and adjusts the printer automatically. Make sure you don't open the top cover or turn off the printer during this process. 9. When the uni-directional alignment is finished, press the button until you see BI-D 2-COLOR. Then press the Menu button again to start the bi-directional black alignment process, which is also completely automatic and takes about 7 minutes. 10. When the bi-directional black alignment is finished, press the button until you see BI-D ALL. Then press the Menu button again to start the alignment process. Again, this process is completely automatic and takes about 7 minutes. 11. When done, press the Pause button to exit the head alignment mode. If you want to verify or fine-tune the automatic alignment process, you can perform a manual head alignment. See your electronic Reference Guide for instructions. 5-108
-
 1
1 -
2
-
3
-
4
-
5
-
6
-
7
-
8
-
9
-
10
-
11
-
12
-
13
-
14
-
15
-
16
-
17
-
18
-
19
-
20
-
21
-
22
-
23
-
24
-
25
-
26
-
27
-
28
-
29
-
30
-
31
-
32
-
33
-
34
-
35
-
36
-
37
-
38
-
39
-
40
-
41
-
42
-
43
-
44
-
45
-
46
-
47
-
48
-
49
-
50
-
51
-
52
-
53
-
54
-
55
-
56
-
57
-
58
-
59
-
60
-
61
-
62
-
63
-
64
-
65
-
66
-
67
-
68
-
69
-
70
-
71
-
72
-
73
-
74
-
75
-
76
-
77
-
78
-
79
-
80
-
81
-
82
-
83
-
84
-
85
-
86
-
87
-
88
-
89
-
90
-
91
-
92
-
93
-
94
-
95
-
96
-
97
-
98
-
99
-
100
-
101
-
102
-
 103
103 -
 104
104 -
 105
105 -
 106
106 -
 107
107 -
 108
108 -
 109
109 -
 110
110 -
 111
111 -
 112
112 -
 113
113 -
114
-
115
-
116
-
117
-
118
-
119
-
120
-
121
-
122
-
123
-
124
-
125
-
126
-
127
-
128
-
129
-
130
-
131
-
132
-
133
-
134
-
135
-
136
-
137
-
138
-
139
-
140
-
141
-
142
-
143
-
144
-
145
-
146
-
147
-
148
-
149
-
150
-
151
-
152
-
153
-
154
-
155
-
156
-
157
-
158
-
159
-
160
 |
 |