Epson Stylus Pro 4800 Portrait Edition Printer Guide - Page 55
Cutting Paper Manually with the Built-in Cutter, If the paper is not positioned correctly, press
 |
View all Epson Stylus Pro 4800 Portrait Edition manuals
Add to My Manuals
Save this manual to your list of manuals |
Page 55 highlights
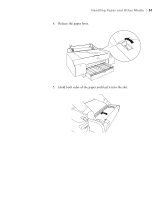
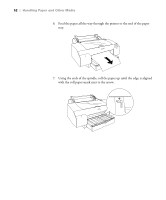
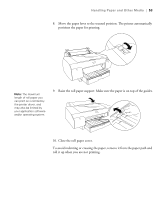
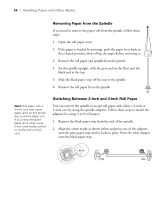
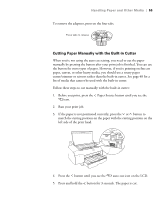
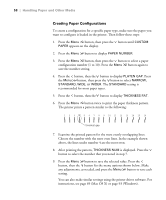
Handling Paper and Other Media | 55 To remove the adapters, press on the four tabs. Press tabs to release Cutting Paper Manually with the Built-in Cutter When you're not using the auto cut setting, you need to cut the paper manually by pressing the button after your print job is finished. You can use the button for most types of paper. However, if you're printing on fine art paper, canvas, or other heavy media, you should use a rotary paper cutter/trimmer or scissors rather than the built-in cutter. See page 48 for a list of media that cannot be used with the built-in cutter. Follow these steps to cut manually with the built-in cutter: 1. Before you print, press the Paper Source button until you see the icon. 2. Run your print job. 3. If the paper is not positioned correctly, press the or button to match the cutting position on the paper with the cutting position on the left side of the print head. 4. Press the button until you see the auto cut icon on the LCD. 5. Press and hold the button for 3 seconds. The paper is cut. 2-55
-
 1
1 -
2
-
3
-
4
-
5
-
6
-
7
-
8
-
9
-
10
-
11
-
12
-
13
-
14
-
15
-
16
-
17
-
18
-
19
-
20
-
21
-
22
-
23
-
24
-
25
-
26
-
27
-
28
-
29
-
30
-
31
-
32
-
33
-
34
-
35
-
36
-
37
-
38
-
39
-
40
-
41
-
42
-
43
-
44
-
45
-
46
-
47
-
48
-
49
-
 50
50 -
 51
51 -
 52
52 -
 53
53 -
 54
54 -
 55
55 -
 56
56 -
 57
57 -
 58
58 -
 59
59 -
 60
60 -
61
-
62
-
63
-
64
-
65
-
66
-
67
-
68
-
69
-
70
-
71
-
72
-
73
-
74
-
75
-
76
-
77
-
78
-
79
-
80
-
81
-
82
-
83
-
84
-
85
-
86
-
87
-
88
-
89
-
90
-
91
-
92
-
93
-
94
-
95
-
96
-
97
-
98
-
99
-
100
-
101
-
102
-
103
-
104
-
105
-
106
-
107
-
108
-
109
-
110
-
111
-
112
-
113
-
114
-
115
-
116
-
117
-
118
-
119
-
120
-
121
-
122
-
123
-
124
-
125
-
126
-
127
-
128
-
129
-
130
-
131
-
132
-
133
-
134
-
135
-
136
-
137
-
138
-
139
-
140
-
141
-
142
-
143
-
144
-
145
-
146
-
147
-
148
-
149
-
150
-
151
-
152
-
153
-
154
-
155
-
156
-
157
-
158
-
159
-
160
 |
 |
