Epson Stylus Pro 4800 Portrait Edition Printer Guide - Page 58
Creating Paper Configurations, Choose the number with the most even lines. In the example shown
 |
View all Epson Stylus Pro 4800 Portrait Edition manuals
Add to My Manuals
Save this manual to your list of manuals |
Page 58 highlights
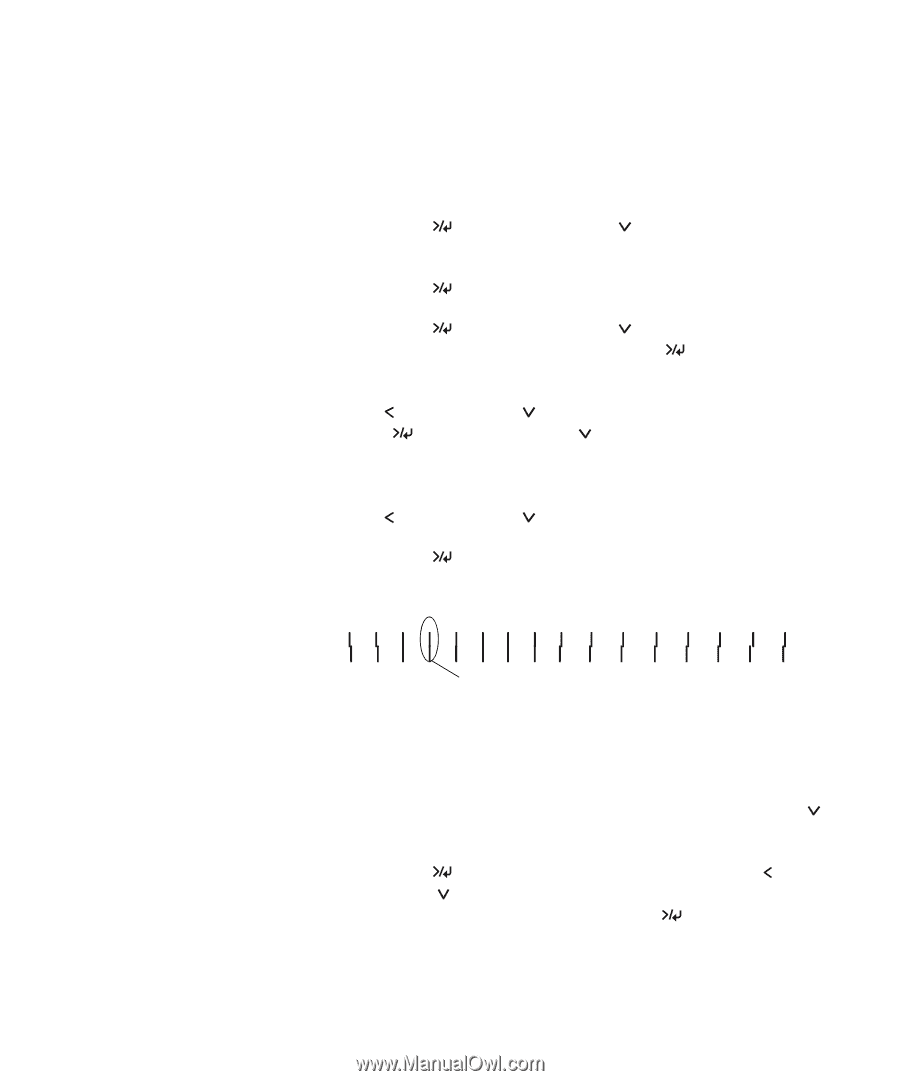
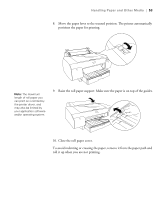
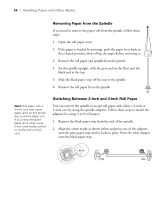
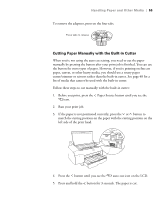
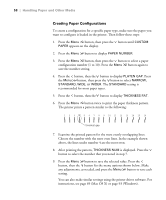
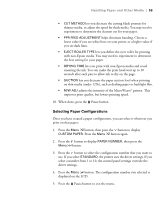
58 | Handling Paper and Other Media Creating Paper Configurations To create a configuration for a specific paper type, make sure the paper you want to configure is loaded in the printer. Then follow these steps: 1. Press the Menu button, then press the button until CUSTOM PAPER appears on the display. 2. Press the Menu button to display PAPER NUMBER. 3. Press the Menu button, then press the button to select a paper configuration number (1 to 10). Press the Menu button again to save the number setting. 4. Press the button, then the button to display PLATEN GAP. Press the Menu button, then press the button to select NARROW, STANDARD, WIDE, or WIDER. The STANDARD setting is recommended for most paper types. 5. Press the button, then the button to display THICKNESS PAT. 6. Press the Menu button twice to print the paper thickness pattern. The printer prints a pattern similar to the following: 1 2 3 4 5 6 7 8 9 10 11 12 13 14 15 16 Smallest gap 7. Examine the printed pattern for the most evenly overlapping lines. Choose the number with the most even lines. In the example shown above, the lines under number 4 are the most even. 8. After printing the pattern, THICKNESS NUM is displayed. Press the button to select the number that you noted in step 7. 9. Press the Menu button to save the selected value. Press the button, then the button for the menu options shown below. Make any adjustments, as needed, and press the Menu button to save each setting. You can also make similar settings using the printer driver software. For instructions, see page 69 (Mac OS X) or page 93 (Windows). 2-58
-
 1
1 -
2
-
3
-
4
-
5
-
6
-
7
-
8
-
9
-
10
-
11
-
12
-
13
-
14
-
15
-
16
-
17
-
18
-
19
-
20
-
21
-
22
-
23
-
24
-
25
-
26
-
27
-
28
-
29
-
30
-
31
-
32
-
33
-
34
-
35
-
36
-
37
-
38
-
39
-
40
-
41
-
42
-
43
-
44
-
45
-
46
-
47
-
48
-
49
-
50
-
51
-
52
-
 53
53 -
 54
54 -
 55
55 -
 56
56 -
 57
57 -
 58
58 -
 59
59 -
 60
60 -
 61
61 -
 62
62 -
 63
63 -
64
-
65
-
66
-
67
-
68
-
69
-
70
-
71
-
72
-
73
-
74
-
75
-
76
-
77
-
78
-
79
-
80
-
81
-
82
-
83
-
84
-
85
-
86
-
87
-
88
-
89
-
90
-
91
-
92
-
93
-
94
-
95
-
96
-
97
-
98
-
99
-
100
-
101
-
102
-
103
-
104
-
105
-
106
-
107
-
108
-
109
-
110
-
111
-
112
-
113
-
114
-
115
-
116
-
117
-
118
-
119
-
120
-
121
-
122
-
123
-
124
-
125
-
126
-
127
-
128
-
129
-
130
-
131
-
132
-
133
-
134
-
135
-
136
-
137
-
138
-
139
-
140
-
141
-
142
-
143
-
144
-
145
-
146
-
147
-
148
-
149
-
150
-
151
-
152
-
153
-
154
-
155
-
156
-
157
-
158
-
159
-
160
 |
 |