Epson Stylus Pro 4800 Portrait Edition Printer Guide - Page 59
Selecting Paper Configurations, button to display
 |
View all Epson Stylus Pro 4800 Portrait Edition manuals
Add to My Manuals
Save this manual to your list of manuals |
Page 59 highlights
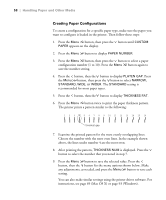
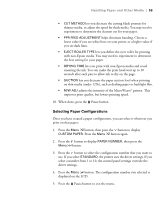
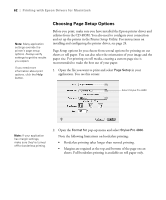
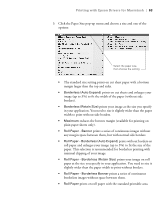
Handling Paper and Other Media | 59 • CUT METHOD lets you decrease the cutting blade pressure for thinner media, or adjust the speed for thick media. You may need to experiment to determine the cleanest cut for your paper. • PPR FEED ADJUSTMENT helps eliminate banding. Choose a lower value if you see white lines on your prints, or a higher value if you see dark lines. • EJECT ROLLER TYPE lets you define the eject roller for printing with non-Epson media. You may need to experiment to determine the best setting for your paper. • DRYING TIME lets you print with non-Epson media and avoid smearing the ink. You can make the print head wait up to 10 seconds after each pass to allow ink to dry on the page. • SUCTION lets you decrease the paper suction level when printing on thin media (under 12 lb), such as drafting paper or backlight film. • M/W ADJ adjusts the intensity of the MicroWeave® pattern. This improves print quality, but lowers printing speed. 10. When done, press the Pause button. Selecting Paper Configurations Once you have created a paper configuration, you can select it whenever you print on that paper: 1. Press the Menu button, then press the button to display CUSTOM PAPER. Press the Menu button again. 2. Press the button to display PAPER NUMBER, then press the Menu button. 3. Press the button to select the configuration number that you want to use. If you select STANDARD, the printer uses the driver settings. If you select a number from 1 to 10, the control panel settings override the driver settings. 4. Press the Menu button. The configuration number you selected is displayed on the LCD. 5. Press the Pause button to exit the menu. 2-59
-
 1
1 -
2
-
3
-
4
-
5
-
6
-
7
-
8
-
9
-
10
-
11
-
12
-
13
-
14
-
15
-
16
-
17
-
18
-
19
-
20
-
21
-
22
-
23
-
24
-
25
-
26
-
27
-
28
-
29
-
30
-
31
-
32
-
33
-
34
-
35
-
36
-
37
-
38
-
39
-
40
-
41
-
42
-
43
-
44
-
45
-
46
-
47
-
48
-
49
-
50
-
51
-
52
-
53
-
 54
54 -
 55
55 -
 56
56 -
 57
57 -
 58
58 -
 59
59 -
 60
60 -
 61
61 -
 62
62 -
 63
63 -
 64
64 -
65
-
66
-
67
-
68
-
69
-
70
-
71
-
72
-
73
-
74
-
75
-
76
-
77
-
78
-
79
-
80
-
81
-
82
-
83
-
84
-
85
-
86
-
87
-
88
-
89
-
90
-
91
-
92
-
93
-
94
-
95
-
96
-
97
-
98
-
99
-
100
-
101
-
102
-
103
-
104
-
105
-
106
-
107
-
108
-
109
-
110
-
111
-
112
-
113
-
114
-
115
-
116
-
117
-
118
-
119
-
120
-
121
-
122
-
123
-
124
-
125
-
126
-
127
-
128
-
129
-
130
-
131
-
132
-
133
-
134
-
135
-
136
-
137
-
138
-
139
-
140
-
141
-
142
-
143
-
144
-
145
-
146
-
147
-
148
-
149
-
150
-
151
-
152
-
153
-
154
-
155
-
156
-
157
-
158
-
159
-
160
 |
 |
