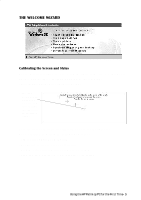
HP 620Lx HP 620LX/660LX PalmTop - (English) User Guide - Page 24
Palmtop PC. You can also synchronize calendar, contact and task information - handheld
 |
View all HP 620Lx manuals
Add to My Manuals
Save this manual to your list of manuals |
Page 24 highlights
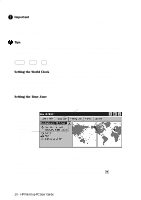
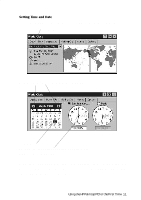
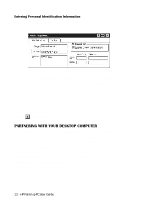
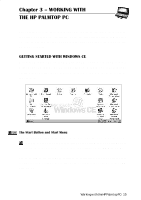
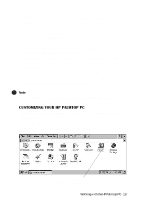
3. Start Windows CE Services 2.0 if it is not already running on your desktop/ notebook PC and turn on your HP Palmtop PC. 4. Prepare the docking cradle for connecting to the desktop PC. Insert the 9-pin end of the synch cable into the serial port of the desktop PC. Insert fully the flat end of the synch cable, arrow side up, to the serial port at the back of the cradle. Connect the AC to a power source and to back of the cradle. ! Besurenevertohaveserialorpowercableconnecteddirectlytothepalmtop when using the cradle. Doing so will permanently damage the unit. 5. Close the palmtop, carefully center it on the cradle. Press down on the palmtop until the unit clicks into place. Partnership should automatically establish between your HP Palmtop PC and the desktop/notebook PC. After you have established the partnership, you are ready to transfer Microsoft Word, Excel and other files between your desktop computer and the HP Palmtop PC. You can also synchronize calendar, contact and task information from your desktop Information Manager data files with data from your Information Manager applications on your desktop computer. If you need further guidance, refer to the "Communications" portion in our website (http:// www.hp.com/handheld/palmtops/hp600lxmanual/index.html). ! Note If you are using Windows 95 on your desktop you can also establish partnership and synchronize data by using an infrared connection. Please refer to "Synchronizing Data" in Chapter 3, for details. 14 - HP Palmtop PC User Guide
-
 1
1 -
2
-
3
-
4
-
5
-
6
-
7
-
8
-
9
-
10
-
11
-
12
-
13
-
14
-
15
-
16
-
17
-
18
-
 19
19 -
 20
20 -
 21
21 -
 22
22 -
 23
23 -
 24
24 -
 25
25 -
 26
26 -
 27
27 -
 28
28 -
 29
29 -
30
-
31
-
32
-
33
-
34
-
35
-
36
-
37
-
38
-
39
-
40
-
41
-
42
-
43
-
44
-
45
-
46
-
47
-
48
-
49
-
50
-
51
-
52
-
53
-
54
-
55
-
56
-
57
-
58
-
59
-
60
-
61
-
62
-
63
-
64
-
65
-
66
-
67
-
68
-
69
-
70
-
71
-
72
-
73
-
74
-
75
-
76
-
77
-
78
-
79
-
80
-
81
-
82
-
83
-
84
-
85
-
86
-
87
-
88
-
89
-
90
-
91
-
92
-
93
-
94
-
95
-
96
-
97
-
98
-
99
-
100
-
101
-
102
-
103
-
104
-
105
-
106
-
107
-
108
-
109
-
110
-
111
-
112
-
113
-
114
-
115
-
116
-
117
-
118
-
119
-
120
-
121
-
122
-
123
-
124
-
125
-
126
-
127
-
128
-
129
-
130
-
131
-
132
-
133
-
134
-
135
-
136
-
137
-
138
-
139
-
140
-
141
-
142
-
143
-
144
-
145
-
146
-
147
-
148
-
149
-
150
-
151
-
152
-
153
-
154
-
155
-
156
-
157
-
158
-
159
-
160
-
161
-
162
-
163
-
164
-
165
-
166
-
167
-
168
-
169
-
170
-
171
-
172
 |
 |
