HP Latex 110 Users Guide - Page 22
Printer states, Change margins, Ready for side A/B
 |
View all HP Latex 110 manuals
Add to My Manuals
Save this manual to your list of manuals |
Page 22 highlights
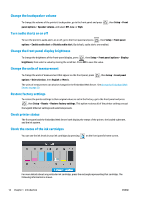
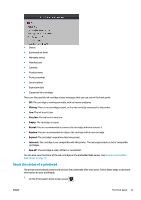
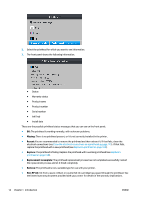
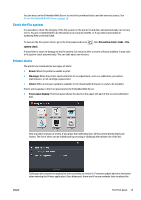
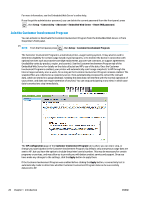
same advice (in the case of firmware updates, a new notification appears when there a new firmware release becomes available). ● Embedded Web Server: The Embedded Web Server shows only one alert at a time, which is judged to be the most important. An alert may require you to perform a maintenance operation; see Hardware maintenance on page 100. The following alerts require a service engineer: ● Service Maintenance Kit 1 ● Service Maintenance Kit 2 ● Service Maintenance Kit 3 Printer states The printer may be in any one of the following states; some of them require waiting. ● Ready (cold): The printer is powered on but has not printed yet, and the heaters are not turned on. ● Preparing to print: The printer is warming up the heaters and preparing the printheads to print. This takes 1 to 6 min. ● Ready for substrate ● Ready for side A/B ● Printing ● Printing side A/B ● Drying: This takes 1.5 to 5 min. ● Finishing: The printer is cooling down and preparing for stand-by. This takes 0.5 to 5 min. If jobs of the same print mode as the already-printed file are sent while the printer is Drying or Finishing, the printer goes to Preparing to print. To save time between prints, you are recommended to use nesting to print several jobs in the same workflow. Change margins The printer margins determine the area between the edges of your image and the edges of the substrate. The side margins for a particular print job are selected in the RIP software; if the job exceeds the substrate width, it will be clipped. The front panel offers additional settings for the top and bottom margins: see Table 11-4 Margins on page 144. These settings apply only to single prints. To set the top margin at the front panel, press top margin. , then Substrate > Substrate handling options > Extra To set the bottom margin at the front panel, press Extra bottom margin. , then Substrate > Substrate handling options > NOTE: The extra top/bottom margin set in the front panel is applied in addition to the top/bottom margin selected in the RIP. 16 Chapter 1 Introduction ENWW
-
 1
1 -
2
-
3
-
4
-
5
-
6
-
7
-
8
-
9
-
10
-
11
-
12
-
13
-
14
-
15
-
16
-
 17
17 -
 18
18 -
 19
19 -
 20
20 -
 21
21 -
 22
22 -
 23
23 -
 24
24 -
 25
25 -
 26
26 -
 27
27 -
28
-
29
-
30
-
31
-
32
-
33
-
34
-
35
-
36
-
37
-
38
-
39
-
40
-
41
-
42
-
43
-
44
-
45
-
46
-
47
-
48
-
49
-
50
-
51
-
52
-
53
-
54
-
55
-
56
-
57
-
58
-
59
-
60
-
61
-
62
-
63
-
64
-
65
-
66
-
67
-
68
-
69
-
70
-
71
-
72
-
73
-
74
-
75
-
76
-
77
-
78
-
79
-
80
-
81
-
82
-
83
-
84
-
85
-
86
-
87
-
88
-
89
-
90
-
91
-
92
-
93
-
94
-
95
-
96
-
97
-
98
-
99
-
100
-
101
-
102
-
103
-
104
-
105
-
106
-
107
-
108
-
109
-
110
-
111
-
112
-
113
-
114
-
115
-
116
-
117
-
118
-
119
-
120
-
121
-
122
-
123
-
124
-
125
-
126
-
127
-
128
-
129
-
130
-
131
-
132
-
133
-
134
-
135
-
136
-
137
-
138
-
139
-
140
-
141
-
142
-
143
-
144
-
145
-
146
-
147
-
148
-
149
-
150
-
151
-
152
-
153
-
154
-
155
-
156
-
157
-
158
-
159
-
160
 |
 |