HP Latex 110 Users Guide - Page 51
WARNING, Insert the spindle carefully into the printer.
 |
View all HP Latex 110 manuals
Add to My Manuals
Save this manual to your list of manuals |
Page 51 highlights
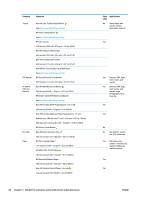
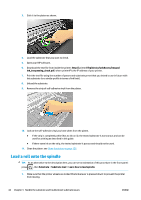
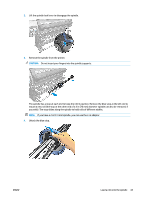
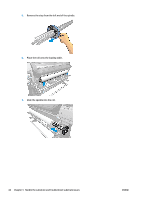
8. The 51 mm (2 in) diameter spindle has only one position for the right stop. There are blue lines on the loading table corresponding to two positions, but when using this spindle you can use only the outer position. 9. Put the blue stop on to the upper end of the spindle, and push it towards the end of the roll. 10. Lock the blue stop when it is in contact with the substrate. 11. Insert the spindle carefully into the printer. WARNING! Avoid trapping your fingers between the spindle and the spindle supports. ENWW Risk of trapped fingers For more safety information, please see Safety precautions on page 3 Load a roll onto the spindle 45
-
 1
1 -
2
-
3
-
4
-
5
-
6
-
7
-
8
-
9
-
10
-
11
-
12
-
13
-
14
-
15
-
16
-
17
-
18
-
19
-
20
-
21
-
22
-
23
-
24
-
25
-
26
-
27
-
28
-
29
-
30
-
31
-
32
-
33
-
34
-
35
-
36
-
37
-
38
-
39
-
40
-
41
-
42
-
43
-
44
-
45
-
 46
46 -
 47
47 -
 48
48 -
 49
49 -
 50
50 -
 51
51 -
 52
52 -
 53
53 -
 54
54 -
 55
55 -
 56
56 -
57
-
58
-
59
-
60
-
61
-
62
-
63
-
64
-
65
-
66
-
67
-
68
-
69
-
70
-
71
-
72
-
73
-
74
-
75
-
76
-
77
-
78
-
79
-
80
-
81
-
82
-
83
-
84
-
85
-
86
-
87
-
88
-
89
-
90
-
91
-
92
-
93
-
94
-
95
-
96
-
97
-
98
-
99
-
100
-
101
-
102
-
103
-
104
-
105
-
106
-
107
-
108
-
109
-
110
-
111
-
112
-
113
-
114
-
115
-
116
-
117
-
118
-
119
-
120
-
121
-
122
-
123
-
124
-
125
-
126
-
127
-
128
-
129
-
130
-
131
-
132
-
133
-
134
-
135
-
136
-
137
-
138
-
139
-
140
-
141
-
142
-
143
-
144
-
145
-
146
-
147
-
148
-
149
-
150
-
151
-
152
-
153
-
154
-
155
-
156
-
157
-
158
-
159
-
160
 |
 |
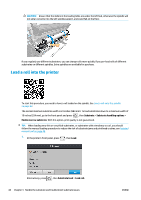
8.
The 51 mm (2 in) diameter spindle has only one position for the right stop. There are blue lines on the
loading table corresponding to two positions, but when using this spindle you can use only the outer
position.
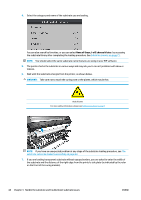
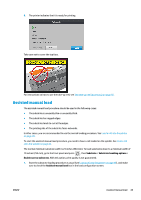
9.
Put the blue stop on to the upper end of the spindle, and push it towards the end of the roll.
10.
Lock the blue stop when it is in contact with the substrate.
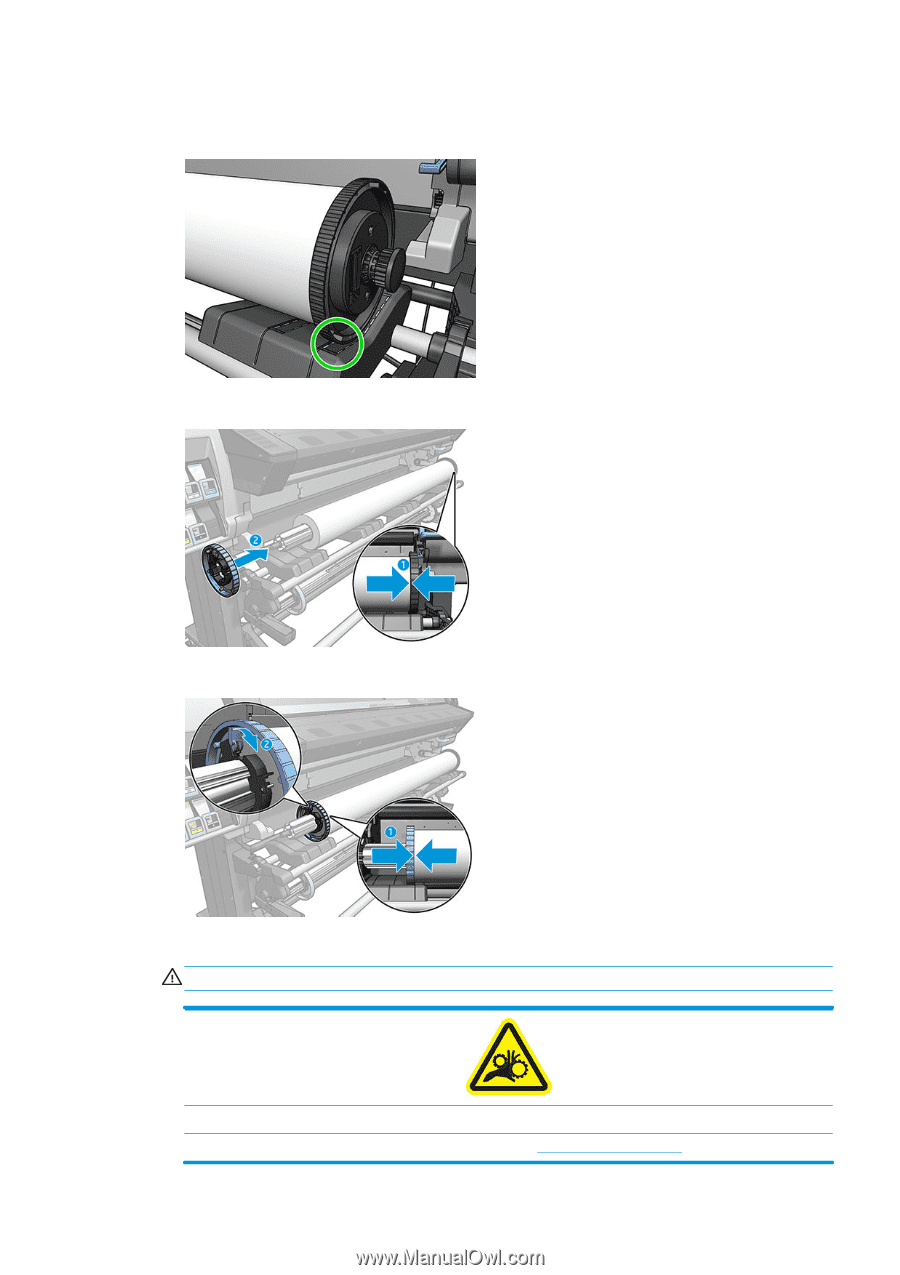
11.
Insert the spindle carefully into the printer.
WARNING!
Avoid trapping your fingers between the spindle and the spindle supports.
Risk of trapped fingers
For more safety information, please see
Safety precautions
on page
3
ENWW
Load a roll onto the spindle
45