HP Latex 110 Users Guide - Page 87
Performing color calibration, Image quality, maintenance, Color calibration, Calibrate
 |
View all HP Latex 110 manuals
Add to My Manuals
Save this manual to your list of manuals |
Page 87 highlights
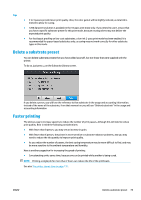
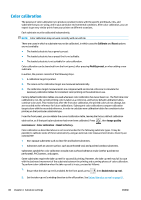
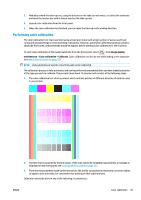
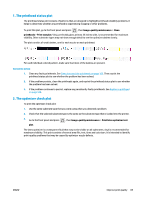
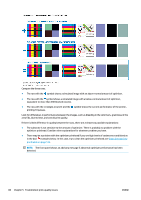
3. Manually rewind the take-up reel, using the buttons on the take-up reel motor, to collect the substrate and raise the tension bar until it almost touches the take-up reel. 4. Launch color calibration from the front panel. 5. When the color calibration has finished, you can reset the take-up reel's winding direction. Performing color calibration The color calibration test chart is printed using a fixed print mode with a high number of passes and fixed curing and drying settings to ensure printing consistency. However, parameters affecting substrate advance should be fine-tuned, and printheads should be aligned, before starting color calibration for the first time. To start color calibration of the loaded substrate from the front panel, select , then Image quality maintenance > Color calibration > Calibrate. Color calibration can also be run while adding a new substrate (see Add a new substrate on page 75). NOTE: Only substrates at least 61 cm (24 in) wide can be calibrated. The calibration process is fully automatic and can be performed unattended after you have loaded substrate of the type you wish to calibrate. The process takes about 15 minutes and consists of the following steps: 1. The color calibration test chart is printed, which contains patches of different densities of each ink used in your printer. 2. The test chart is scanned by the line sensor. If the scan cannot be completed successfully, a message is displayed on the front panel; see Front-panel error codes on page 137. 3. From the measurements made by the line sensor, the printer calculates the necessary correction tables to apply to your print jobs, for consistent color printing on that substrate type. Calibration should be done in any of the following circumstances: ENWW Color calibration 81
-
 1
1 -
2
-
3
-
4
-
5
-
6
-
7
-
8
-
9
-
10
-
11
-
12
-
13
-
14
-
15
-
16
-
17
-
18
-
19
-
20
-
21
-
22
-
23
-
24
-
25
-
26
-
27
-
28
-
29
-
30
-
31
-
32
-
33
-
34
-
35
-
36
-
37
-
38
-
39
-
40
-
41
-
42
-
43
-
44
-
45
-
46
-
47
-
48
-
49
-
50
-
51
-
52
-
53
-
54
-
55
-
56
-
57
-
58
-
59
-
60
-
61
-
62
-
63
-
64
-
65
-
66
-
67
-
68
-
69
-
70
-
71
-
72
-
73
-
74
-
75
-
76
-
77
-
78
-
79
-
80
-
81
-
 82
82 -
 83
83 -
 84
84 -
 85
85 -
 86
86 -
 87
87 -
 88
88 -
 89
89 -
 90
90 -
 91
91 -
 92
92 -
93
-
94
-
95
-
96
-
97
-
98
-
99
-
100
-
101
-
102
-
103
-
104
-
105
-
106
-
107
-
108
-
109
-
110
-
111
-
112
-
113
-
114
-
115
-
116
-
117
-
118
-
119
-
120
-
121
-
122
-
123
-
124
-
125
-
126
-
127
-
128
-
129
-
130
-
131
-
132
-
133
-
134
-
135
-
136
-
137
-
138
-
139
-
140
-
141
-
142
-
143
-
144
-
145
-
146
-
147
-
148
-
149
-
150
-
151
-
152
-
153
-
154
-
155
-
156
-
157
-
158
-
159
-
160
 |
 |
