HP Latex 2700 User Guide 3 - Page 72
Substrate presets, Use a new substrate, Prepare the printer for a new substrate, Add a substrate
 |
View all HP Latex 2700 manuals
Add to My Manuals
Save this manual to your list of manuals |
Page 72 highlights
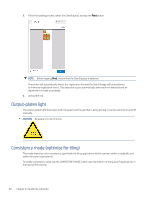
4. Tap Save if you accept the displayed properties. Substrate presets Each supported substrate type has its own characteristics. For optimum print quality, the printer changes the way it prints on each different substrate type. For example, some may need more ink and some may require higher temperatures for drying and curing. So the printer must be given a description of the requirements of each substrate type. This description is called a substrate preset. The printer is supplied with substrate presets for some specific substrate types, and also with presets for some generic types. As it is inconvenient to scroll through a list of all substrate types available, your printer contains substrate presets for only the most commonly used substrate types. Generic substrate presets cannot be modified, but you can create your own substrate presets (see Add a substrate preset on page 65), or search for further ready-made presets in the Media Locator: https://www.printos.com/ml/#/medialocator/. Use a new substrate Whenever you load a new substrate type into your printer, you must choose a substrate preset for it. 1. If no specific preset is available, try using a generic preset in the same substrate category. 2. For full control of your preset, clone a generic preset and adjust the settings manually. See Edit a substrate preset on page 76. This is recommended for advanced users only. Prepare the printer for a new substrate Try to ensure that your printer is in a suitable state for creating a new preset. 1. Run any pending maintenance task, in particular printhead checks and alignment. 2. Stop the print queue and wait for the printer to finish the current job. No jobs should be sent to the printer until the new substrate preset is complete. 3. Choose a suitable carriage beam printing position: see Set the carriage beam position on page 81. Add a substrate preset To add a substrate preset, follow these steps. Substrate presets 65
-
 1
1 -
2
-
3
-
4
-
5
-
6
-
7
-
8
-
9
-
10
-
11
-
12
-
13
-
14
-
15
-
16
-
17
-
18
-
19
-
20
-
21
-
22
-
23
-
24
-
25
-
26
-
27
-
28
-
29
-
30
-
31
-
32
-
33
-
34
-
35
-
36
-
37
-
38
-
39
-
40
-
41
-
42
-
43
-
44
-
45
-
46
-
47
-
48
-
49
-
50
-
51
-
52
-
53
-
54
-
55
-
56
-
57
-
58
-
59
-
60
-
61
-
62
-
63
-
64
-
65
-
66
-
 67
67 -
 68
68 -
 69
69 -
 70
70 -
 71
71 -
 72
72 -
 73
73 -
 74
74 -
 75
75 -
 76
76 -
 77
77 -
78
-
79
-
80
-
81
-
82
-
83
-
84
-
85
-
86
-
87
-
88
-
89
-
90
-
91
-
92
-
93
-
94
-
95
-
96
-
97
-
98
-
99
-
100
-
101
-
102
-
103
-
104
-
105
-
106
-
107
-
108
-
109
-
110
-
111
-
112
-
113
-
114
-
115
-
116
-
117
-
118
-
119
-
120
-
121
-
122
-
123
-
124
-
125
-
126
-
127
-
128
-
129
-
130
-
131
-
132
-
133
-
134
-
135
-
136
-
137
-
138
-
139
-
140
-
141
-
142
-
143
-
144
-
145
-
146
-
147
-
148
-
149
-
150
-
151
-
152
-
153
-
154
-
155
-
156
-
157
-
158
-
159
-
160
-
161
-
162
-
163
-
164
-
165
-
166
-
167
-
168
-
169
-
170
-
171
-
172
-
173
-
174
-
175
-
176
-
177
-
178
-
179
-
180
-
181
-
182
-
183
-
184
-
185
-
186
-
187
-
188
-
189
-
190
-
191
-
192
-
193
-
194
-
195
-
196
-
197
-
198
-
199
-
200
-
201
-
202
-
203
-
204
-
205
-
206
-
207
-
208
-
209
-
210
-
211
-
212
-
213
-
214
-
215
-
216
-
217
-
218
-
219
-
220
-
221
-
222
-
223
-
224
-
225
-
226
-
227
-
228
-
229
-
230
-
231
-
232
-
233
-
234
-
235
-
236
-
237
-
238
-
239
-
240
-
241
-
242
-
243
-
244
-
245
-
246
-
247
-
248
-
249
-
250
-
251
-
252
-
253
-
254
-
255
-
256
-
257
-
258
-
259
-
260
-
261
-
262
-
263
-
264
-
265
-
266
-
267
-
268
-
269
-
270
-
271
-
272
-
273
-
274
-
275
-
276
-
277
-
278
-
279
-
280
-
281
-
282
-
283
-
284
-
285
-
286
-
287
-
288
-
289
-
290
-
291
-
292
-
293
-
294
-
295
-
296
-
297
-
298
-
299
-
300
-
301
-
302
-
303
-
304
-
305
-
306
-
307
-
308
-
309
-
310
-
311
-
312
-
313
-
314
-
315
-
316
-
317
-
318
-
319
-
320
-
321
-
322
-
323
-
324
-
325
-
326
-
327
-
328
-
329
-
330
-
331
-
332
-
333
-
334
-
335
-
336
-
337
-
338
-
339
-
340
-
341
-
342
-
343
-
344
-
345
 |
 |
