HP Scanjet 7450c HP Scanjet 7400C Series Scanner Windows - (English) User Manu - Page 17
¸pdlolqj²d²vfdq
 |
View all HP Scanjet 7450c manuals
Add to My Manuals
Save this manual to your list of manuals |
Page 17 highlights
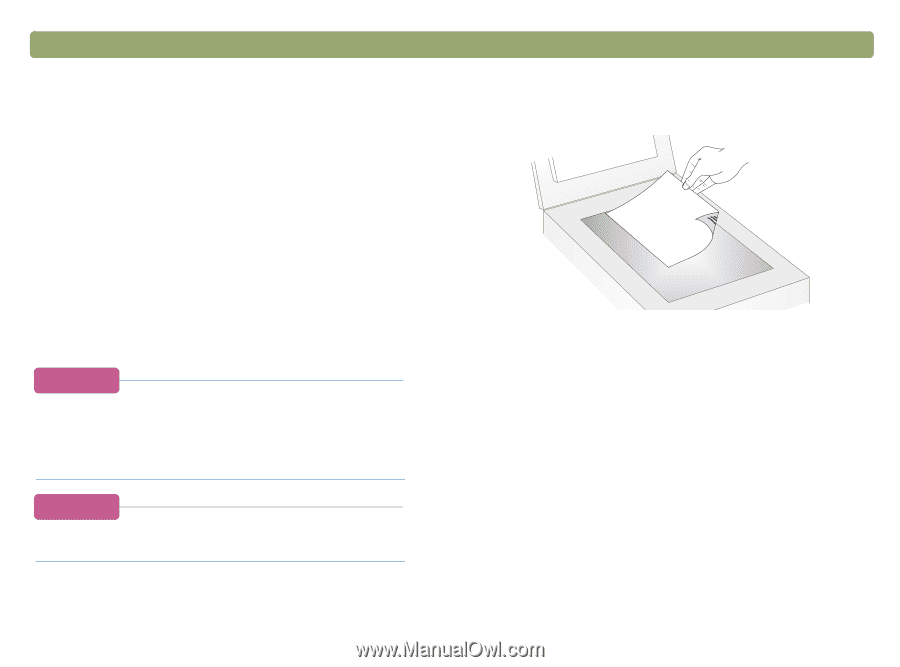
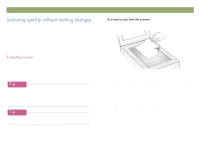
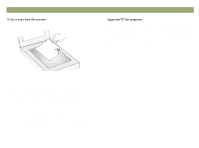
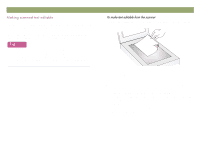
Back to TOC Use the scanner buttons to scan quickly to a destination using settings optimized for that destination. A destination is a printer, file, or another program, such as your e-mail, fax, and word-processing program. If you are scanning slides or transparent items using the XPA, you must scan from the HP PrecisionScan Pro software. See "Scanning from HP PrecisionScan Pro" on page 31. Scanning from scanner buttons 17 1 Place the original face down on the scanner glass and close the lid. When you e-mail using the scanner button, the scanner scans the item using default settings optimized for mailing. If you have a supported e-mail program, the scanned image automatically appears as a file attachment in a new e-mail message, which you then address and send. If your e-mail program is not supported, choose E-mail anyway. The scanner scans the item using the optimal settings, and the computer prompts you to save the item as a file. Open your e-mail program and attach the file to a message as you normally do. To view the scanned item before you send it, open the file attachment from the new e-mail message. Note: To load items in the ADF, see page 66. 2 Select E-MAIL PHOTO or E-MAIL DOCUMENT by pressing the small button beneath the lights until the light next to your choice is lit. If the item contains both text and graphics, select E-MAIL DOCUMENT. 3 Press E-MAIL on the scanner. 4 If the scanner or the computer prompts you for another page, do one of the following: If you do not have more pages to scan, click Done. If there are additional pages of this item, load the next page and click Scan. Repeat until all pages are scanned. Then, click Done. 5 If you have a supported e-mail program, the scanned image automatically appears as a file attachment in a new message. Address the message and send it as you normally do. If the scanned image does not attach to a new message, see "Supported e-mail programs" on page 18.
-
 1
1 -
2
-
3
-
4
-
5
-
6
-
7
-
8
-
9
-
10
-
11
-
 12
12 -
 13
13 -
 14
14 -
 15
15 -
 16
16 -
 17
17 -
 18
18 -
 19
19 -
 20
20 -
 21
21 -
 22
22 -
23
-
24
-
25
-
26
-
27
-
28
-
29
-
30
-
31
-
32
-
33
-
34
-
35
-
36
-
37
-
38
-
39
-
40
-
41
-
42
-
43
-
44
-
45
-
46
-
47
-
48
-
49
-
50
-
51
-
52
-
53
-
54
-
55
-
56
-
57
-
58
-
59
-
60
-
61
-
62
-
63
-
64
-
65
-
66
-
67
-
68
-
69
-
70
-
71
-
72
-
73
-
74
-
75
-
76
-
77
-
78
-
79
-
80
-
81
-
82
-
83
-
84
-
85
-
86
-
87
-
88
-
89
-
90
-
91
-
92
-
93
-
94
-
95
-
96
-
97
-
98
-
99
-
100
-
101
-
102
-
103
-
104
-
105
-
106
-
107
-
108
-
109
-
110
-
111
-
112
-
113
-
114
-
115
-
116
-
117
-
118
-
119
-
120
-
121
-
122
-
123
-
124
-
125
-
126
-
127
-
128
-
129
-
130
-
131
-
132
-
133
-
134
-
135
-
136
 |
 |